
Introduction
Bacon Roses are the ultimate creative expression of love for anyone who believes that the way to the heart is through the stomach. Imagine the look on your partner's face when you present them with a bouquet that doesn't just look beautiful but smells like smoky, caramelized heaven. These edible flowers are more than just a snack; they are a conversation piece, a labor of love, and a delicious twist on traditional romance. Whether it is for Valentine's Day, an anniversary, or just a Tuesday surprise, mastering the art of the savory bouquet is a skill that will serve you for a lifetime. If you are planning a full morning of love, you might also consider pairing these with The Most Romantic Heart Shaped Quiche for an Unforgettable Brunch to truly set the mood.
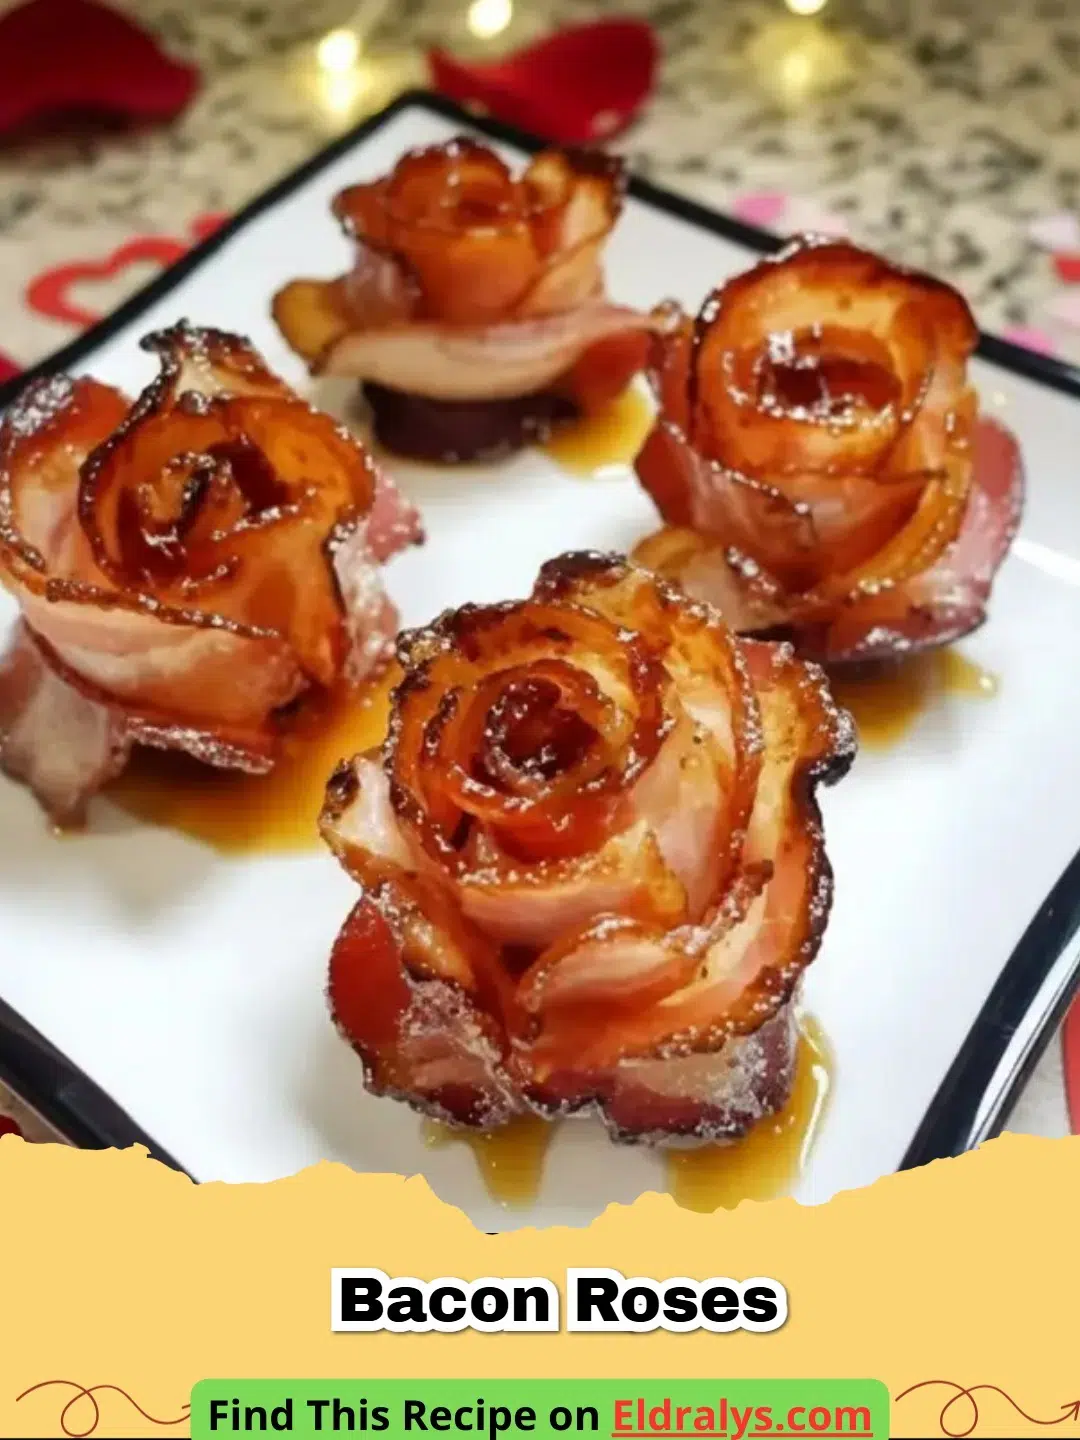
Creating Bacon Roses requires a delicate balance of culinary technique and artistic flair. You aren't just cooking meat; you are sculpting it. The way the fat renders and the edges crisp up creates the perfect illusion of delicate petals. When you choose high-quality thick-cut bacon, the results are sturdy, flavorful, and visually striking. The addition of a touch of black pepper and optional brown sugar elevates the flavor profile from a simple breakfast side to a gourmet treat. In this comprehensive guide, we will walk through every step of the process to ensure your roses are as beautiful as they are tasty, providing tips that even a novice cook can follow to achieve professional results.
Why You’ll Love It
You will absolutely adore making Bacon Roses because they offer a unique combination of visual appeal and irresistible flavor. Unlike real flowers that wither and fade within a few days, these roses provide immediate gratification and a memory that lingers on the palate. The combination of salty, smoky bacon with a hint of sweet caramelization creates a complex flavor profile that satisfies every craving. It is a whimsical yet sophisticated way to present a classic ingredient, proving that you don't need a high price tag to create an unforgettable moment.
Furthermore, the process of assembling these roses is surprisingly meditative and rewarding. There is a deep sense of satisfaction in watching a simple strip of meat transform into a work of art in the oven. It is a fantastic DIY project that allows you to get creative with presentation, from the type of stems you use to the way you arrange the final bouquet. This recipe is also highly customizable; you can adjust the spice level or sweetness to suit your loved one's specific tastes. It is the perfect centerpiece for a breakfast in bed or a decadent addition to a romantic evening spread.
Ingredients
The beauty of this recipe lies in its simplicity, requiring only a few high-quality components to create a masterpiece. Here is what you will need:
- 1 lb Thick-cut bacon (approximately 12 slices)
- 1 tsp Freshly cracked black pepper
- 1 tbsp Brown sugar (optional, for that perfect caramelized petal edge)
- 1 bunch Artificial rose stems (or fresh kale/parsley for a natural look)
- Toothpicks (to secure the shapes)
Notes and Substitutions
When selecting your bacon, look for 'center-cut' varieties as they tend to have a more uniform shape which makes rolling much easier. If you want to avoid sugar, you can omit the brown sugar entirely and still achieve a beautiful, though less 'shiny', rose. For a spicy kick, a tiny pinch of cayenne pepper mixed with the black pepper adds a lovely heat that pairs perfectly with the smokiness. If you cannot find artificial stems, long wooden skewers wrapped in green floral tape work excellently as a substitute. You can find more inspiration for your presentation by looking at The Ultimate Classic Romantic Board for a Dreamy Date Night.
Equipment
To ensure your Bacon Roses maintain their shape and cook evenly, you will need the following kitchen tools:
- Standard muffin tin (essential for keeping the roses upright)
- Baking sheet (to catch any grease drips)
- Wire cooling rack
- Small bowl for the seasoning mix
- Paper towels
Instructions
- Step 1: Preheat your oven to 375°F (190°C). Line a baking sheet with foil and place a muffin tin on top. This setup allows any excess grease to drip onto the foil rather than smoking up your oven.
- Step 2: Pat each slice of thick-cut bacon dry with paper towels. This is a crucial step for achieving the right texture and ensuring the seasoning sticks properly to the meat.
- Step 3: Lay the bacon strips flat on a clean surface. Sprinkle the freshly cracked black pepper and the optional brown sugar evenly over one side of each strip.
- Step 4: Starting from one end, roll the bacon strip tightly into a spiral. Aim for one end to be slightly more 'flared' out than the other to mimic the opening of a rosebud.
- Step 5: Secure the base of the roll by piercing it with two toothpicks in an 'X' shape. This ensures the Bacon Roses do not unroll during the rendering process in the oven.
- Step 6: Place each roll into a separate cup of the muffin tin, with the seasoned 'petal' side facing upward. The walls of the tin will support the rose as the fat softens.
- Step 7: Bake for 35-45 minutes. You are looking for a deep mahogany color and edges that look crisp and slightly curled. Check them around the 30-minute mark to ensure they aren't browning too quickly.
- Step 8: Remove from the oven and carefully lift each rose out of the tin using tongs. Place them on a wire rack to cool completely. This cooling phase allows the bacon to firm up so it stays on the stems.
- Step 9: Once cooled, remove the artificial flower heads from your rose stems. Gently push the stem into the bottom of the bacon rose until it is secure.
Pro Tips
The secret to the most realistic Bacon Roses is all in the tension of the roll. If you roll too loosely, the center might not cook through; if you roll too tightly, the petals won't flare out naturally. According to culinary experts at Food Network, rendering fat slowly is the key to perfect bacon texture. If your bacon is exceptionally fatty, you may want to drain the muffin tin halfway through the baking process to prevent the roses from 'boiling' in their own grease. Additionally, using a toothpick to gently pull out the top edges of the bacon halfway through cooking can help create more defined petals. Always let the roses cool for at least 10 minutes before attempting to put them on the stems, as the grease acts as a lubricant and they may slip off if still warm.
Serving, Storage & Variations
Serve your Bacon Roses in a beautiful vase as a centerpiece, or lay them across a breakfast plate for a dramatic presentation. They are best enjoyed at room temperature or slightly warmed. For variations, try brushing the tips with a maple syrup glaze in the last five minutes of baking for a 'dewy' look and extra sweetness. You can also experiment with different seasonings like smoked paprika or garlic powder for varied flavor profiles.
If you have leftovers, store the bacon 'buds' in an airtight container in the refrigerator for up to 3 days. To reheat, place them back in a muffin tin and warm in the oven at 300°F for 5-7 minutes until the fat glistens again. Avoid the microwave as it will make the 'petals' chewy rather than crisp. For a larger event, consider serving these alongside other savory treats on a charcuterie spread.
Nutrition Information
| Nutrient | Amount |
|---|---|
| Calories | 110 kcal |
| Protein | 6g |
| Carbohydrates | 1g |
| Fat | 9g |
Note: Nutrition information is an estimate based on standard ingredients per single rose. Actual values may vary based on the brand of bacon and specific trimming of fat.
Conclusion
Bacon Roses are a testament to the fact that the best gifts are often the ones made by hand. They combine the whimsy of a craft project with the sophisticated flavors of high-quality ingredients, resulting in a romantic gesture that is truly one-of-a-kind. By following these steps and using thick-cut bacon, you can create a stunning edible bouquet that will be remembered long after the last bite is gone. Get creative, have fun, and let your culinary skills blossom into something beautiful!


FAQs
Can I make Bacon Roses in advance?
Yes, you can bake the bacon 'buds' a day in advance. Store them in an airtight container in the refrigerator and assemble the bouquet just before gifting to ensure they stay secure on the stems.
What type of bacon works best for roses?
Thick-cut bacon is essential. Standard thin bacon is too flimsy to maintain the petal shape and often shrivels too much during the baking process.
How do I prevent the roses from falling over?
The key is to use a muffin tin to support them during baking and to secure the base with toothpicks. Once cooled and firmed up, they will sit perfectly on the stems.
Is the brown sugar mandatory?
No, it is optional, but it helps with the 'petal' appearance by adding a dark, caramelized edge that mimics the natural color variations in a real rose.

DIY Edible Bacon Roses Bouquet
- Total Time: 55 minutes
- Yield: 12 roses 1x
- Diet: Gluten-Free
Description
A stunning and delicious edible bouquet made from crispy, caramelized thick-cut bacon strips.
Ingredients
1 lb Thick-cut bacon (12 slices)
1 tsp Freshly cracked black pepper
1 tbsp Brown sugar (optional)
1 bunch Artificial rose stems
Instructions
Step 1: Preheat oven to 375°F and line a baking sheet with foil, placing a muffin tin on top.
Step 2: Pat bacon slices dry and season one side with pepper and optional brown sugar.
Step 3: Roll each slice tightly into a rosebud shape and secure the base with two toothpicks in an X.
Step 4: Place each roll in a muffin tin cup and bake for 35-45 minutes until crispy and dark mahogany.
Step 5: Cool on a wire rack, then remove flower heads from stems and slide the bacon 'buds' onto the stems.
Notes
Ensure you use thick-cut bacon; thin bacon will not hold its shape as a rose.
- Prep Time: 15 minutes
- Cook Time: 40 minutes
- Category: Appetizer
- Method: Baking
- Cuisine: American
Nutrition
- Serving Size: 1 rose
- Calories: 110 kcal
- Sugar: 1g
- Sodium: 290mg
- Fat: 9g
- Saturated Fat: 3g
- Unsaturated Fat: 5g
- Trans Fat: 0g
- Carbohydrates: 1g
- Fiber: 0g
- Protein: 6g
- Cholesterol: 25mg
Related posts:
 The Ultimate Cowboy Steak with Truffle Honey Butter That Will Melt Your Heart
 The Most Irresistible Honey Garlic Steak Bites That Will Melt Your Heart
 The Most Divine High Protein Sugar-Free Monkey Bread That Will Melt Your Soul
 The Most Legendary Authentic Thai Crying Tiger (Sua Rong Hai) Steak Recipe That Will Heal Your Soul

Leave a Reply