
Introduction to the Art of Bubble Gum
Bubble Gum is more than just a treat; it is a vibrant pink ticket straight back to the most nostalgic days of our youth, filled with playground laughter and sweet summer afternoons. The history of this chewy marvel dates back to the early 20th century, specifically to 1928 when an accountant named Walter Diemer accidentally discovered a formula that was less sticky and more elastic than standard chewing gum. Diemer, who worked for the Fleer Chewing Gum Company, created a batch of pink dough because pink was the only food coloring he had on hand at the moment of his breakthrough. This happy accident led to the birth of Dubble Bubble, and the world has been captivated by the art of the bubble ever since. Making your own Bubble Gum at home allows you to step into the shoes of an amateur candy chemist, experimenting with textures and flavors that store-bought options simply cannot match. It is a fascinating process that involves understanding the delicate balance between polymers, plasticizers, and sweeteners. When you create this candy from scratch, you gain a deep appreciation for the science of elasticity. You aren't just making a snack; you are engineering a cultural icon. Whether you are planning a themed birthday party or just want a unique weekend project, this recipe will guide you through the intricate steps of creating a masterpiece that pops with flavor. If you are looking for other whimsical treats, you might also enjoy The Most Whimsical Bubblegum Cloud Slice Dessert You'll Ever Crave. The process of making gum is therapeutic and educational, teaching kids and adults alike about melting points and viscosity. As we dive into this comprehensive guide, prepare to transform your kitchen into a miniature candy factory where the scent of fruit and sweetness fills the air. Every stretch and fold of the warm gum dough is a reminder of why we love this confection so much. In modern times, the Bubble gum industry has evolved, but the core joy remains the same as it was in Diemer's day.
Why You’ll Love Making This Recipe
You will absolutely adore this recipe because it provides a level of customization that is impossible to find in a grocery store aisle. By making your own Bubble Gum, you control the intensity of the flavor, the level of sweetness, and even the structural integrity of the bubbles you blow. Most commercial gums lose their flavor within minutes, but our homemade version allows you to fold in high-quality extracts and citric acid for a long-lasting, zesty experience. Furthermore, the satisfaction of seeing a solid gum base transform into a soft, pliable dough is incredibly rewarding. It is a tactile experience that connects you to the craft of traditional confectionery. This project is also a fantastic way to engage children in a safe and exciting kitchen experiment. They will be amazed to see how common kitchen tools can be used to create something as specialized as candy. Additionally, this recipe makes for wonderful, personalized gifts. Imagine handing out small jars of hand-rolled gum in custom flavors like pomegranate or wild cherry to your friends and family. It is a conversation starter and a unique way to share your passion for baking and candy making. If you love nostalgic sweets, you should also check out The Ultimate Homemade Lemon Drops: A Tangy Burst of Childhood Joy. Ultimately, this recipe is about recapturing a sense of playfulness and mastery over the treats we often take for granted. It is fun, scientific, and delicious.
Ingredients Required for Success
To achieve the perfect chew, you will need a few specialized items that are essential for authentic results. The most critical ingredient is the gum base, which usually comes in small pellets or a block. This provides the 'chew' and elasticity that characterizes Bubble Gum. You will also need corn syrup, which acts as a liquid sweetener and helps maintain a smooth consistency. Glycerin is a must-have as a softening agent; without it, your gum will become brittle and hard almost immediately. Powdered sugar serves as the bulk of the dough and provides the sweetness we crave. Citric acid is optional but highly recommended for fruit-flavored gums to provide that signature tang. Finally, you will need liquid food coloring and concentrated candy flavorings. Standard grocery store extracts can work, but professional candy oils offer a much punchier taste that stands up to the heavy gum base. Always ensure your ingredients are fresh to prevent any off-flavors.
Notes and Substitutions
If you cannot find a synthetic gum base, some specialty shops sell natural chicle, though it has a slightly earthier taste and a different stretch profile. For the corn syrup, you can substitute brown rice syrup if you prefer a different sugar profile, though the color of the gum may be affected. When it comes to flavorings, the sky is the limit. While strawberry and watermelon are classics, don't be afraid to try floral notes like rose or lavender for a sophisticated twist. If you are avoiding artificial dyes, there are many natural fruit-based colorants available that can still provide that lovely pink hue. Just be aware that natural colors may fade faster when exposed to light.
Essential Equipment
You do not need a laboratory to make this, but a few specific tools will make the process seamless. A microwave-safe glass bowl is necessary for melting the base, as it retains heat well. You will also need a sturdy silicone spatula for mixing the incredibly sticky base. A clean, smooth surface like a marble slab or a silicone baking mat is vital for kneading. A pair of kitchen shears or a sharp knife will help you cut the gum into bite-sized pieces. Finally, having some parchment paper or wax paper ready for wrapping is a great way to store your finished product.
Step-by-Step Instructions
The secret to great gum lies in the temperature and the technique of kneading. Follow these steps carefully to ensure your batch is perfect.
- Step 1: Begin by placing your gum base pellets into a microwave-safe glass bowl. Add the corn syrup and half of the glycerin to the bowl. Heat the mixture in 30-second intervals, stirring in between with a silicone spatula until the base is completely melted and looks like a thick, smooth syrup. Be very careful as the melted base is extremely hot and can cause burns.
- Step 2: Once melted, add your desired food coloring and concentrated flavoring to the bowl. If you are making a sour gum, this is also the time to add a pinch of citric acid. Stir vigorously to ensure the color is uniform and the scent is fully incorporated into the hot base. The heat helps the flavor particles bond with the polymers of the gum base.
- Step 3: Create a well in the center of a large pile of powdered sugar on your silicone mat or marble slab. Pour the hot gum mixture into the center of the sugar. Slowly start folding the sugar into the base using your spatula. As the mixture cools slightly and becomes less sticky, you can begin to use your hands to knead the dough.
- Step 4: Knead the gum dough for at least 5 to 10 minutes. This is the most important part of the process. You want to work as much powdered sugar into the base as possible until it reaches a firm but pliable consistency similar to modeling clay. If the dough feels too stiff, add a drop or two of the remaining glycerin. If it is too sticky, keep adding more powdered sugar.
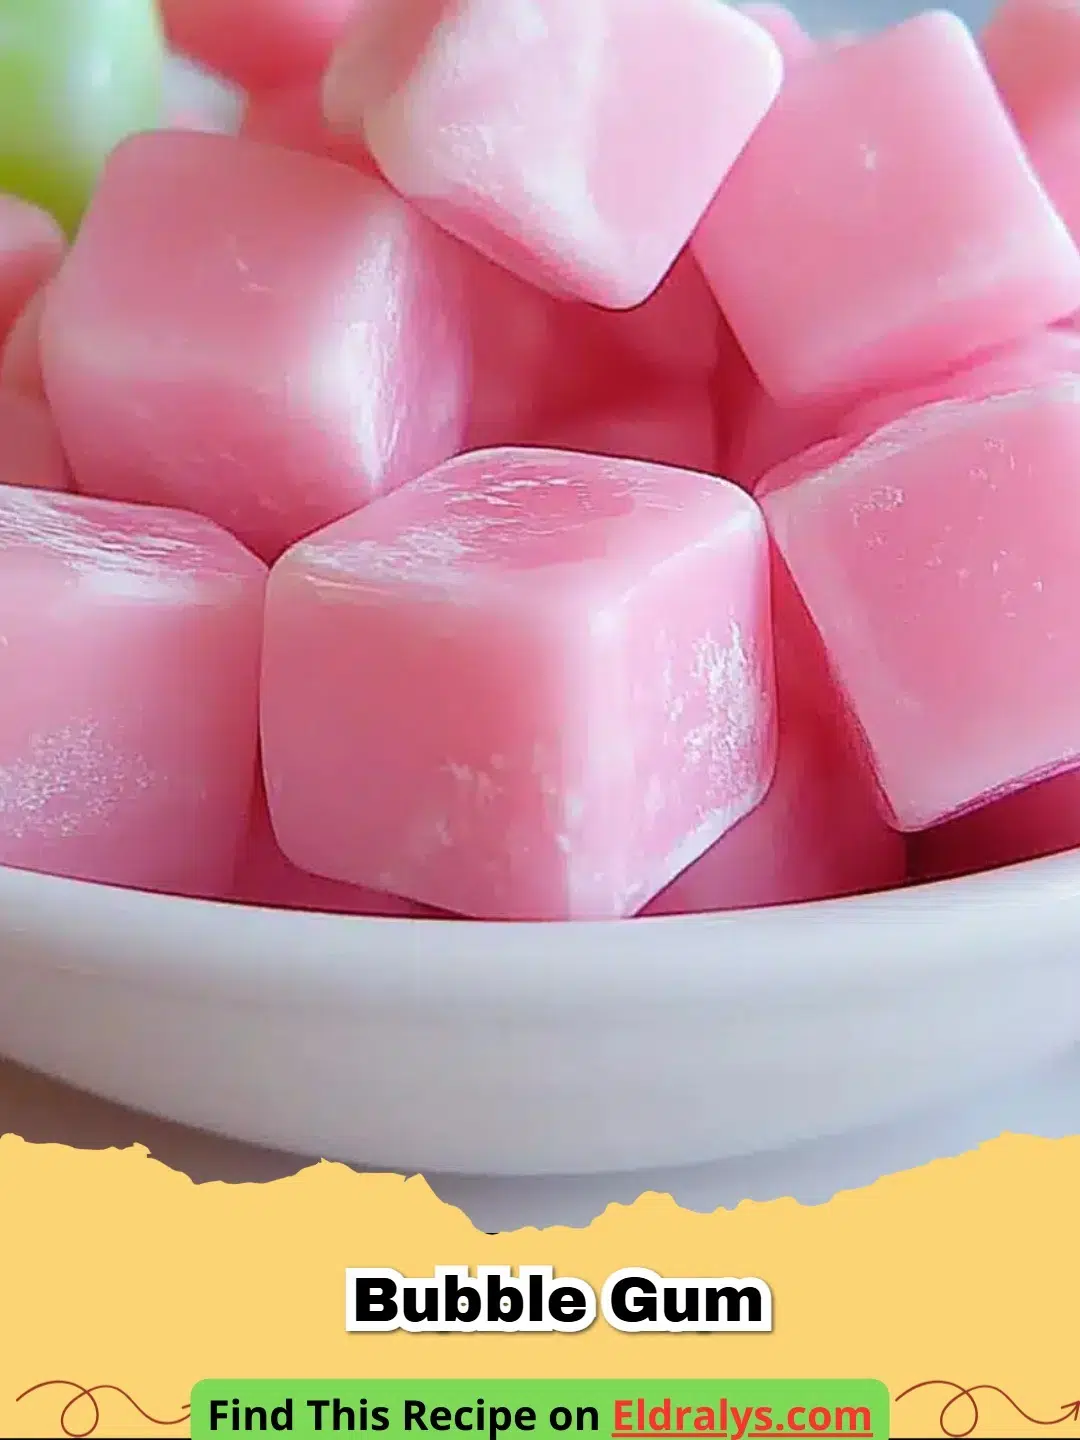
- Step 5: Once the dough is smooth and elastic, roll it out into long ropes about half an inch thick. Use your kitchen shears or a knife to snip the ropes into small, individual pieces. Dust each piece lightly with a little extra powdered sugar to prevent them from sticking together.
- Step 6: Let the gum pieces sit at room temperature for about 30 minutes to firm up. This allows the structure to set before you wrap them or enjoy them. Once set, you can wrap individual pieces in small squares of wax paper for that classic candy shop look.
Pro Tips for the Best Results
When working with Bubble Gum, remember that temperature is your best friend and your worst enemy. If the base cools too quickly, it will become impossible to knead, so work efficiently once you pour it onto the sugar. If you find the mixture is getting too hard while kneading, you can pop it back into the microwave for 5-10 seconds to soften it up. Always use more powdered sugar than you think you need; the gum base is incredibly hungry for sweetness. For the best bubbles, ensure you have kneaded the dough thoroughly. This develops the elasticity required to hold air. Lastly, avoid using too much liquid coloring, as excess moisture can ruin the texture of the gum and make it grainy.
Serving, Storage & Variations
Serve your homemade Bubble Gum as a fun treat at parties or as a unique addition to a dessert board. For storage, keep the gum in an airtight container at room temperature. Avoid refrigerating it, as the moisture in the fridge can make the sugar coating sticky. If you want to try variations, consider making 'Striped Gum' by rolling two different colored ropes together. You can also make 'Center-Filled Gum' by placing a tiny drop of fruit jam inside a small ball of gum and sealing it tightly. For a holiday twist, try cinnamon or peppermint flavors with red and white swirls. The possibilities are endless when you master the basic dough technique.
Nutrition Information
| Nutrient | Amount |
|---|---|
| Calories | 45 kcal |
| Protein | 0g |
| Carbohydrates | 11g |
| Fat | 0.1g |
The nutrition information provided is an estimate based on standard ingredients and may vary depending on the specific brands and flavorings used in your kitchen.
Conclusion
Creating your own Bubble Gum is a delightful journey into the world of candy making that rewards patience and creativity. There is a special kind of magic in taking raw, industrial-feeling ingredients and transforming them into a soft, fragrant treat that brings a smile to everyone's face. We hope this guide inspires you to experiment with new flavors and share the joy of homemade candy with your loved ones. Once you master the perfect bubble, you will never look at a pack of store-bought gum the same way again. Happy chewing and happy popping!


FAQs
Why is my homemade Bubble Gum too hard?
The most common reason for hard gum is not using enough glycerin or under-heating the gum base. Glycerin acts as a softener that keeps the polymers flexible at room temperature.
Can I use natural ingredients for the gum base?
Yes, you can use chicle, which is the traditional natural latex from the sapodilla tree. However, most modern recipes use a food-grade synthetic base for better bubble-blowing properties.
How long does homemade gum last?
Homemade gum lasts for about 2-3 weeks if stored in an airtight container in a cool, dry place. Over time, it may lose its stretch as the moisture evaporates.

Homemade Bubble Gum
- Total Time: 25 minutes
- Yield: 20 pieces 1x
- Diet: Vegetarian
Description
A fun and scientific recipe for creating stretchy, flavorful pink bubble gum from scratch.
Ingredients
1/2 cup gum base pellets
2 tablespoons corn syrup
1 teaspoon glycerin
1/2 cup powdered sugar (plus extra for kneading)
1/2 teaspoon candy flavoring oil
2 drops liquid food coloring
1/4 teaspoon citric acid (optional for tartness)
Instructions
Step 1: Combine gum base, corn syrup, and half the glycerin in a microwave-safe bowl and heat in 30-second intervals until melted.
Step 2: Stir in the food coloring, flavoring oil, and citric acid until fully incorporated into the hot base.
Step 3: Pour the mixture into a well of powdered sugar on a silicone mat.
Step 4: Knead the mixture, adding more sugar as needed, until a smooth, non-sticky dough forms.
Step 5: Roll into ropes and cut into individual pieces using kitchen shears.
Step 6: Dust with extra powdered sugar and let set for 30 minutes before wrapping.
Notes
Ensure you use food-grade glycerin specifically sold for candy making to maintain the best safety and texture standards.
- Prep Time: 20 minutes
- Cook Time: 5 minutes
- Category: Dessert
- Method: Mixing and Kneading
- Cuisine: American
Nutrition
- Serving Size: 1 piece
- Calories: 45 kcal
- Sugar: 10g
- Sodium: 2mg
- Fat: 0.1g
- Saturated Fat: 0g
- Unsaturated Fat: 0g
- Trans Fat: 0g
- Carbohydrates: 11g
- Fiber: 0g
- Protein: 0g
- Cholesterol: 0mg
Related posts:
 The Ultimate Cowboy Steak with Truffle Honey Butter That Will Melt Your Heart
 The Most Irresistible Honey Garlic Steak Bites That Will Melt Your Heart
 The Most Divine High Protein Sugar-Free Monkey Bread That Will Melt Your Soul
 The Most Legendary Authentic Thai Crying Tiger (Sua Rong Hai) Steak Recipe That Will Heal Your Soul

Leave a Reply