
Tired of fussy cheesecakes that crack and demand a water bath? Say hello to the glorious, imperfectly perfect Burnt Basque Cheesecake! And guess what? We’re making it even easier by baking it in a humble loaf pan. That’s right, no springform drama, just pure, creamy, caramelized bliss in convenient sliceable form.
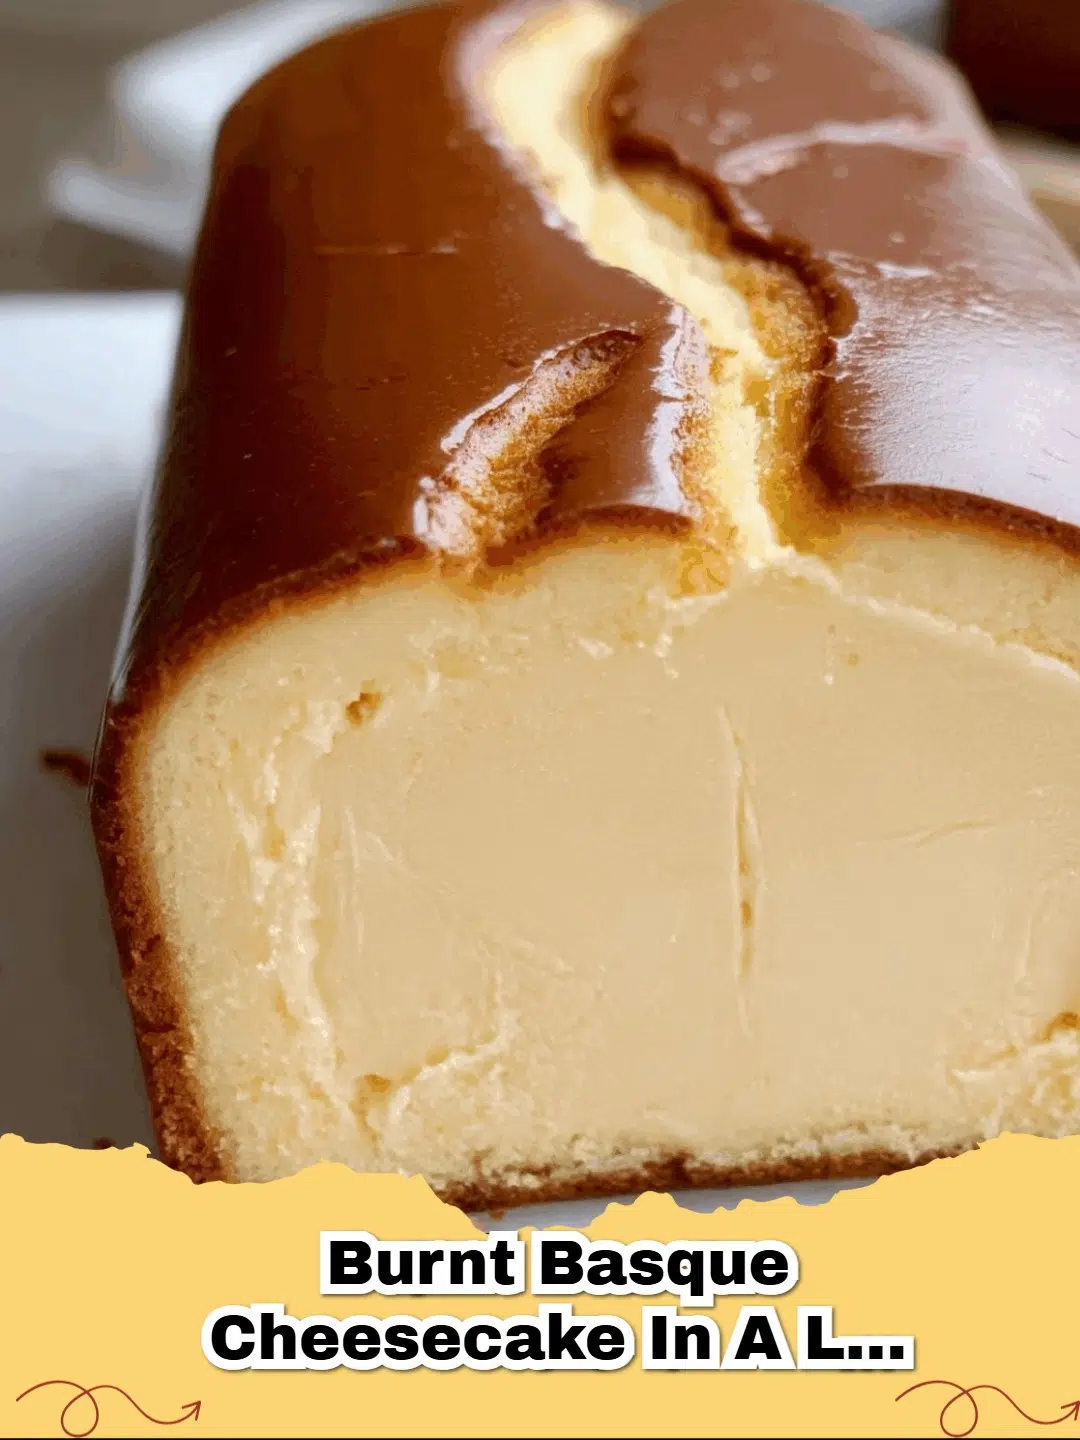
This isn't your average cheesecake. Hailing from La Viña in San Sebastián, Spain, the Burnt Basque Cheesecake embraces a rustic charm with its deeply caramelized, almost blackened exterior and an unbelievably creamy, custardy interior. It's meant to be cracked, jiggly, and undeniably delicious. Making it in a loaf pan means you get perfect individual slices without any fuss, making it ideal for smaller gatherings or just treating yourself.
Why a Loaf Pan is Your New Best Friend for Basque Cheesecake
Using a loaf pan simplifies the process immensely. You don't have to worry about leaks from a springform, and the tall sides help the cheesecake achieve its dramatic rise and fall. Plus, it's easier to line and lift out, resulting in a perfectly portioned dessert. It’s a game-changer for cheesecake lovers who appreciate simplicity without sacrificing flavor or texture.
Essential Ingredients for Your Loaf Pan Basque Cheesecake
- Full-Fat Cream Cheese: This is non-negotiable for that rich, decadent texture. Make sure it's at room temperature for a smooth batter.
- Granulated Sugar: Sweetness, of course, but also crucial for that beautiful caramelization.
- Large Eggs: Again, room temperature is key. They provide structure and richness.
- Heavy Cream: Adds to the luxurious creaminess. Lighter creams can work, but heavy cream delivers the best results.
- All-Purpose Flour: Just a touch helps stabilize the cheesecake, preventing it from collapsing too much.
- Salt: A pinch enhances all the other flavors.
Using a quality chef's knife will make preparing any additional toppings or serving the cooled cheesecake much easier, ensuring clean cuts through the rich dessert.
How to Achieve That Signature 'Burnt' Look and Creamy Center
The magic of a Burnt Basque Cheesecake lies in its high baking temperature. This aggressive heat creates the beautiful dark crust, while the shorter baking time ensures the interior remains wonderfully soft and molten. Don't be afraid of the dark crust – it's where much of the flavor comes from! When you pull it out of the oven, it will be super jiggly in the center; this is exactly what you want. It will continue to set as it cools.
Tips for Success
- Don't Overmix: Once the flour is added, mix just until combined to avoid developing too much gluten, which can make the cheesecake tough.
- Parchment Paper is Your Friend: Line your loaf pan generously with parchment paper, allowing it to overhang. This makes lifting the cooled cheesecake out a breeze.
- Chill, Chill, Chill: Patience is key! While it's tempting to dive in, chilling the cheesecake for several hours (or overnight) allows it to fully set and develop its incredible texture.
Serve this delightful cheesecake on its own, or with a sprinkle of sea salt, fresh berries, or a drizzle of caramel sauce. It's truly a showstopper that requires minimal effort and delivers maximum impact. Get ready to impress with this easy, elegant dessert!
FAQs
Can I make Burnt Basque Cheesecake without a springform pan?
Absolutely! This recipe is specifically designed for a standard loaf pan, making it accessible even if you don't have a springform pan. The loaf pan creates beautiful, sliceable portions and simplifies the baking process.
What gives Burnt Basque Cheesecake its unique 'burnt' top?
The signature 'burnt' top comes from baking the cheesecake at a very high temperature for a relatively short period. This caramelizes the sugars on the surface, creating a delicious, slightly bitter crust that perfectly contrasts the creamy interior.
Why is it important for ingredients like cream cheese and eggs to be at room temperature?
Using room temperature ingredients is crucial for a smooth, lump-free batter. Cold ingredients won't emulsify properly, leading to a textured cheesecake. Room temperature cream cheese and eggs blend together seamlessly, ensuring that signature creamy texture.


How do I know when my Basque cheesecake is perfectly done?
Your Burnt Basque Cheesecake is done when the edges are set and deeply caramelized (burnt!), but the center still has a significant wobble. It will firm up considerably as it cools, achieving that desirable custardy texture.

Burnt Basque Cheesecake Loaf Pan
- Total Time: 1 hour 55 minutes (includes cooling)
- Yield: 8 servings 1x
- Diet: Vegetarian
Description
A deliciously rich and creamy Burnt Basque Cheesecake baked conveniently in a loaf pan, featuring a signature caramelized exterior and custardy interior.
Ingredients
16 oz full-fat cream cheese, room temperature
¾ cup granulated sugar
3 large eggs, room temperature
1 cup heavy cream
¼ cup all-purpose flour
¼ teaspoon salt
Instructions
Step 1: Preheat your oven to 400°F (200°C). Line a standard 9x5-inch loaf pan with parchment paper, allowing plenty of overhang on all sides. This will help you lift the cheesecake out later.
Step 2: In a large mixing bowl, beat the room temperature cream cheese and granulated sugar together with an electric mixer on medium speed until smooth and creamy, about 2-3 minutes. Scrape down the sides of the bowl as needed.
Step 3: Add the eggs one at a time, mixing well after each addition until fully incorporated. Ensure each egg is completely blended before adding the next.
Step 4: Pour in the heavy cream and mix until just combined. The mixture should be smooth and homogenous.
Step 5: Sift the all-purpose flour and salt into the cream cheese mixture. Mix on low speed until just incorporated and no streaks of flour remain. Be careful not to overmix.
Step 6: Pour the batter into the prepared loaf pan. Tap the pan gently on the counter a few times to release any large air bubbles.
Step 7: Bake for 40-50 minutes, or until the top is deeply caramelized (almost burnt!) and the cheesecake is still very jiggly in the center when gently shaken. The edges should be set.
Step 8: Remove from the oven and let cool completely in the loaf pan on a wire rack for at least 1 hour. The cheesecake will sink in the center as it cools.
Step 9: Once cooled to room temperature, transfer the loaf pan to the refrigerator and chill for at least 4 hours, or preferably overnight, for the best texture and flavor. This allows it to firm up properly.
Step 10: Using the parchment paper overhang, carefully lift the chilled cheesecake out of the loaf pan. Slice and serve at room temperature for the ultimate creamy experience.
Notes
For an extra touch, serve with fresh berries or a light dusting of powdered sugar. A pinch of flaky sea salt on top before serving also enhances the flavors beautifully.
- Prep Time: 15 minutes
- Cook Time: 40 minutes
- Category: Dessert
- Method: Baking
- Cuisine: Spanish
Nutrition
- Serving Size: 1 slice
- Calories: 380 kcal
- Sugar: 20g
- Sodium: 220mg
- Fat: 30g
- Saturated Fat: 18g
- Unsaturated Fat: 10g
- Trans Fat: 1g
- Carbohydrates: 25g
- Fiber: 0g
- Protein: 7g
- Cholesterol: 180mg


Leave a Reply