
There’s nothing quite like the irresistible aroma and satisfying crunch of perfectly cooked, classic buttermilk fried chicken. It’s a dish that evokes comfort, tradition, and pure culinary joy. Forget bland, greasy imitations; we’re diving deep into the secrets of creating fried chicken that’s moist on the inside, incredibly flavorful, and boasts a golden, shatteringly crisp crust.
This recipe takes you back to basics, harnessing the power of a simple buttermilk brine and a well-seasoned flour dredge to deliver an authentic taste experience. Whether you’re a seasoned home cook or trying fried chicken for the first time, our step-by-step guide will help you achieve fried chicken perfection every single time.
The Magic of Buttermilk in Fried Chicken
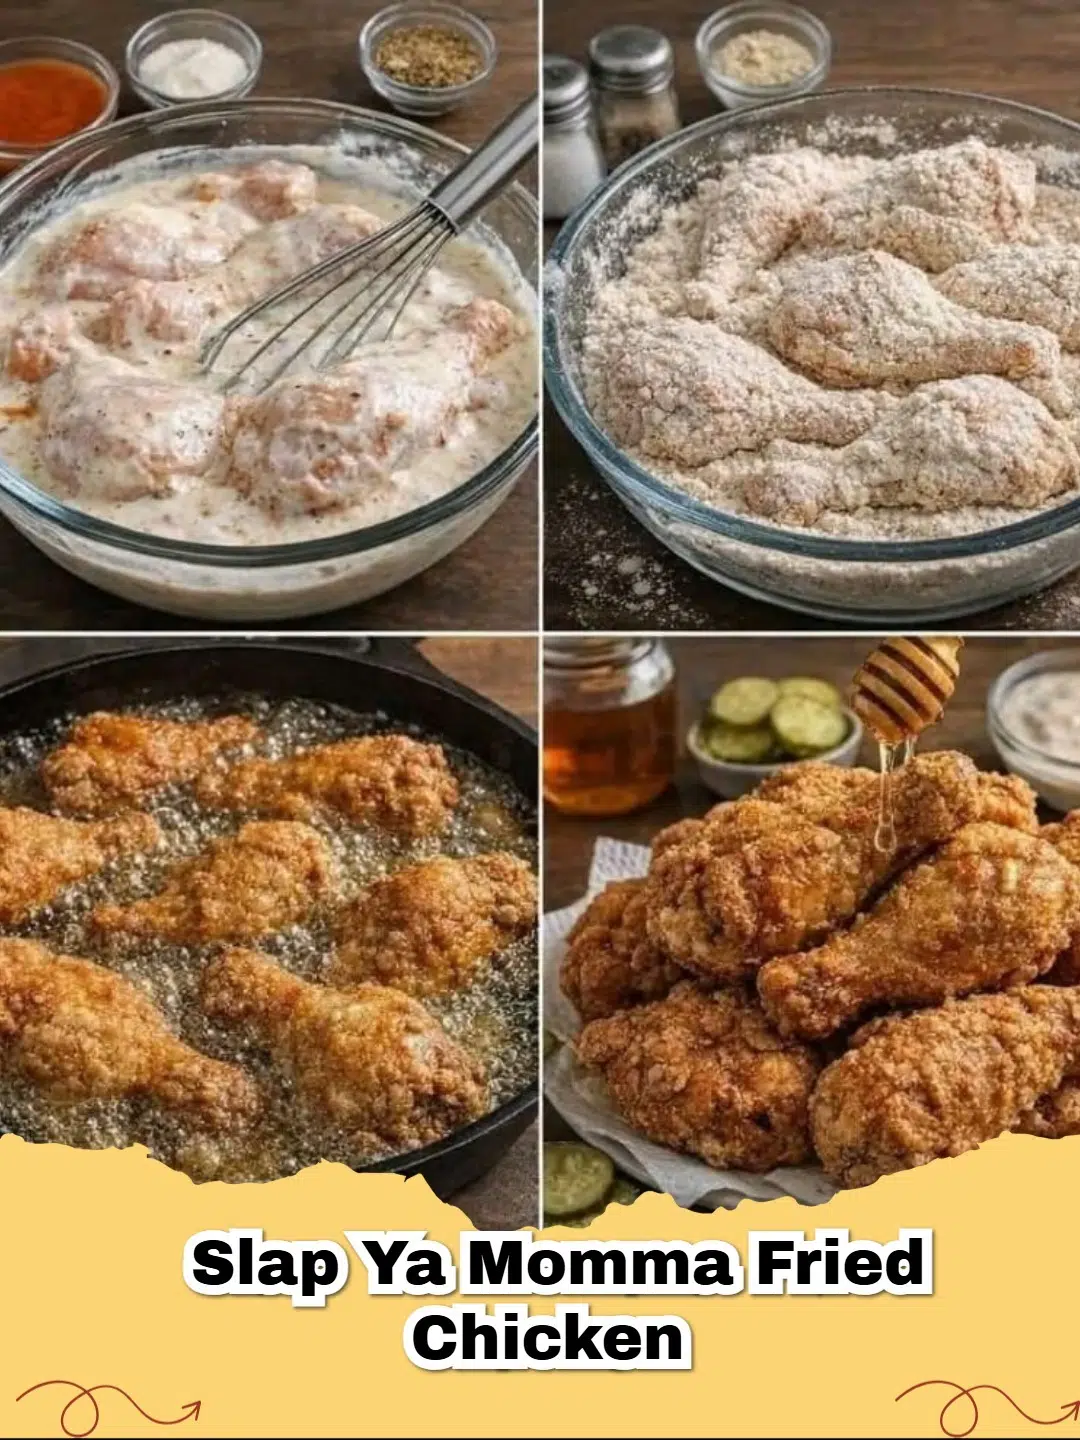
So, what’s the big deal with buttermilk? It’s truly the secret ingredient for tender, flavorful fried chicken. The mild acidity in buttermilk works as a natural tenderizer, breaking down tough muscle fibers in the chicken, resulting in incredibly juicy meat. Beyond tenderizing, the thick consistency of buttermilk clings to the chicken pieces, providing the perfect canvas for your seasoned flour dredge to adhere to. This ensures an even, thick coating that fries up into that quintessential crispy crust we all crave.
Choosing the Right Chicken Pieces
For classic fried chicken, a whole chicken cut into pieces is traditional, offering a variety of dark and white meat. You can use a mix of drumsticks, thighs, wings, and breasts. If using breasts, consider cutting larger ones in half to ensure even cooking with the other pieces. Always pat your chicken very dry after rinsing to help the buttermilk stick better.
Perfecting Your Seasoning and Dredge
The flavor of fried chicken largely comes from its seasoned flour dredge. Don't be shy with the spices! Our recipe includes a robust blend of salt, black pepper, paprika, garlic powder, onion powder, and an optional kick of cayenne pepper. This combination creates a savory, slightly spicy profile that perfectly complements the chicken. For precision and ease in prepping your ingredients, a quality chef's knife is always a great tool to have in your kitchen.
When dredging, ensure each piece of chicken is fully coated in the seasoned flour, pressing gently to help the flour adhere. A double dredge (dipping in buttermilk, then flour, then buttermilk again, then flour) can create an even thicker, crispier coating, but a single dredge is often sufficient for a wonderfully crisp result.
Frying Fundamentals: Temperature and Technique
The key to evenly cooked, crispy fried chicken that isn't greasy is maintaining the right oil temperature. Aim for 325-350°F (160-175°C). Too low, and your chicken will absorb too much oil and become greasy; too high, and the outside will burn before the inside cooks through. Use a heavy-bottomed pot or a deep fryer and a reliable thermometer to monitor the temperature.
Fry chicken in batches, being careful not to overcrowd the pot. Overcrowding lowers the oil temperature and can lead to uneven cooking and a less crispy crust. Once fried to a golden brown and cooked through (internal temperature of 165°F or 74°C), transfer the chicken to a wire rack set over a baking sheet to drain excess oil. This also allows air circulation, keeping the crust crisp.
Serving Your Masterpiece
Classic buttermilk fried chicken is fantastic on its own, but it truly shines when paired with traditional Southern sides. Think creamy mashed potatoes, tangy collard greens, sweet corn on the cob, or a fresh coleslaw. A sprinkle of fresh parsley for garnish adds a touch of color, but honestly, this chicken is so good, it barely needs anything extra.
Ready to get frying? Gather your ingredients and prepare for a truly unforgettable meal that will have everyone asking for seconds (and the recipe!). Enjoy the process, savor the aroma, and delight in the taste of homemade classic buttermilk fried chicken.
FAQs
Why is buttermilk used in fried chicken?
Buttermilk works magic on chicken! Its lactic acid tenderizes the meat without making it tough, while its thickness helps the seasoned flour adhere perfectly, creating that signature crispy crust.


What's the best oil for frying chicken?
For the best results, use oils with a high smoke point and neutral flavor, such as peanut oil, canola oil, or vegetable oil. These oils can withstand the high temperatures needed for crispy fried chicken without burning.
How do I ensure my fried chicken is crispy?
Achieving a crispy crust requires a few key steps: ensure your oil is at the correct temperature (around 325-350u00b0F or 160-175u00b0C), don't overcrowd the pan, and allow the chicken to rest on a wire rack after frying to let excess oil drain and steam escape, preventing sogginess.
Can I make fried chicken gluten-free?
Yes, you can! Simply substitute the all-purpose flour with a gluten-free flour blend designed for frying or a mix of rice flour and cornstarch for a deliciously crispy, gluten-free fried chicken.

Classic Buttermilk Fried Chicken
- Total Time: 45-50 minutes (plus 4 hours to overnight marinating)
- Yield: 4-6 servings 1x
- Diet: Comfort Food
Description
Master the art of making incredibly juicy and crispy buttermilk fried chicken, a true comfort food classic.
Ingredients
1 whole chicken (approx. 3-4 lbs), cut into 8 pieces
2 cups buttermilk
2 cups all-purpose flour
1 teaspoon salt
1 teaspoon black pepper
1 teaspoon paprika
1 teaspoon garlic powder
1 teaspoon onion powder
½ teaspoon cayenne pepper (optional)
4-6 cups vegetable, canola, or peanut oil (for frying)
Instructions
Step 1: In a large bowl or resealable plastic bag, combine the chicken pieces and buttermilk. Ensure all chicken is coated. Cover and refrigerate for at least 4 hours, or preferably overnight, for maximum tenderness and flavor.
Step 2: In a separate shallow dish or bowl, whisk together the all-purpose flour, salt, black pepper, paprika, garlic powder, onion powder, and cayenne pepper (if using).
Step 3: Remove chicken from the buttermilk, allowing excess to drip off. Dredge each piece thoroughly in the seasoned flour mixture, pressing to ensure a thick, even coating. Set coated chicken aside on a wire rack while you prepare the oil.
Step 4: In a large, heavy-bottomed pot or Dutch oven, pour enough oil to reach about 2-3 inches deep. Heat the oil over medium-high heat until it reaches 325-350°F (160-175°C). Use a thermometer to monitor the temperature.
Step 5: Carefully place 2-3 pieces of chicken into the hot oil, ensuring not to overcrowd the pot. Fry for 6-8 minutes per side, or until golden brown and the internal temperature reaches 165°F (74°C). The cooking time will vary depending on the size of the chicken pieces.
Step 6: Once cooked, remove the fried chicken from the oil and place it on a wire rack set over a baking sheet to drain excess oil. This helps maintain crispness. Repeat with remaining chicken pieces, ensuring the oil returns to temperature between batches.
Step 7: Serve your classic buttermilk fried chicken immediately with your favorite sides and enjoy!
Notes
For extra crispiness, you can do a double dredge: buttermilk, flour, buttermilk, then flour again. Always allow chicken to rest on a wire rack after frying to keep it crispy.
- Prep Time: 20 minutes
- Cook Time: 25-30 minutes
- Category: Main Course
- Method: Frying
- Cuisine: American Southern
Nutrition
- Serving Size: 1 piece (approx. 4oz)
- Calories: 420 kcal
- Sugar: 1g
- Sodium: 450mg
- Fat: 28g
- Saturated Fat: 7g
- Unsaturated Fat: 18g
- Trans Fat: 0g
- Carbohydrates: 25g
- Fiber: 1g
- Protein: 35g
- Cholesterol: 120mg


Leave a Reply