
Halloween isn't just for candy; it's the perfect excuse to get creative with your savory snacks too! If you're looking for a show-stopping appetizer that's both delicious and delightfully disturbing, these Creepy Deviled Eggs are your answer. They take a beloved classic and give it a ghoulish makeover that's sure to be the talk of any Halloween party or spooky gathering.
Forget bland and basic deviled eggs! We're talking about creamy, tangy yolk filling nestled in perfectly cooked egg whites, transformed with a few simple tricks into edible art. They're surprisingly easy to make, incredibly fun to decorate, and guaranteed to disappear faster than a ghost in the night. Get ready to impress your guests with this frightfully fantastic finger food!
Why These Spooky Deviled Eggs Are a Halloween Must-Have
Every host knows the importance of party-perfect food, and these creepy deviled eggs tick all the boxes for a memorable Halloween spread:
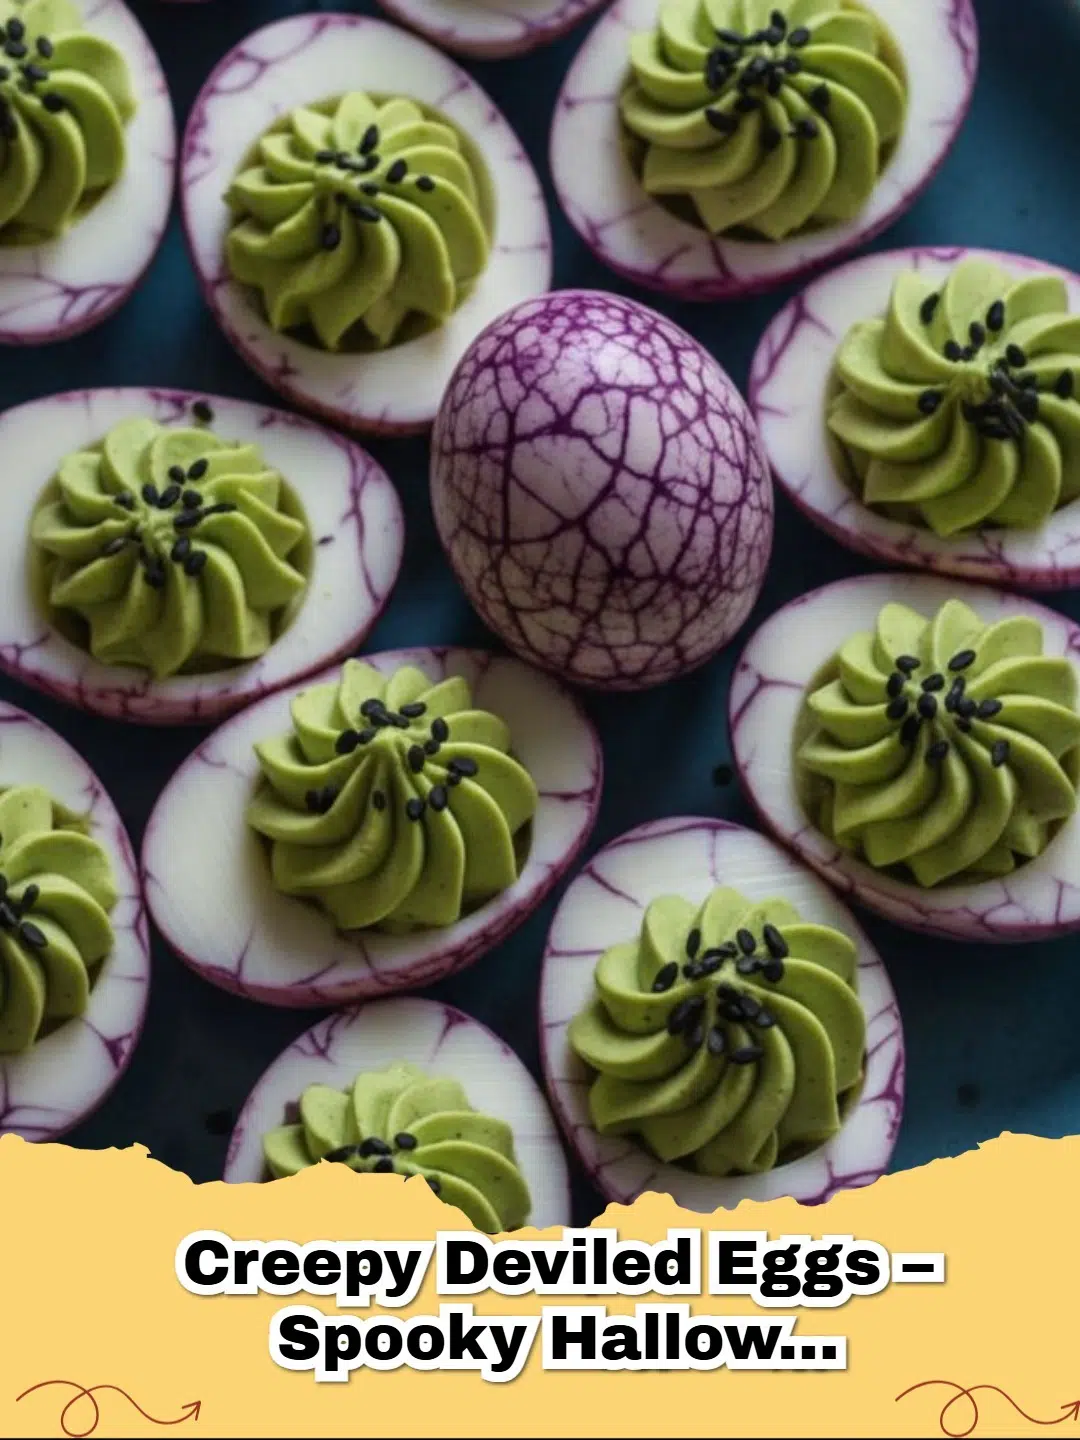
- Visually Striking: A few drops of food coloring and some strategically placed black olives turn ordinary eggs into miniature culinary monsters.
- Irresistibly Delicious: Underneath the spooky facade is the classic, creamy deviled egg flavor everyone adores. No one will be scared to dig in!
- Easy to Customize: Whether you want subtle spiderwebs, eerie eyeballs, or full-blown olive spiders, this recipe offers a fantastic canvas for your wildest spooky ideas.
- Party-Ready: They're excellent finger food, easy to transport, and can even be made ahead of time, which is a lifesaver for busy Halloween hosts.
Choosing the Right Eggs for Success
Starting with good quality eggs is key for any deviled egg recipe. While farm-fresh eggs are wonderful, slightly older eggs (about a week or two past their packing date) tend to peel much easier after hard boiling. This will save you a lot of frustration when preparing your spooky creations! For more seasonal inspiration, try our Easy No-Chill Pumpkin Spice Cookies: Your New Fall Favorite.
Essential Ingredients for Your Ghoulish Eggs
You'll find most of these ingredients are staples in any kitchen. The real magic comes with the decorative elements that bring the 'creepy' to life!
- Large eggs
- Mayonnaise
- Dijon mustard
- White vinegar (or pickle juice for a zingy twist!)
- Salt & black pepper
- Black food coloring gel (for dark yolks or dyeing whites)
- Pitted black olives (for spider bodies and legs)
- Red food coloring gel (optional, for 'bloodshot' eyes or veins)
For more appetizer inspiration, check out this great guide on Halloween party food ideas from Food Network.
Crafting Your Creepy Deviled Eggs: Tips & Tricks
Making deviled eggs is straightforward, but a few pointers will ensure your spooky appetizers are perfect:
- Perfect Peeling: After boiling, plunge eggs immediately into an ice bath. This stops cooking and helps the shells release easily.
- Smooth Yolk Mixture: Mash yolks thoroughly before adding other ingredients to avoid any lumps. A fork works well, or for an extra silky texture, press them through a fine-mesh sieve.
- Don't Overmix: Once you add the wet ingredients, mix until just combined. Overmixing can make the filling too runny, which is no fun for piping!
- Taste & Adjust: Always taste your yolk mixture before piping. Adjust seasonings as needed to suit your preference. Perhaps a little more mustard or a pinch more salt makes all the difference!
Serving and Storing Your Spooky Treats
These Creepy Deviled Eggs are best served chilled. Arrange them artfully on a platter for maximum visual impact. For make-ahead convenience, you can prepare the eggs and filling separately, storing them in airtight containers in the refrigerator. Assemble and decorate a few hours before your party. Leftovers, if any, will keep well in an airtight container in the fridge for up to two days. If you're looking for another savory bite for your party, consider our Easy Cranberry Pecan Chicken Salad: Your 15-Minute Recipe Guide!.
Unleash Your Inner Mad Scientist!
These Creepy Deviled Eggs are more than just an appetizer; they're a fun activity and a conversation starter! They prove that Halloween food can be both spooky and utterly delicious. So, gather your ingredients, unleash your creative spirit, and get ready to whip up a batch of these hauntingly good treats that will have everyone screaming for more!
FAQs
How can I make my deviled eggs look truly terrifying for Halloween?
For truly creepy deviled eggs, you can dye the egg white halves with food coloring (like green or purple) before filling them. Then, pipe in a darkly colored yolk mixture and drag a toothpick through it for a spiderweb effect. Black olives are perfect for crafting realistic spider bodies and spindly legs on top of the finished eggs.


Can these spooky deviled eggs be prepared in advance?
Yes, they are excellent for make-ahead party prep! You can hard boil and peel the eggs up to 2-3 days ahead. The yolk filling can also be prepared a day or two in advance and stored in an airtight container or piping bag in the refrigerator. Assemble and decorate them a few hours before serving for the best appearance.
What are some fun variations for decorating deviled eggs for Halloween?
Beyond spiders, consider 'eyeball' deviled eggs with a sliced olive for the pupil and red food coloring for 'bloodshot' veins. You could also pipe a 'brain' pattern with a round tip, or use a tiny piece of red bell pepper as a 'devil's tongue' sticking out from a black-dyed yolk.
How long do deviled eggs typically last in the refrigerator?
Deviled eggs are best consumed within 2 days when stored properly in an airtight container in the refrigerator. While they may still be safe beyond that, the texture and freshness of the filling and whites can diminish, and any food coloring may start to bleed.

Creepy Deviled Eggs
- Total Time: 35 minutes
- Yield: 12 deviled eggs (6 servings) 1x
- Diet: Vegetarian
Description
Transform classic deviled eggs into a frightfully fun and delicious Halloween appetizer, perfect for any spooky celebration!
Ingredients
6 large eggs
1/4 cup mayonnaise
1 teaspoon Dijon mustard
1 tablespoon white vinegar (or pickle juice)
1/4 teaspoon salt
Pinch of black pepper
Black food coloring gel (optional, for dark yolks or cracked egg whites)
6 pitted black olives, halved
Red food coloring gel (optional, for 'bloodshot' eyes)
Instructions
Step 1: Carefully hard boil your eggs. Once cooked, immediately transfer them to an ice bath for 5-10 minutes to stop the cooking process and make them easier to peel.
Step 2: Gently peel the cooled eggs and slice each in half lengthwise. Carefully scoop out the yolks and place them in a medium bowl, arranging the egg white halves on a serving platter.
Step 3: Mash the egg yolks thoroughly with a fork. Add mayonnaise, Dijon mustard, white vinegar (or pickle juice), salt, and black pepper. Mix until smooth and creamy.
Step 4: If desired for a 'creepy' look, add a few drops of black food coloring gel to the yolk mixture and mix until fully incorporated for dark, spooky yolks. Alternatively, you can dye the egg whites for different effects.
Step 5: Transfer the yolk mixture to a piping bag with a star tip (or a Ziploc bag with a corner snipped) and pipe the filling into the egg white halves.
Step 6: To create spiders, use the halved pitted black olives for the bodies. Place one half on top of each filled egg. Slice the remaining olive halves into thin strips for spider legs and arrange 3-4 legs on each side of the olive body. For bloodshot eyes, you can use red food coloring gel and a toothpick.
Step 7: Chill the creepy deviled eggs for at least 30 minutes before serving.
Notes
For an extra tangy kick, use pickle juice instead of white vinegar. Get creative with your decorations – green food coloring for zombie eggs or orange for pumpkin-themed yolks!
- Prep Time: 20 minutes
- Cook Time: 15 minutes
- Category: Appetizer
- Method: Boiling, Assembling
- Cuisine: American
Nutrition
- Serving Size: 2 halves
- Calories: 90 kcal
- Sugar: 1g
- Sodium: 120mg
- Fat: 7g
- Saturated Fat: 2g
- Unsaturated Fat: 4g
- Trans Fat: 0g
- Carbohydrates: 2g
- Fiber: 0g
- Protein: 6g
- Cholesterol: 180mg


Leave a Reply