
Get ready to revolutionize your snack game with these incredible Crispy Cheesy Taco Sticks! Imagine the rich, savory flavors of your favorite taco, all bundled into a perfectly crunchy, golden-brown wrapper, bursting with melted cheese. These handheld delights are more than just an appetizer; they’re a culinary adventure that will have everyone reaching for more, whether it's for a casual family dinner or a lively get-together.
These taco sticks offer the ultimate combination of a satisfying crisp exterior and a tender, zesty filling. The seasoned ground beef and gooey cheese create a harmonious blend of tastes that’s both comforting and exciting. Perfect for game day, a fun movie night, or simply when you're craving something deliciously different, these Cheesy Taco Sticks are set to become a treasured recipe in your kitchen!
Why You'll Adore These Cheesy Taco Sticks
Our Cheesy Taco Sticks are crafted for maximum flavor and effortless preparation. Here’s why they’re destined to be a hit:
- Effortlessly Easy: With simple instructions and common ingredients, you'll create these delightful savory bites in no time.
- Crowd-Pleasing Perfection: The classic taco taste paired with melted cheese is a universal favorite, ensuring smiles all around.
- Flavor Flexibility: Feel free to customize with different meats, cheeses, or even add vegetables to suit your palate.
- Dipping Dream: Their convenient stick shape makes them ideal for dipping into your favorite sauces and enjoying on the go.
Ingredients for Your Cheesy Taco Stick Adventure
Creating these tempting sticks requires just a few pantry staples. You’ll find the full list in the recipe card below, but here’s a quick overview:
- Lean ground beef
- Taco seasoning mix
- Shredded cheddar cheese
- Egg roll wrappers
- Olive oil (for brushing)
- Your choice of dips like sour cream, salsa, or guacamole for serving.
Crafting Your Crispy Cheesy Taco Sticks: A Step-by-Step Guide
Let's get cooking! These steps will guide you to perfect golden-brown taco sticks.
Prepare the Flavorful Filling
First, we create the heart of our taco sticks: a rich, cheesy, and perfectly seasoned meat filling.
- Step 1: In a large skillet, brown the ground beef over medium heat, breaking it apart until it’s fully cooked and no pink remains. Drain any excess fat to ensure your taco sticks stay delightfully crispy.
- Step 2: Stir in the taco seasoning packet along with a small amount of water, following the package directions. Cook for another 2-3 minutes, allowing the aromatic spices to fully infuse the meat.
- Step 3: Remove the skillet from the heat. Add the shredded cheddar cheese to the warm meat mixture and stir until it’s completely melted and smoothly combined, creating a gooey, irresistible filling.
Assemble and Roll with Ease
Now for the fun part – wrapping up all that cheesy taco goodness!
- Step 4: On a clean, dry surface, lay out an egg roll wrapper so that it forms a diamond shape, with one corner pointing towards you.
- Step 5: Place about 2 tablespoons of the cheesy taco meat mixture in the center of the wrapper, leaving ample space around the edges for sealing.
- Step 6: Bring the bottom corner of the wrapper up and over the filling. Fold in the left and right side corners towards the center. Then, tightly roll the wrapper upwards towards the remaining top corner. Dab a tiny bit of water on the top edge to secure the seal. Repeat this process with the rest of your wrappers and filling.

Bake to Golden Perfection
The final step for that irresistible crisp!
- Step 7: Preheat your oven to 400°F (200°C). Line a baking sheet with parchment paper.
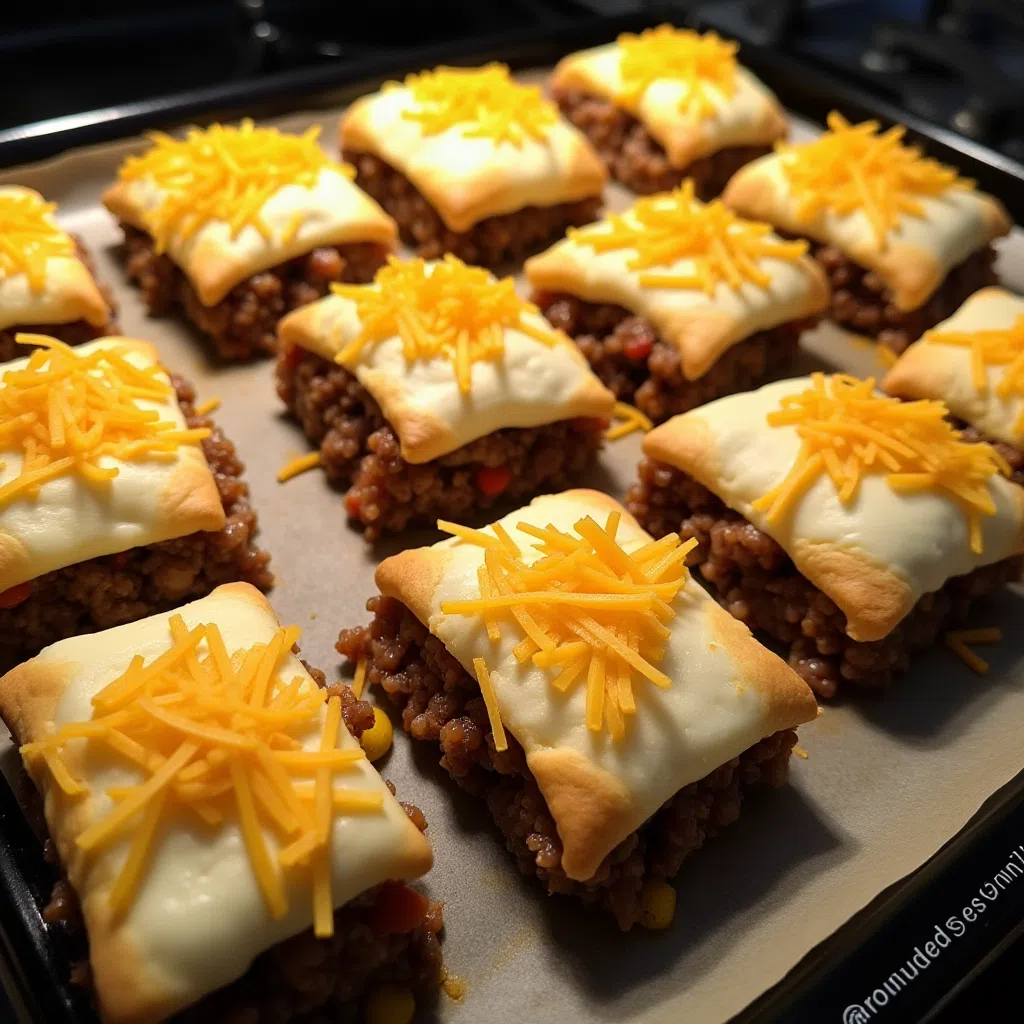
- Step 8: Arrange the rolled taco sticks on the prepared baking sheet, ensuring there’s a little space between each one for even cooking. Lightly brush the tops of the sticks with olive oil to encourage a beautiful golden, crispy crust.
- Step 9: Bake for 15-20 minutes, or until the taco sticks are gloriously golden brown and wonderfully crispy.
Serve and Savor Every Bite!
The moment you’ve been waiting for!
- Step 10: Let the baked taco sticks cool for a few minutes before serving, as the filling will be very hot.
- Step 11: Arrange them on a platter with your favorite accompaniments. Think cool sour cream, vibrant fresh salsa, or creamy guacamole. For another fantastic taco-inspired dish, consider making Easy Walking Taco Casserole!
Creative Twists and Smart Hacks
These Cheesy Taco Sticks are amazing as they are, but don't hesitate to experiment!
- Spice It Up: Add finely diced jalapeños or a dash of cayenne pepper to the meat mixture for an extra kick.
- Cheese Swap: Explore different cheeses like Monterey Jack for extra creaminess, or a spicy pepper jack for more heat.
- Veggie Boost: Mix in finely chopped and sautéed bell peppers or onions into the beef filling for added texture and nutrients.
- Alternative Proteins: Shredded chicken or even a savory bean and corn mixture can be fantastic alternatives to ground beef. For more cheesy goodness with chicken, check out our Loaded Chicken Bacon Ranch Taco Bell Bombs.
Storing and Reheating Your Delicious Taco Sticks
To enjoy these tasty treats later, here’s how to store and reheat them to perfection:
- Refrigerate: Store any cooled leftover taco sticks in an airtight container in the refrigerator for up to 3 days.
- Freeze (Uncooked): Lay uncooked sticks on a baking sheet and freeze until solid. Once solid, transfer them to a freezer-safe bag for up to 2 months. Bake from frozen, adding 5-10 minutes to the baking time.
- Reheat for Crispiness: For the best results, reheat in a 350°F (175°C) oven for about 10 minutes, or use an air fryer until they are heated through and wonderfully crunchy again. You can learn more about taco seasoning ingredients and history at Wikipedia's page on Taco Seasoning.
Conclusion
These Crispy Cheesy Taco Sticks are more than just a recipe; they are a ticket to fun, flavor-packed meals that everyone will adore. Simple to prepare, incredibly versatile, and undeniably delicious, they prove that the most basic ingredients can come together to create something truly extraordinary.


We hope you have a fantastic time making and sharing these delightful Cheesy Taco Sticks. Happy cooking, and get ready for a burst of taco goodness in every crispy bite!
FAQs
Can Cheesy Taco Sticks be prepared ahead of time?
Yes, you can assemble the taco sticks up to a day in advance and store them uncooked in the refrigerator. For longer storage, freeze them unbaked and bake directly from frozen, adding a few extra minutes to the cooking time.
What are the best dipping sauces for these taco sticks?
Cheesy Taco Sticks pair wonderfully with classic dips like sour cream, fresh salsa, and creamy guacamole. For a zesty kick, try a homemade avocado-lime crema or a spicy queso dip.
Can I make a vegetarian version of Cheesy Taco Sticks?
Absolutely! Substitute the ground beef with seasoned black beans, cooked lentils, or your favorite plant-based ground meat alternative. Ensure your taco seasoning is suitable for vegetarian diets.
What's the best way to reheat leftover taco sticks to keep them crispy?
To restore their delightful crunch, reheat leftover taco sticks in a preheated oven at 350u00b0F (175u00b0C) for 8-10 minutes, or in an air fryer for 3-5 minutes, until they are hot and crispy.

Crispy Cheesy Taco Sticks
- Total Time: 40 minutes
- Yield: 20 taco sticks 1x
- Diet: Comfort Food
Description
These irresistibly crispy and cheesy taco sticks are packed with seasoned ground beef and melted cheddar, perfect for a fun snack or party appetizer.
Ingredients
1 pound lean ground beef
1 packet taco seasoning mix
1 cup shredded cheddar cheese
1 package egg roll wrappers (approx. 20 wrappers)
1 tablespoon olive oil (for brushing)
Instructions
Step 1: Brown the ground beef in a large skillet over medium heat until no pink remains, then drain any excess fat.
Step 2: Stir in the taco seasoning mix with a small amount of water as directed on the packet, and cook for 2-3 minutes to allow flavors to develop.
Step 3: Remove the skillet from heat, add the shredded cheddar cheese, and stir until completely melted and well combined with the seasoned beef.
Step 4: Lay an egg roll wrapper on a clean surface in a diamond shape. Place about 2 tablespoons of the cheesy taco meat mixture in the center.
Step 5: Fold the bottom corner over the filling, then fold in the left and right corners. Roll the wrapper tightly upwards towards the top corner, dabbing the top edge with water to seal. Repeat for all wrappers.
Step 6: Preheat your oven to 400°F (200°C). Line a baking sheet with parchment paper and arrange the rolled taco sticks with space between them.
Step 7: Lightly brush the tops of the taco sticks with olive oil for a golden, crispy finish.
Step 8: Bake for 15-20 minutes, or until the sticks are golden brown and wonderfully crispy.
Step 9: Allow to cool for a few minutes before serving with your favorite dips like sour cream, salsa, or guacamole.
Notes
For extra spice, add diced jalapeños to the meat filling. These also freeze well uncooked; simply bake from frozen, adding extra time.
- Prep Time: 20 minutes
- Cook Time: 20 minutes
- Category: Appetizer
- Method: Baking
- Cuisine: Mexican-inspired
Nutrition
- Serving Size: 2 sticks
- Calories: 180 kcal
- Sugar: 1g
- Sodium: 350mg
- Fat: 9g
- Saturated Fat: 4g
- Unsaturated Fat: 4g
- Trans Fat: 0g
- Carbohydrates: 15g
- Fiber: 1g
- Protein: 10g
- Cholesterol: 45mg


Leave a Reply