
Prepare to be enchanted by these stunning Red Velvet Brownies with Cream Cheese Frosting! This recipe takes the classic allure of red velvet and transforms it into an incredibly moist, fudgy brownie experience, crowned with a luscious, tangy cream cheese frosting. It’s a dessert that’s as beautiful to look at as it is delicious to devour, perfect for holidays, celebrations, or simply to brighten an ordinary day.
The deep, rich cocoa flavor with a hint of vanilla, combined with the signature red hue and that irresistible swirl of creamy frosting, makes these brownies truly special. Get ready for a dessert that’s destined to become a household favorite!
Why You'll Adore These Red Velvet Brownies
- Unmistakable Red Velvet Flavor: A perfect balance of subtle chocolate and a characteristic tang.
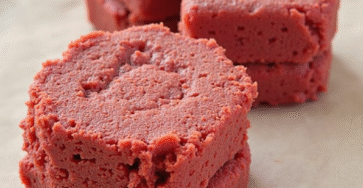
- Heavenly Fudgy Texture: Achieve the ideal dense, chewy brownie every single time.
- Visually Striking: The vibrant red base and white frosting create an elegant, festive presentation.
- Effortlessly Delicious: A straightforward recipe that yields impressive, bakery-quality results.
Key Ingredients for Your Baking Adventure
Crafting these extraordinary brownies is simpler than you think, requiring ingredients you likely already have or can easily find.
For the Fudgy Red Velvet Brownies:
- 1/2 cup unsalted butter (melted)
- 1 cup granulated sugar
- 2 large eggs
- 1 teaspoon vanilla extract
- 1 tablespoon red food coloring
- 1 cup all-purpose flour
- 1/4 cup unsweetened cocoa powder
- 1/4 teaspoon salt
- 1/2 teaspoon baking powder
For the Tangy Cream Cheese Frosting:
- 4 ounces cream cheese (softened)
- 1/4 cup unsalted butter (softened)
- 1 cup powdered sugar
- 1 teaspoon vanilla extract
- A pinch of salt

Your Step-by-Step Guide to Perfection
Follow these easy instructions to create a batch of these unforgettable Red Velvet Brownies.
Step 1: Prepare Your Baking Environment
Preheat your oven to a comfortable 350°F (175°C). Take an 8x8 inch baking pan and lightly grease it. For effortless removal later, consider lining the pan with parchment paper, allowing some overhang on the sides.
Step 2: Combine Wet Ingredients for the Brownies
In a generously sized mixing bowl, combine the melted unsalted butter and granulated sugar. Whisk these together until they are perfectly smooth and well integrated. Next, incorporate the eggs, vanilla extract, and the vivid red food coloring. Stir until you achieve a consistent color and smooth texture.
Step 3: Prepare Your Dry Mixture
Grab a separate medium bowl and whisk together the all-purpose flour, unsweetened cocoa powder, salt, and baking powder. Make sure there are no lumps, ensuring an even distribution in your brownies.
Step 4: Integrate Wet and Dry Components
Slowly add the prepared dry ingredient mixture into your wet ingredients. Mix gently, just until everything is combined. Be mindful not to overmix, as this can lead to a denser, more cake-like brownie texture rather than the desired fudgy consistency.
Step 5: Bake to Fudgy Perfection
Carefully pour your vibrant red brownie batter into the prepared 8x8 inch baking pan, spreading it evenly. Bake in your preheated oven for 20-25 minutes. To check for doneness, insert a toothpick into the center; it should come out with moist crumbs, not wet batter. This is key for fudginess!
Step 6: Prepare the Dreamy Cream Cheese Frosting
While your brownies are baking and starting to cool, it's time to whip up the frosting. In a medium bowl, beat the softened cream cheese and softened unsalted butter until they are light and creamy. Gradually add the powdered sugar, vanilla extract, and a pinch of salt. Continue beating until your frosting is wonderfully smooth and fluffy.
Step 7: Cool Completely and Frost
Once the brownies are baked, let them cool in the pan for about 10 minutes. Then, carefully transfer them to a wire rack to cool completely. Patience here is a virtue – fully cooled brownies ensure your frosting sets beautifully. Once cool, generously spread the luscious cream cheese frosting over the top.
Step 8: Slice and Indulge
Cut your frosted brownies into neat squares. For the cleanest cuts, I recommend chilling the brownies for about 30 minutes before slicing. Now, serve and relish every rich, fudgy bite of your homemade Red Velvet Brownies!
Tips for Mastering Your Red Velvet Brownies
- Temperature is Key for Frosting: Ensure your cream cheese and butter are truly at room temperature for the smoothest, lump-free frosting.
- Don't Overmix the Batter: Overmixing develops gluten, which can make brownies tough. Mix just until the dry ingredients disappear.
- The Toothpick Test is Your Friend: Pull the brownies when a toothpick comes out with moist crumbs, not fully clean. This guarantees a fudgy interior!
- Chill for Perfect Slices: For those Instagram-worthy, clean-edged squares, a brief chill in the fridge after frosting makes all the difference.
Storage & Make-Ahead Brilliance
These brownies are fantastic for preparing in advance! Store any frosted leftovers in an airtight container in the refrigerator for up to a week. If you haven't frosted them yet, the unfrosted brownies can be kept at room temperature for 2-3 days. They also freeze wonderfully; just wrap individual brownies tightly in plastic wrap and store them in a freezer-safe bag for up to two months. Thaw in the fridge or at room temperature before serving.
Exciting Variations to Explore
Feel free to get creative with your Red Velvet Brownies!


- Add a Chocolate Swirl: Swirl in 1/2 cup of white chocolate or dark chocolate chips into the batter before baking for extra pockets of melty goodness.
- Introduce a Nutty Crunch: Fold in 1/2 cup of chopped pecans or walnuts with your dry ingredients for a delightful texture. If you love nutty desserts, you might also enjoy these Classic Pecan Pie Cookies!
- Boost the Cocoa: A teaspoon of instant espresso powder added to the cocoa powder will deepen the chocolate flavor without making it taste like coffee.
- Festive Flair: Decorate the frosting with seasonal sprinkles to match any holiday or special occasion.
More Decadent Desserts to Love
If you're a devoted fan of red velvet, you absolutely must try our Red Velvet Strawberry Cheesecake for another impressive and delicious dessert that captures that iconic flavor profile. For even more sweet inspiration, browse our full collection of delectable treats!
The Fascinating Story Behind Red Velvet
The history of red velvet cake, the inspiration for these brownies, is quite intriguing! Originally, the slight reddish tint came from a natural chemical reaction between cocoa powder and acidic ingredients like buttermilk and vinegar. However, as cocoa processing methods changed, red food coloring became a standard addition to achieve the striking crimson hue we know today. To dive deeper into its captivating origins, you can explore the history of red velvet cake on Wikipedia.
A Final Sweet Note
These Red Velvet Brownies with Cream Cheese Frosting are truly a joy to make and an absolute delight to eat. They perfectly combine rich flavor, wonderful texture, and a show-stopping appearance. We hope this recipe becomes a treasured addition to your baking repertoire. Happy baking, and enjoy every decadent bite!
FAQs
What gives Red Velvet Brownies their signature vibrant color?
The distinct red color in these brownies primarily comes from red food coloring. While traditional red velvet cake recipes sometimes achieved a subtle reddish tint from the reaction of cocoa with acidic ingredients, modern recipes often use food coloring for that iconic, vivid hue.
Can I bake these brownies without adding red food coloring?
Absolutely! You can skip the red food coloring if you prefer. The brownies will still boast a rich cocoa flavor, and you might notice a natural brownish-red tint from the cocoa, but they won't have the bright, classic red velvet appearance.
What is the best way to store Red Velvet Brownies with cream cheese frosting?
To maintain freshness and quality, store your Red Velvet Brownies with cream cheese frosting in an airtight container in the refrigerator for up to one week. Unfrosted brownies can be stored at room temperature for 2-3 days.
How can I ensure my Red Velvet Brownies turn out perfectly fudgy?
The key to fudgy brownies is to avoid overmixing the batter after adding the dry ingredients and, most importantly, not to overbake them. Look for a toothpick inserted into the center to come out with moist crumbs, not completely clean batter.

Red Velvet Brownies with Cream Cheese Frosting
- Total Time: 45 minutes
- Yield: 16 brownies 1x
- Diet: N/A
Description
Fudgy, rich Red Velvet Brownies crowned with a tangy, creamy cream cheese frosting, creating a truly decadent dessert experience.
Ingredients
1/2 cup unsalted butter (melted)
1 cup granulated sugar
2 large eggs
1 teaspoon vanilla extract
1 tablespoon red food coloring
1 cup all-purpose flour
1/4 cup unsweetened cocoa powder
1/4 teaspoon salt
1/2 teaspoon baking powder
4 ounces cream cheese (softened)
1/4 cup unsalted butter (softened) for frosting
1 cup powdered sugar
1 teaspoon vanilla extract for frosting
A pinch of salt for frosting
Instructions
Step 1: Preheat your oven to 350°F (175°C). Lightly grease an 8x8 inch baking pan. For easy removal, line it with parchment paper, leaving an overhang on the sides.
Step 2: In a large mixing bowl, combine the melted unsalted butter and granulated sugar. Whisk until well combined and smooth. Add the eggs, vanilla extract, and red food coloring. Stir until uniform.
Step 3: In a separate medium bowl, whisk together the all-purpose flour, unsweetened cocoa powder, salt, and baking powder until no lumps remain.
Step 4: Gradually add the dry ingredient mixture to the wet ingredients. Mix gently until just combined. Avoid overmixing to ensure fudgy brownies.
Step 5: Pour the batter evenly into the prepared baking pan. Bake for 20-25 minutes. A toothpick inserted into the center should come out with moist crumbs, not wet batter.
Step 6: While the brownies cool, prepare the frosting. In a medium bowl, beat softened cream cheese and softened butter until light and creamy. Gradually add powdered sugar, vanilla extract, and a pinch of salt. Beat until smooth and fluffy.
Step 7: Allow brownies to cool in the pan for 10 minutes, then transfer to a wire rack to cool completely. This is crucial for the frosting. Once fully cooled, spread the cream cheese frosting evenly over the top.
Step 8: Cut the frosted brownies into squares. For clean slices, chill the brownies for about 30 minutes before cutting. Serve and enjoy!
Notes
Ensure all dairy ingredients for the frosting are at room temperature for a smooth, lump-free consistency. Do not overbake the brownies; a slightly underbaked brownie is a fudgy brownie!
- Prep Time: 20 minutes
- Cook Time: 25 minutes
- Category: Dessert
- Method: Baking
- Cuisine: American
Nutrition
- Serving Size: 1 brownie
- Calories: 310 kcal
- Sugar: 35g
- Sodium: 100mg
- Fat: 15g
- Saturated Fat: 9g
- Unsaturated Fat: 6g
- Trans Fat: 0g
- Carbohydrates: 42g
- Fiber: 1g
- Protein: 3g
- Cholesterol: 65mg


Leave a Reply