
Bringing Magic to Your Table with Easter Egg Cheesecake Jars
Easter Egg Cheesecake Jars are the ultimate colorful and creamy addition to your spring table, offering a whimsical twist on a classic dessert. When the flowers begin to bloom and the sun stays out a little longer, our cravings shift toward light, airy, and festive treats. These individual portions are not only visually stunning but also incredibly practical for family gatherings and egg hunts. There is something truly special about having your own personal jar of heaven, layered with a buttery crust and a velvety filling.
The beauty of these Easter Egg Cheesecake Jars lies in their simplicity and the joy they bring to both children and adults. In a world of complicated pastries, the no-bake cheesecake method stands out as a reliable and stress-free option. Whether you are hosting a formal brunch or a casual backyard get-together, these jars provide a sophisticated yet playful dessert solution. Let's dive into why this specific recipe has become a staple for spring celebrations everywhere.
Why You’ll Love It
You will absolutely adore these Easter Egg Cheesecake Jars because they eliminate the anxiety of cracks and water baths associated with traditional baking. The no-bake format ensures a silky-smooth texture that melts in your mouth without the need for an oven. Furthermore, the portability of the jars makes them the perfect candidate for picnics or as a thoughtful gift for neighbors. You can even prepare them up to two days in advance, leaving you more time to focus on your holiday main course.
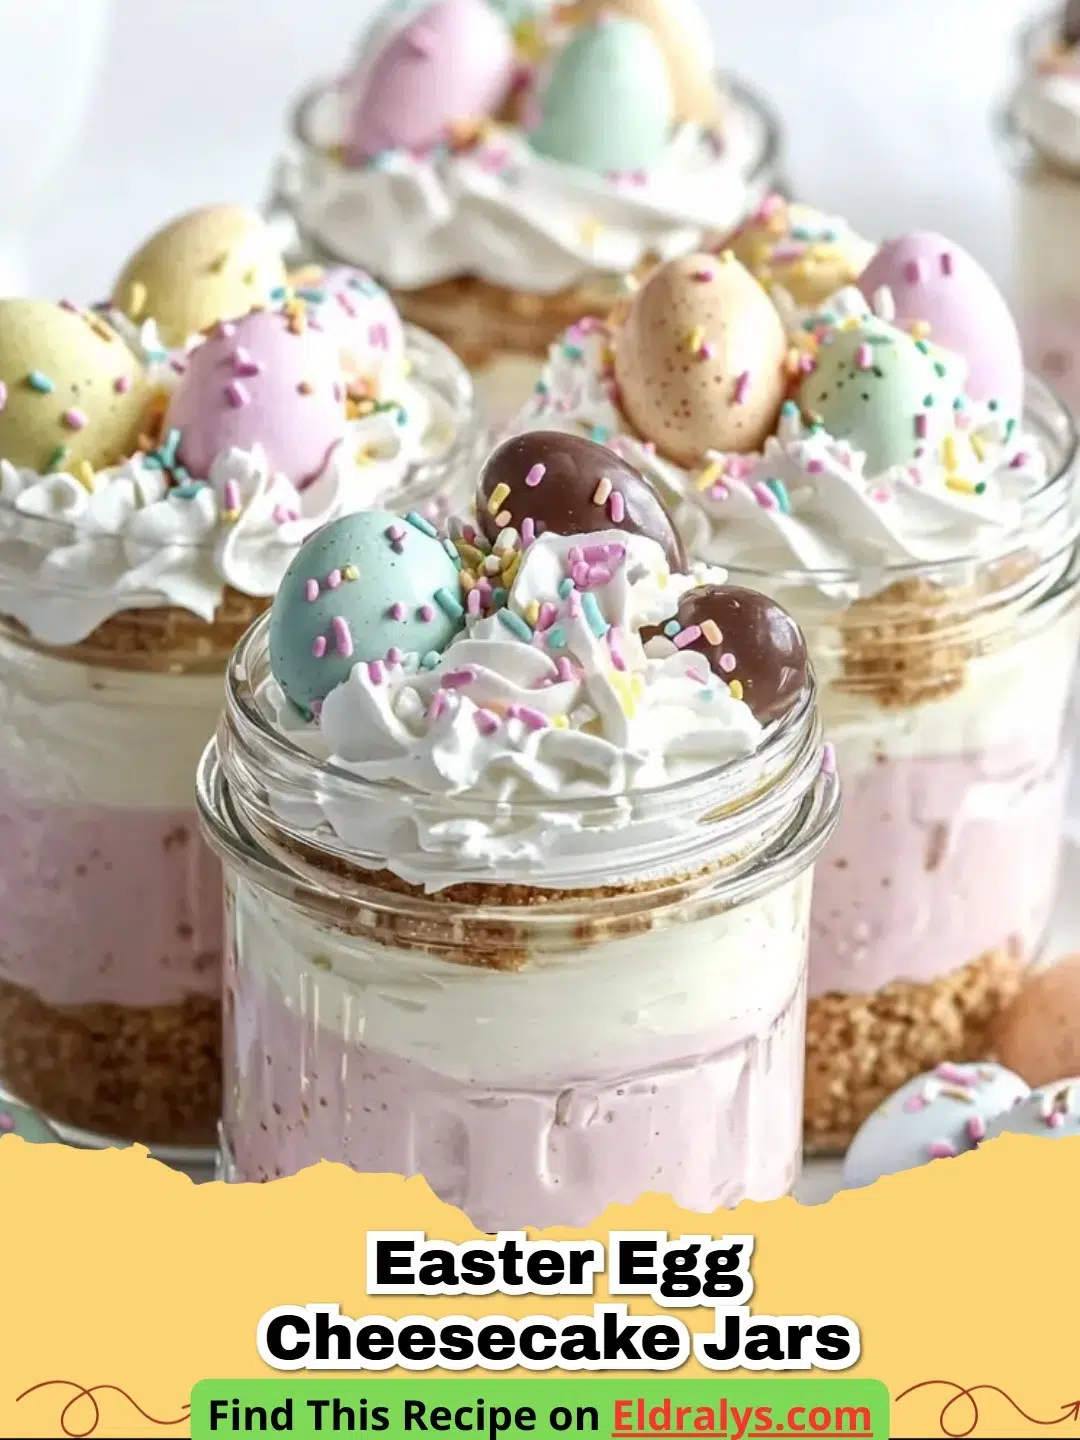
Beyond the convenience, the flavor profile is a crowd-pleaser that balances the tanginess of cream cheese with the sweetness of vanilla and chocolate. Topping them with colorful speckled mini eggs creates an instant holiday vibe that looks like it came straight from a professional bakery. If you enjoy this aesthetic, you might also want to try Easter No-Bake Mini Cheesecakes: The Most Adorable & Easy Spring Dessert! for more seasonal inspiration.
Ingredients for Success
To create the perfect Easter Egg Cheesecake Jars, you will need a handful of high-quality ingredients that work in harmony. The crust is made from graham cracker crumbs mixed with melted unsalted butter, providing a firm yet crumbly base. For the filling, you will need full-fat cream cheese, powdered sugar, pure vanilla extract, and heavy whipping cream. The star of the show, of course, is the bag of speckled mini chocolate eggs that add crunch and festive color.
Notes and Substitutions
- Cream Cheese: Always use the brick-style cream cheese rather than the spreadable kind found in tubs for a stable filling.
- Graham Crackers: You can substitute these with digestive biscuits or even crushed vanilla wafers for a different flavor profile.
- Sweetener: If you prefer a less sweet dessert, you can reduce the powdered sugar by a quarter cup.
- Decorations: While mini eggs are traditional, you can also add edible glitter or pastel sprinkles.
Equipment Needed
Making Easter Egg Cheesecake Jars requires very little specialized equipment. You will need a medium mixing bowl for the crust and a large mixing bowl for the filling. A hand mixer or a stand mixer is essential to achieve that perfectly aerated, fluffy cheesecake consistency. Finally, gather six to eight small glass jars (4-oz or 8-oz size) and a small spoon or piping bag to layer the ingredients neatly.
Instructions: Step-by-Step Perfection
- Step 1: Begin by crushing your graham crackers into fine crumbs using a food processor or a sealed bag and a rolling pin.
- Step 2: Combine the crumbs with the melted butter in a medium bowl until the mixture resembles wet sand.
- Step 3: Evenly distribute the crust mixture into the bottom of your jars, pressing down firmly with the back of a spoon to create a solid layer.
- Step 4: In a large bowl, beat the softened cream cheese until smooth and free of any lumps.
- Step 5: Gradually add the powdered sugar and vanilla extract, continuing to beat until fully incorporated and creamy.
- Step 6: In a separate chilled bowl, whip the heavy cream until stiff peaks form, then gently fold it into the cream cheese mixture using a spatula.
- Step 7: Transfer the filling to a piping bag and fill each jar, leaving about half an inch of space at the top for decorations.
- Step 8: Chill the jars in the refrigerator for at least four hours, or ideally overnight, to allow the cheesecake to set.
- Step 9: Just before serving, top each jar with a generous handful of mini chocolate eggs and a small sprig of mint if desired.
Pro Tips for the Best Results
The secret to the best Easter Egg Cheesecake Jars is ensuring your cream cheese is at true room temperature before mixing. If it is too cold, you will end up with tiny lumps that are impossible to smooth out. Another tip is to chill your mixing bowl and beaters before whipping the heavy cream; this helps the cream reach stiff peaks much faster. For a clean look, always use a piping bag to fill the jars rather than a spoon. According to Wikipedia's history of cheesecake, the texture is the most defining characteristic of this dessert, so take your time with the folding process to keep the air in the mousse.
Serving, Storage & Variations
Serve your Easter Egg Cheesecake Jars chilled, perhaps alongside a cup of spring tea or a light coffee. For storage, keep the jars sealed in the refrigerator for up to four days. If you are feeling adventurous, try adding a layer of lemon curd between the crust and the filling for a bright, citrusy surprise. This variation pairs beautifully with the concept found in The Most Irresistible Easter Egg Lemon Cheesecake Bars with a Zesty Twist for Your Spring Celebration. You can also mix crushed mini eggs directly into the filling for an extra chocolatey crunch in every bite.
Nutrition Information
| Nutrient | Amount |
|---|---|
| Calories | 445 kcal |
| Protein | 6g |
| Carbohydrates | 38g |
| Fat | 30g |
| Saturated Fat | 18g |
| Sugar | 25g |
| Sodium | 280mg |
Note: The nutritional information provided above is an estimate based on standard ingredients and may vary depending on the brands used.
Conclusion
In conclusion, Easter Egg Cheesecake Jars are a delightful, stress-free way to bring sweetness to your holiday. Their charming appearance and decadent flavor make them a guaranteed hit for any spring gathering. By following these simple steps and pro tips, you can create a professional-grade dessert right in your own kitchen. We hope these jars bring a smile to your face and a sparkle to your Easter celebration. Happy whisking and even happier eating!


FAQs
How long do Easter Egg Cheesecake Jars last in the fridge?
These dessert jars can be stored in the refrigerator for up to 3 to 4 days. For the best texture, keep the lids tightly closed and add the chocolate egg decorations just before serving to prevent the colors from bleeding into the cream.
Can I make these cheesecake jars gluten-free?
Yes! Simply swap the standard graham cracker crumbs for your favorite gluten-free cookie crumbs or gluten-free graham cracker alternatives. Ensure that your mini chocolate eggs are also certified gluten-free.
Do I need to use a specific type of jar?
Standard 4-ounce or 8-ounce wide-mouth mason jars work best for individual servings. However, any small glass container or even clear plastic cups will work if you want to see the beautiful layers.

Easter Egg Cheesecake Jars
- Total Time: 4 hours 20 minutes
- Yield: 6 servings 1x
- Diet: Vegetarian
Description
A delightful no-bake dessert featuring layers of graham cracker crust and creamy vanilla cheesecake, topped with festive mini chocolate eggs.
Ingredients
1.5 cups graham cracker crumbs
1/3 cup unsalted butter, melted
16 oz cream cheese, softened
1 cup powdered sugar
1 tsp vanilla extract
1 cup heavy whipping cream, chilled
1 cup mini speckled chocolate eggs
Instructions
Step 1: Mix graham cracker crumbs and melted butter in a bowl until combined.
Step 2: Press 2-3 tablespoons of the crumb mixture into the bottom of six small glass jars.
Step 3: Beat softened cream cheese until smooth, then add powdered sugar and vanilla.
Step 4: Whip the heavy cream in a separate bowl until stiff peaks form, then fold into the cream cheese mixture.
Step 5: Pipe or spoon the cheesecake filling into the jars over the crust.
Step 6: Refrigerate for at least 4 hours to set properly.
Step 7: Top with mini chocolate eggs just before serving.
Notes
Ensure the cream cheese is fully at room temperature to avoid lumps in the filling.
- Prep Time: 20 minutes
- Cook Time: 0 minutes
- Category: Dessert
- Method: No-Bake
- Cuisine: American
Nutrition
- Serving Size: 1 jar
- Calories: 445 kcal
- Sugar: 25g
- Sodium: 280mg
- Fat: 30g
- Saturated Fat: 18g
- Unsaturated Fat: 9g
- Trans Fat: 0g
- Carbohydrates: 38g
- Fiber: 1g
- Protein: 6g
- Cholesterol: 85mg
Related posts:
 The Ultimate Cowboy Steak with Truffle Honey Butter That Will Melt Your Heart
 The Most Irresistible Honey Garlic Steak Bites That Will Melt Your Heart
 The Most Divine High Protein Sugar-Free Monkey Bread That Will Melt Your Soul
 The Most Legendary Authentic Thai Crying Tiger (Sua Rong Hai) Steak Recipe That Will Heal Your Soul

Leave a Reply