
Introduction
Easter Jell-O Pie is the quintessential dessert for anyone looking to bring a splash of pastel color and a light, refreshing finish to their holiday feast. As the flowers begin to bloom and the sun stays out just a bit longer, our palates naturally shift away from the heavy, spice-laden treats of winter toward something more ethereal. This Easter Jell-O Pie captures the very essence of spring in every bite, combining the nostalgic wobble of gelatin with a cloud-like whipped texture that melts on the tongue. It is a dessert that reminds us of childhood gatherings, church potlucks, and the simple joy of a no-bake masterpiece that looks far more complicated than it actually is. Whether you are hosting a large family brunch or a quiet afternoon tea, this pie serves as a beautiful centerpiece that appeals to both the young and the young at heart.
The beauty of the Easter Jell-O Pie lies in its versatility. You can customize the colors to match your table decor, ranging from soft petal pinks to vibrant grassy greens. This recipe is designed to be stress-free, allowing you to focus on egg hunts and main courses while the refrigerator does all the heavy lifting. In a world of complex baking, there is something deeply satisfying about a dessert that relies on a few simple ingredients and the magic of chilling time. Let's dive into why this specific Easter Jell-O Pie is destined to become your new favorite holiday tradition.
Why You’ll Love It
You will fall in love with this Easter Jell-O Pie primarily because of its incredible texture. Unlike heavy cheesecakes or dense flour-based pies, this treat is exceptionally light and airy. It provides a sweet conclusion to a meal without leaving you feeling overly full. Additionally, the visual appeal is unmatched; the pastel colors are inherently festive and look stunning when garnished with spring-themed candies. It is also incredibly kid-friendly, both in flavor and in the making process. Since there is no oven required, it is a safe and fun way to get little ones involved in the kitchen. Finally, the prep time is minimal, taking only about 15 minutes of active work, making it the perfect solution for busy hosts who want a high-impact dessert without hours of labor.
The Nostalgia of the Easter Jell-O Pie
To truly appreciate the Easter Jell-O Pie, one must look back at the history of gelatin in American culinary culture. During the mid-20th century, Jell-O was the king of the kitchen. It represented modernity, convenience, and a touch of whimsy. Homemakers found endless ways to incorporate it into salads, side dishes, and, most famously, desserts. The Easter Jell-O Pie is a direct descendant of those classic 'fluff' recipes that graced every holiday table. There is a deep-seated comfort in these flavors; they evoke memories of grandmothers' kitchens and sunny afternoons. By bringing this pie to your table today, you are not just serving a sweet treat; you are bridging generations and celebrating a legacy of simple, joyful cooking.
The Science of the Perfect Set
Creating a stable Easter Jell-O Pie requires understanding the relationship between heat, gelatin, and aeration. When you dissolve the gelatin in boiling water, the proteins unwind. As the mixture cools, those proteins begin to form a network that traps liquid, creating the 'set' we know and love. By folding in whipped topping, you are introducing air bubbles into that network, which transforms the firm gelatin into a mousse-like consistency. It is crucial to let the Jell-O cool slightly before adding the whipped component; if the liquid is too hot, it will deflate the air bubbles and melt the fats, resulting in a flat, dense pie. Patience during the chilling phase is equally important. Gelatin needs time to fully bond, which is why a minimum of four hours in the fridge is mandatory for a sliceable Easter Jell-O Pie.
Ingredients
The ingredients for an Easter Jell-O Pie are straightforward and can be found in any local grocery store. You will need one package (3 oz) of your favorite fruit-flavored gelatin, one cup of boiling water, and one container (8 oz) of thawed whipped topping. For the base, a standard graham cracker crust or a shortbread crust works beautifully. To garnish, think about festive additions like jelly beans, whipped cream rosettes, or even small chocolate eggs. The simplicity of these components ensures that the flavor of the fruit really shines through, providing a bright contrast to the buttery crust.
Notes and Substitutions
While we recommend a graham cracker crust for its classic crunch, you can easily swap it for a gluten-free version or even a crushed Oreo base for a different flavor profile. If you prefer to avoid store-bought whipped topping, you can use two cups of heavy whipping cream beaten with a half-cup of powdered sugar. However, be aware that real whipped cream is less stable than commercial whipped topping, so your Easter Jell-O Pie may be softer. For a more intense fruit flavor, you can replace half of the boiling water with fruit juice, though this may slightly alter the color of your final product.
Equipment
One of the best parts of making an Easter Jell-O Pie is that it requires almost no specialized equipment. You will need a medium-sized heat-proof mixing bowl for dissolving the gelatin and a sturdy whisk or a rubber spatula for folding in the whipped topping. A liquid measuring cup is essential for getting the water ratio exactly right. Beyond that, you just need a 9-inch pie plate and enough space in your refrigerator for the pie to sit level while it sets.
Instructions
- Step 1: Begin by placing your flavored gelatin powder into a medium heat-proof mixing bowl. Carefully pour one cup of boiling water over the powder.
- Step 2: Whisk the mixture continuously for approximately two minutes, or until the gelatin is completely dissolved and no granules remain at the bottom of the bowl.
- Step 3: Allow the mixture to sit at room temperature for about 15 to 20 minutes. It should be cool to the touch but still in a liquid state. Do not let it set at this stage.
- Step 4: Using a rubber spatula, gently fold in the thawed whipped topping. Use slow, circular motions to incorporate the white cream into the colored gelatin until the mixture is uniform in color and no white streaks remain.
- Step 5: Pour the mixture into your prepared graham cracker or shortbread crust. Use the back of a spoon to smooth out the top into an even layer.
- Step 6: Place the Easter Jell-O Pie in the refrigerator. Chill for a minimum of 4 hours, though 6 hours or overnight is recommended for the cleanest slices.
- Step 7: Just before serving, garnish the pie with additional whipped cream, fresh berries, or Easter-themed candies to enhance its festive appearance.
Pro Tips
For the absolute best results with your Easter Jell-O Pie, make sure your whipped topping is fully thawed but still cold. Using frozen or partially frozen topping will result in lumps in your pie. When folding, be careful not to over-mix; you want to maintain as much air as possible to keep the texture light. If you want a more vibrant color, you can add a single drop of food coloring to the gelatin mixture before folding in the cream. Another trick is to slightly chill the crust before adding the filling, which helps prevent it from becoming soggy. Finally, always use a sharp, warm knife to slice the pie, wiping it clean between each cut for professional-looking servings.
Color Psychology and Spring Themes
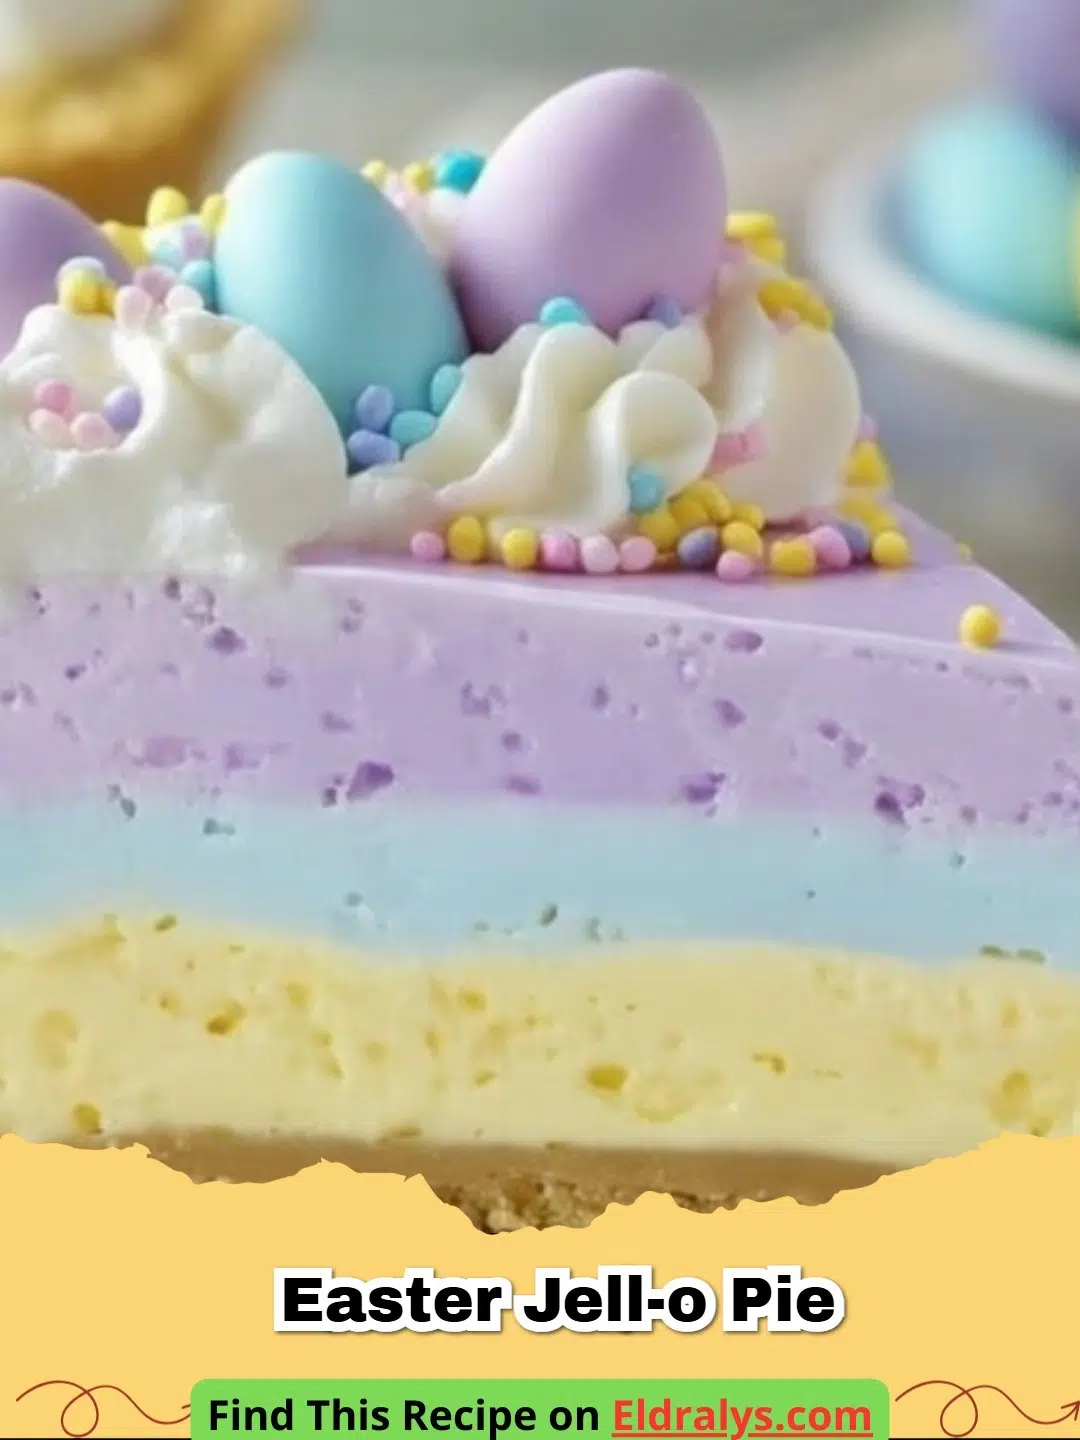
The visual impact of the Easter Jell-O Pie is closely tied to color psychology. Pastel colors like soft yellow, mint green, and sky blue are associated with renewal, growth, and tranquility. These hues trigger a sense of calm and happiness, which is exactly the mood we want to cultivate during a holiday gathering. By selecting specific flavors, such as peach for a soft orange or blueberry for a gentle purple, you can evoke different emotional responses. You might even consider making a 'layered' Easter Jell-O Pie by chilling thin layers of different colors sequentially, creating a striped rainbow effect that is sure to draw gasps of delight from your guests.
Making it a Family Tradition
The kitchen is the heart of the home, especially during holidays. Because this recipe is so accessible, it is a perfect candidate for a yearly family activity. Children love watching the liquid Jell-O transform into a fluffy mousse. You can set up a 'garnish station' where kids can decorate their own slices with sprinkles or chocolate bunnies. Building these traditions around simple tasks like making an Easter Jell-O Pie creates lasting bonds and teaches children that cooking is an act of love. For more holiday inspiration, you might also enjoy making The Most Magical Coconut Cream Easter Egg Truffles Your Family Will Adore or The Most Adorable Easter Blossom Cookies Your Family Will Cherish to round out your dessert spread.
Serving, Storage & Variations
Serve your Easter Jell-O Pie straight from the refrigerator to maintain its structure. It pairs wonderfully with a side of fresh fruit or a cup of herbal tea. For storage, keep the pie covered with plastic wrap or a pie dome in the fridge; it will stay fresh for 3 to 4 days. As for variations, the sky is the limit. You can fold in small pieces of fruit, such as crushed pineapple (drained well) or mandarin oranges, for extra texture. Some adventurous bakers even add a layer of cream cheese at the bottom of the crust for a 'Jell-O Cheesecake' hybrid. No matter how you choose to modify it, the core appeal of the Easter Jell-O Pie remains its refreshing simplicity.
Advanced Garnishing Techniques
If you want to take your Easter Jell-O Pie to the next level, consider using piped whipped cream instead of just spreading it. Use a star tip to create beautiful borders around the edge of the crust. You can also create 'chocolate nests' using melted chocolate and shredded coconut to sit on top of the pie, filling them with small candy eggs. This adds a level of sophistication that makes the dessert feel high-end despite its humble ingredients. Remember that garnishing should be done right before serving, especially when using candies that might bleed color into the moist surface of the pie over time. For more tips on working with gelatin, you can check out authority guides on The Kitchn.
Pairing Your Pie with Easter Mains
The light, fruity nature of the Easter Jell-O Pie makes it an ideal counterpart to traditional Easter main courses. If you are serving a salty, honey-glazed ham, the bright acidity of a lemon or lime-flavored pie provides a necessary palate cleanser. For those serving lamb with mint sauce, a strawberry or raspberry Easter Jell-O Pie offers a sweet, berry-forward finish that complements the earthy notes of the meat. Even for a lighter brunch featuring quiches and salads, the pie holds its own as a whimsical, non-intimidating dessert that invites everyone to take just one more slice.
Troubleshooting Common Issues
Even with a recipe as simple as the Easter Jell-O Pie, issues can occasionally arise. If your pie feels too soft after 4 hours, it likely needed more time to chill or the gelatin wasn't fully dissolved. If you notice 'weeping' (liquid pooling at the bottom), it usually means the whipped topping was over-folded or the pie has been sitting at room temperature too long. To fix a soft pie, you can try placing it in the freezer for 20-30 minutes just before serving to firm it up. To prevent a soggy crust, ensure your gelatin mixture is not hot when you pour it in; it should be cool room temperature to protect the integrity of the graham crackers.


Nutrition Information
Understanding the nutritional profile of your holiday treats can help you plan a balanced meal. Below is the estimate for a standard serving of this light and airy dessert.
| Nutrient | Amount |
|---|---|
| Calories | 280 kcal |
| Protein | 3g |
| Carbohydrates | 38g |
| Fat | 14g |
| Sugar | 22g |
| Sodium | 190mg |
Disclaimer: The nutritional information provided is an estimate based on standard ingredients and may vary depending on the specific brands used.
Conclusion
In the end, the Easter Jell-O Pie is more than just a recipe; it is a celebration of spring's arrival and the joy of shared holiday moments. Its vibrant colors, airy texture, and nostalgic charm make it a standout choice for any Easter gathering. By following these simple steps and tips, you can create a dessert that is as beautiful to look at as it is delicious to eat. So, this year, skip the heavy baked goods and embrace the refreshing, no-bake magic of the Easter Jell-O Pie. Your guests, your family, and your busy schedule will surely thank you!
FAQs
How long does Easter Jell-O Pie need to set in the fridge?
For the best texture and clean slices, you should let your Easter Jell-O Pie chill for at least 4 to 6 hours, though overnight is ideal to ensure the gelatin has fully stabilized with the whipped topping.
Can I use real whipped cream instead of whipped topping?
Yes, you can use stabilized whipped cream, but keep in mind that real cream is softer. You may need to use slightly more gelatin or ensure the cream is whipped to very stiff peaks to prevent the Easter Jell-O Pie from becoming too runny.
Can I make this pie ahead of time?
Absolutely! Easter Jell-O Pie is an excellent make-ahead dessert. It can be prepared up to 48 hours in advance, as long as it remains refrigerated until the moment of serving.
What flavor of Jell-O works best for Easter?
While lemon and lime offer a bright spring green and yellow, strawberry or raspberry are popular for their pink hues. Mixing several light-colored layers can also create a beautiful rainbow effect.

Classic Easter Jell-O Pie
- Total Time: 4 hours 15 minutes
- Yield: 8 servings 1x
- Diet: Vegetarian
Description
A light, airy, and vibrant no-bake pie that brings the perfect pastel touch to your Easter celebration.
Ingredients
1 package (3 oz) fruit-flavored gelatin (lemon, lime, or strawberry)
1 cup boiling water
1 container (8 oz) whipped topping, thawed
1 prepared graham cracker crust (9-inch)
Optional: Whipped cream and Easter candies for garnish
Instructions
Step 1: Dissolve the gelatin in 1 cup of boiling water, whisking for 2 minutes until fully dissolved.
Step 2: Let the gelatin mixture cool at room temperature for 15-20 minutes until cool but still liquid.
Step 3: Gently fold the thawed whipped topping into the cooled gelatin until the mixture is a uniform color.
Step 4: Pour the filling into the graham cracker crust and smooth the top.
Step 5: Refrigerate for at least 4 hours, or until completely set.
Step 6: Garnish with extra whipped cream and festive candies before serving cold.
Notes
For a firmer pie, ensure the gelatin is completely dissolved in boiling water before cooling. Overnight chilling provides the best slicing results.
- Prep Time: 15 minutes
- Cook Time: 0 minutes
- Category: Dessert
- Method: No-Bake
- Cuisine: American
Nutrition
- Serving Size: 1 slice
- Calories: 280 kcal
- Sugar: 22g
- Sodium: 190mg
- Fat: 14g
- Saturated Fat: 8g
- Unsaturated Fat: 4g
- Trans Fat: 0g
- Carbohydrates: 38g
- Fiber: 1g
- Protein: 3g
- Cholesterol: 5mg
Related posts:
 The Ultimate Cowboy Steak with Truffle Honey Butter That Will Melt Your Heart
 The Most Irresistible Honey Garlic Steak Bites That Will Melt Your Heart
 The Most Divine High Protein Sugar-Free Monkey Bread That Will Melt Your Soul
 The Most Legendary Authentic Thai Crying Tiger (Sua Rong Hai) Steak Recipe That Will Heal Your Soul

Leave a Reply