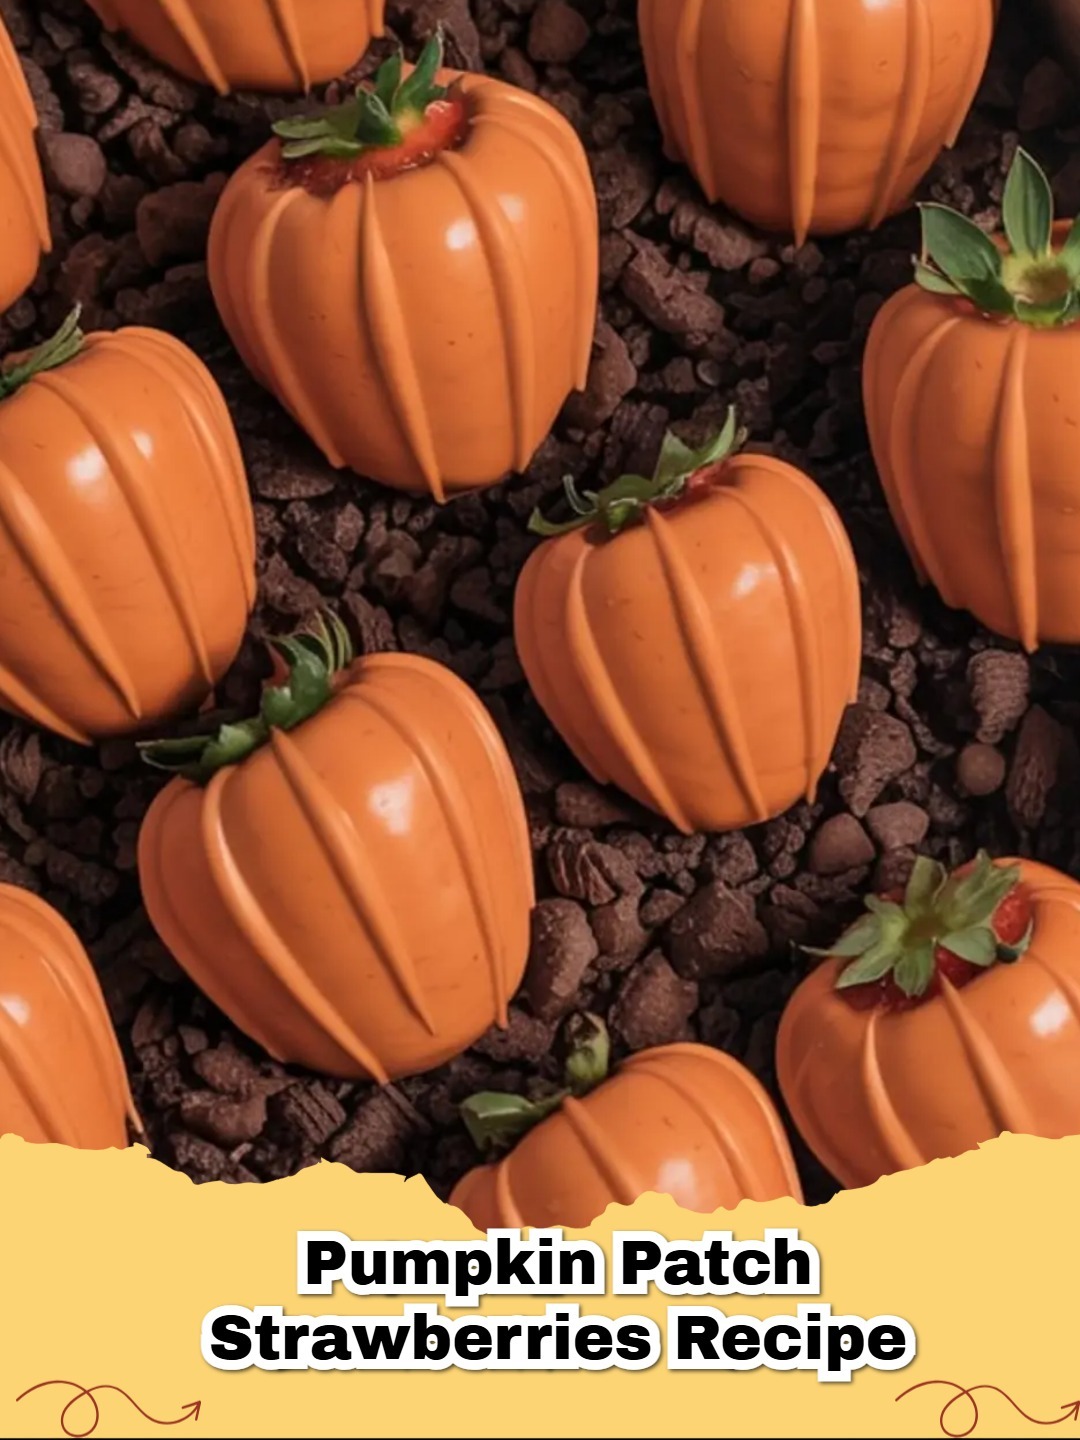
Fall is in the air, and with it comes a craving for all things pumpkin and cozy! While pumpkin spice lattes and pies get a lot of love, sometimes you want something a little different, something adorable, and undeniably delicious. Enter these Easy Chocolate Covered Pumpkin Patch Strawberries – a treat that combines the freshness of ripe strawberries with the festive charm of a pumpkin patch!
Imagine a platter of vibrant orange 'pumpkins' nestled on a bed of chocolate 'dirt,' just waiting to be picked. This recipe is not only simple to follow but also incredibly fun to make, making it perfect for Halloween parties, Thanksgiving dessert tables, or just a delightful autumn snack with the family.
Why You'll Love These Pumpkin Patch Strawberries
These aren't just any chocolate-covered strawberries; they're a miniature edible autumn wonderland! Here's why they'll become your new favorite fall treat:
- Kid-Friendly Fun: Decorating the strawberries is a fantastic activity for all ages, letting creativity bloom.
- Visually Stunning: They make a gorgeous centerpiece or addition to any dessert spread, especially for fall-themed gatherings.
- Simple & Quick: With just a few ingredients and straightforward steps, you can have a batch ready in under an hour.
- Deliciously Refreshing: The sweetness of the chocolate perfectly complements the juicy tartness of fresh strawberries.
Ingredients You'll Need
Gathering your ingredients is the first step to creating this charming dessert. You'll need fresh, firm strawberries, vibrant orange candy melts (or white chocolate with food coloring), and a few simple additions to create the 'dirt' and pumpkin ridges. Freshness is key for the strawberries, and quality candy melts will ensure a smooth finish.
Tips for Perfect Pumpkin Strawberries
Achieving those perfectly coated, smooth, and adorable pumpkin strawberries is easier than you think with a few expert tips:
- Dryness is Key: Ensure your strawberries are absolutely, positively dry after washing. Even a tiny bit of moisture can cause the chocolate to seize or make it difficult for the coating to adhere smoothly.
- Melt with Care: When melting your candy melts or chocolate, do so gently. Microwave in short bursts, stirring well in between, to prevent scorching or overheating. For best results, especially when working with candy melts, understanding how to properly melt chocolate is key to a smooth, glossy finish. A fantastic resource for mastering this can be found on Hershey's guide on melting chocolate.
- Thinning the Chocolate: If your melted chocolate seems too thick for dipping, a tiny bit of coconut oil or shortening can help achieve a perfect, flowing consistency without affecting the taste.
- Piping Bag Precision: For the pumpkin ridges, a small piping bag or even a Ziploc bag with a tiny corner snipped off will give you the control needed for delicate lines. Practice on parchment paper first if you're nervous!
How to Make Your Own Edible Pumpkin Patch
The process of transforming simple strawberries into festive pumpkins is surprisingly straightforward. From thoroughly drying your fruit to carefully dipping and then decorating with charming ridges and a 'dirt' base, each step builds towards a delightful edible masterpiece. It's a project that's as rewarding to create as it is to eat!
Serving and Storage Suggestions
These chocolate covered pumpkin patch strawberries are best served shortly after they are made, or at least within a day or two. The vibrant colors and fresh taste are at their peak. Store any leftovers in an airtight container in the refrigerator to maintain freshness. Bring them out a few minutes before serving to allow them to slightly warm up for optimal flavor.
These Easy Chocolate Covered Pumpkin Patch Strawberries are more than just a dessert; they're a festive experience! They bring joy to any table and are sure to be a conversation starter. So, grab your strawberries, melt that chocolate, and get ready to harvest your very own delicious pumpkin patch!
FAQs
How long do chocolate-covered pumpkin patch strawberries last?
For the best taste and texture, these chocolate-covered strawberries are best enjoyed within 1-2 days. Store them in an airtight container in the refrigerator.
Can I use regular chocolate instead of candy melts for this recipe?
Yes, you can! If using regular white chocolate, you'll need to add orange food coloring designed for chocolate (oil-based) to achieve the pumpkin color. Tempering regular chocolate can also give a smoother, snappier finish, but candy melts are simpler for beginners.
What if my chocolate gets too thick or seizes while melting?
If your chocolate becomes too thick, you can stir in a small amount of coconut oil or shortening (as specified in the recipe) to thin it to a dippable consistency. If it seizes (becomes lumpy and hard), it usually means moisture has gotten into it, or it's been overheated. Unfortunately, seized chocolate is difficult to recover for dipping.
Are there any tips for getting a smooth chocolate coating on the strawberries?
Absolutely! Ensure your strawberries are completely dry before dipping, as any moisture can cause the chocolate to seize or slide off. Work with chocolate at the correct temperature (not too hot!) and allow excess chocolate to drip off fully before placing them on parchment paper.

Easy Chocolate Covered Pumpkin Patch Strawberries
- Total Time: 30 minutes
- Yield: Approximately 18-24 strawberries 1x
- Diet: Vegetarian
Description
Transform fresh strawberries into adorable chocolate pumpkins with this easy recipe, perfect for any fall celebration or sweet treat!
Ingredients
1 lb fresh strawberries (choose large, firm ones with bright green tops)
12 oz orange candy melts (or white chocolate + orange food coloring)
1 tsp coconut oil or shortening (optional, for smoother melting)
12 chocolate sandwich cookies (like Oreos), crushed
6 chocolate peanut butter cups or chocolate disks (optional, for added texture)
2–3 tbsp of the melted orange chocolate (set aside for drizzling)
Instructions
Step 1: Prepare the Strawberries: Wash and thoroughly dry the strawberries. Pat them dry with paper towels and let them sit on a clean towel while you prepare the chocolate. Make sure no moisture remains, as this can cause the chocolate to seize or slip off the fruit.
Step 2: Melt the Chocolate: Place the orange candy melts (or white chocolate with orange food coloring) into a microwave-safe bowl. Microwave in 30-second intervals, stirring thoroughly after each session, until completely smooth. If the chocolate is too thick, stir in the coconut oil or shortening to thin it slightly.
Step 3: Dip the Strawberries: Hold each strawberry by its leafy top and dip it into the melted chocolate, gently swirling to coat all sides evenly. Allow any excess chocolate to drip off, then place the strawberry on a parchment-lined baking sheet. Continue dipping until all strawberries are coated.
Step 4: Add the Pumpkin Ridges: Let the dipped strawberries set for 5 to 10 minutes. Fill a piping bag or a zip-top bag (with a tiny corner snipped) with the reserved melted chocolate. Pipe vertical lines from the top to the bottom of each strawberry to mimic the ridges of a pumpkin.
Step 5: Create the Patch: Crush the chocolate sandwich cookies into fine crumbs to make a “dirt” layer. Spread the crumbs over a serving tray or platter. Arrange the decorated strawberries on top, spacing them like they’re growing in a garden. Add chocolate peanut butter cups as stepping stones for extra texture and presentation.
Notes
For best results, ensure strawberries are completely dry before dipping. Work in a cool environment to prevent chocolate from melting too quickly. Use oil-based food coloring if using white chocolate, not water-based.
- Prep Time: 20 minutes
- Cook Time: 10 minutes
- Category: Dessert, Snack
- Method: Dipping, Decorating
- Cuisine: American
Nutrition
- Serving Size: 2 strawberries
- Calories: 150 kcal
- Sugar: 15g
- Sodium: 30mg
- Fat: 8g
- Saturated Fat: 5g
- Unsaturated Fat: 3g
- Trans Fat: 0g
- Carbohydrates: 20g
- Fiber: 2g
- Protein: 1g
- Cholesterol: 5mg


Leave a Reply