
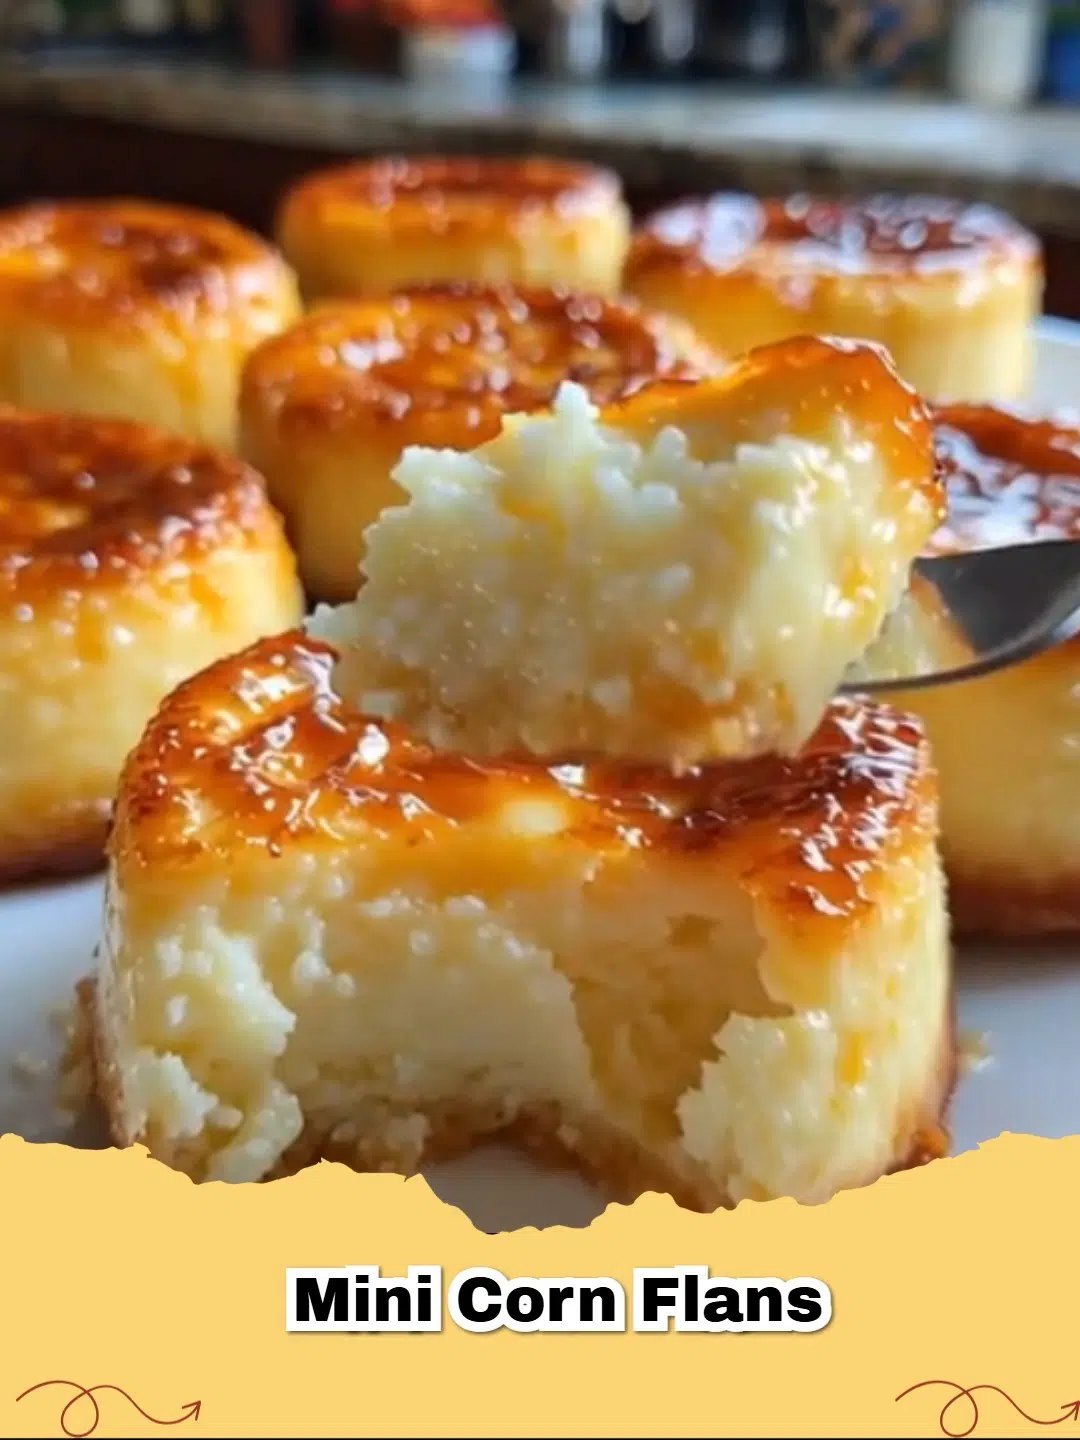
There are some recipes that just instantly transport you back in time, isn't there? For me, it's these delightful Mini Corn Flans, affectionately known as 'Grandma's Little Bites.' Each creamy, sweet morsel is more than just a dessert; it's a hug from the past, a whisper of Sunday afternoons spent in Grandma's kitchen, filled with warmth and the irresistible aroma of something truly special.
These mini flans are a testament to the magic of simple ingredients and the love put into making them. They're surprisingly easy to prepare, combining the natural sweetness of corn with the richness of condensed milk and cream cheese, all baked to a silky perfection. If you've never tried a corn flan, prepare to be amazed by its unique charm and comforting flavor profile.
The Secret to Grandma's Perfect Mini Corn Flans
Grandma always had a knack for making everything taste extraordinary, and her mini corn flans were no exception. The secret lies in the balance of flavors and the gentle cooking method. The corn adds a subtle earthy sweetness that perfectly complements the creamy custard base, while a hint of vanilla rounds out the profile.
Preparing the ingredients is straightforward. You'll want to ensure your cream cheese is at room temperature for easy blending. For dicing the cream cheese into smaller pieces, a Quality Chef's Knife can make the task quick and precise, ensuring it incorporates beautifully into the mixture without overmixing.
Why You'll Love This Recipe
- Nostalgic Comfort: It truly feels like a taste of childhood.
- Individual Portions: Mini flans are perfect for serving and portion control.
- Unique Flavor: The sweet corn adds an unexpected yet delicious twist to classic flan.
- Make-Ahead Friendly: These flans taste even better chilled overnight, making them ideal for entertaining.
- Simple Ingredients: You likely have most of these on hand already!
Tips for Flan Perfection
Achieving that perfectly smooth, silky texture is key to a great flan. Here are a few pointers from Grandma's playbook:
- Don't Overblend: While you want the corn mixture smooth, once you add the eggs and cream cheese, mix gently. Overmixing can incorporate too much air, leading to a bubbly texture.
- The Water Bath is Crucial: Baking in a water bath creates a moist, even heat, preventing the flans from cracking or becoming rubbery. Ensure the water is hot (but not boiling) when you add it to the baking dish.
- Patience with Cooling: Resist the urge to unmold too early! Flans need to cool completely at room temperature and then chill thoroughly in the refrigerator for several hours (or overnight) to set properly and unmold cleanly.
- Caramel Coating: A thin, even layer of caramel at the bottom of your molds not only adds sweetness but also helps the flan release beautifully.
Whether you're recreating a cherished memory or starting a new tradition, these Mini Corn Flans are guaranteed to bring smiles. So gather your ingredients, channel your inner Grandma, and get ready to enjoy a truly enchanting dessert!
FAQs
What kind of corn is best for Grandma's Mini Corn Flans?
Fresh corn from the cob is ideal for the best flavor and texture, but you can also use frozen corn kernels (thawed) or even canned corn (drained well) in a pinch. Just ensure the corn is sweet and tender.
Can I make these mini corn flans ahead of time?
Absolutely! Mini corn flans are an excellent make-ahead dessert. You can prepare them up to 2-3 days in advance and store them covered in the refrigerator. They often taste even better after a day or two as the flavors meld.
What is a 'water bath' and why is it used for flans?
A water bath (or 'bain-marie') is a cooking technique where you place a dish containing food, like flan, into a larger pan filled with hot water. This creates a moist, gentle cooking environment, preventing the flan from cracking, overcooking, or developing a rubbery texture, resulting in a perfectly smooth and creamy custard.


How do I ensure my mini corn flans unmold cleanly?
The key to clean unmolding is proper cooling and preparation. Always coat your molds with caramel first. After baking, let the flans cool completely at room temperature, then chill them thoroughly in the refrigerator for several hours or overnight. When ready to serve, carefully run a thin knife around the edge of each flan before inverting onto a plate.

Grandma's Mini Corn Flans
- Total Time: 45 minutes (plus cooling time)
- Yield: 8 mini flans 1x
- Diet: Vegetarian
Description
These delightful mini corn flans are a creamy, sweet, and nostalgic dessert, perfect for a taste of homemade comfort and sweet childhood memories.
Ingredients
2 ears of corn (about 2 cups kernels)
2 eggs
1/4 stick (2 tablespoons) unsalted butter, melted
1/2 can (7 oz) sweetened condensed milk
100 g (about 3.5 oz) cream cheese, softened and cut into small pieces
1/2 teaspoon vanilla extract
Caramel sauce (for coating molds)
Instructions
Step 1: Preheat your oven to 180°C (350°F). Prepare a baking dish for a water bath. Coat the bottom of 8 small flan molds or ramekins with a thin layer of caramel sauce.
Step 2: Blend the corn kernels with the sweetened condensed milk, melted butter, and vanilla extract in a blender until completely smooth. You may need to scrape down the sides a few times.
Step 3: Add the eggs and small pieces of softened cream cheese to the blender. Pulse gently a few times, just until combined. Be careful not to overmix; you want to maintain some of those creamy swirls from the cream cheese.
Step 4: Pour the flan mixture into the prepared caramel-coated molds, filling each about 3/4 full.
Step 5: Carefully place the filled molds into your larger baking dish. Pour hot water into the larger dish, reaching about halfway up the sides of the flan molds, creating a water bath.
Step 6: Bake in the preheated oven for 30 minutes, or until the edges are set but the centers still have a slight jiggle. Cooking time may vary based on mold size.
Step 7: Carefully remove the baking dish from the oven. Let the flans cool in the water bath for a few minutes, then transfer the molds to a wire rack to cool completely at room temperature.
Step 8: Once cooled, refrigerate the mini flans for at least 4 hours, or preferably overnight, to allow them to set fully. To unmold, run a thin knife around the edge of each flan, then invert onto a serving plate. Enjoy!
Notes
For an extra touch of flavor, you can lightly roast the corn kernels before blending. Ensure cream cheese is at room temperature to avoid lumps. For a perfectly smooth texture, strain the blended mixture through a fine-mesh sieve before pouring into molds. Serve chilled.
- Prep Time: 15 minutes
- Cook Time: 30 minutes
- Category: Dessert
- Method: Baking, Water Bath
- Cuisine: Mexican-Inspired
Nutrition
- Serving Size: 1 flan
- Calories: 280 kcal
- Sugar: 30g
- Sodium: 120mg
- Fat: 13g
- Saturated Fat: 7g
- Unsaturated Fat: 5g
- Trans Fat: 0g
- Carbohydrates: 38g
- Fiber: 1g
- Protein: 6g
- Cholesterol: 70mg


Leave a Reply