
When it comes to effortlessly impressive desserts, a no-bake lush recipe is a true champion. And this Layered Cherry Cheesecake Lush takes the crown! Imagine a symphony of textures and flavors: a rich chocolate cookie crust, a velvety cheesecake layer, sweet and tart cherry pie filling, and a smooth chocolate pudding, all crowned with fluffy whipped topping. It’s a dessert that not only looks stunning but tastes absolutely divine, making it perfect for any gathering, holiday, or simply a sweet treat.
This recipe brings together classic dessert elements in an approachable, no-fuss way. No oven required, just a little mixing, layering, and chilling. Let's get ready to create a dessert that will have everyone asking for the recipe!
The Anatomy of a Perfect Layered Lush
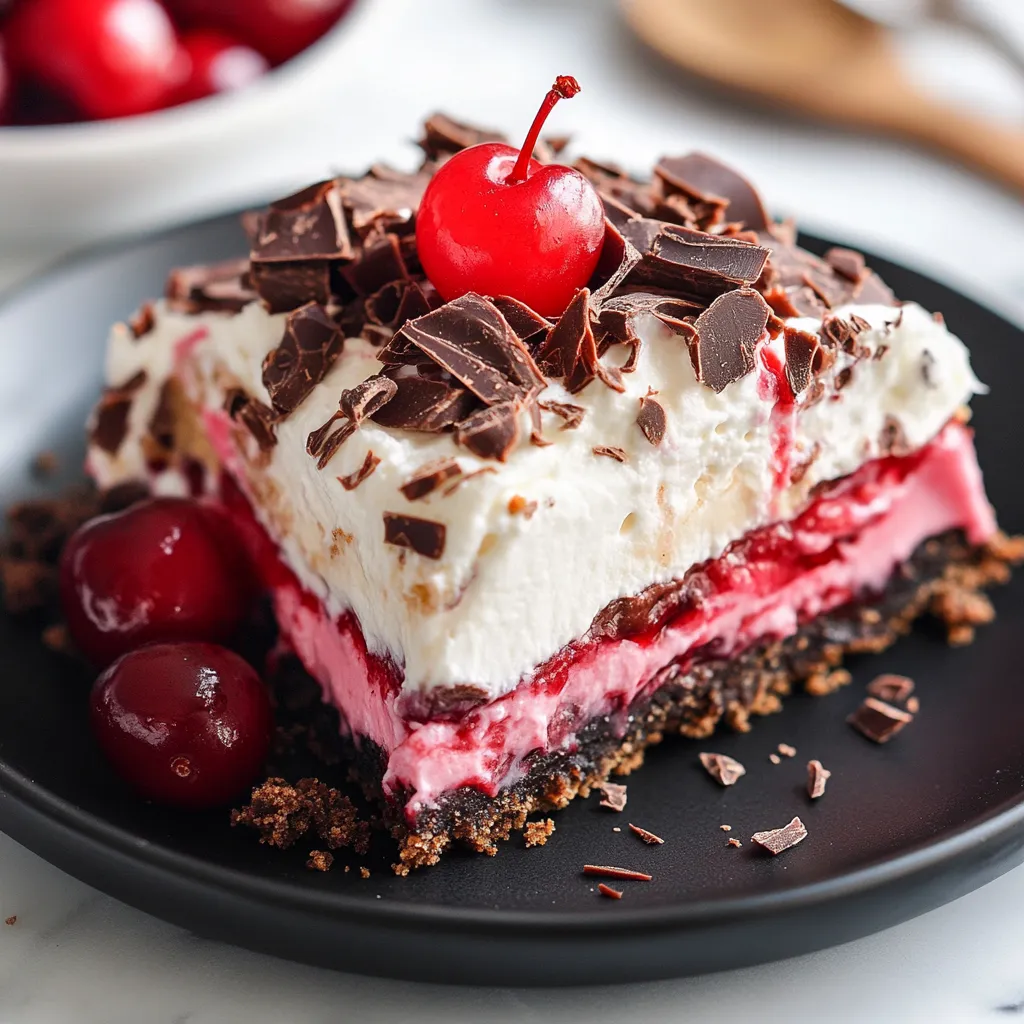
The beauty of this Layered Cherry Cheesecake Lush lies in its distinct yet harmonious layers. Each one plays a crucial role in delivering that irresistible taste and texture profile:
- Crunchy Chocolate Crust: The foundation is a simple yet decadent mix of chocolate graham cracker or Oreo crumbs and melted butter. This creates a sturdy, flavorful base that complements the creamy layers above.
- Dreamy Cream Cheese Layer: A light and fluffy mixture of softened cream cheese, powdered sugar, and whipped topping provides the classic cheesecake tang and creamy texture.
- Sweet Cherry Burst: A generous layer of cherry pie filling adds a vibrant fruit flavor and a beautiful splash of color, cutting through the richness with its sweet-tart notes.
- Silky Chocolate Pudding: A smooth, rich instant chocolate pudding layer elevates the dessert, bringing a deep cocoa flavor that pairs wonderfully with the cherry.
- Cloud-Like Topping: A final blanket of whipped topping ties all the layers together, adding a light, airy finish that melts in your mouth.
Ready to assemble this masterpiece? Grab your ingredients, and let's begin!
How to Craft Your Layered Cherry Cheesecake Lush
Gathering Your Ingredients and Equipment
Before you start, make sure you have all your ingredients at room temperature where specified, and a 9x13-inch baking dish ready. A good Quality Chef's Knife can be useful for cutting through your chocolate crumbs if you're using whole cookies.
Making the Foundation: The Crust
Step 1: In a medium bowl, combine 2 cups of chocolate graham cracker or Oreo crumbs with ½ cup of melted butter. Mix until the crumbs are uniformly moistened and resemble wet sand. Press this mixture firmly and evenly into the bottom of a 9x13-inch baking dish. Place the dish in the refrigerator for 10-15 minutes to allow the crust to set.
Building the Creamy Core
Step 2: While the crust chills, prepare the cream cheese layer. In a separate bowl, beat 8 oz of softened cream cheese with 1 cup of powdered sugar until the mixture is completely smooth and creamy. Gently fold in 1½ cups of whipped topping until no streaks remain and the mixture is well combined. Carefully spread this creamy concoction over the chilled crust, ensuring it covers the crust from edge to edge.

Adding the Fruit and Pudding Layers
These next layers bring the signature 'lush' quality to the dessert, creating a beautiful visual and a burst of complementary flavors.
Step 3: Carefully spoon the 1 can (21 oz) of cherry pie filling over the cream cheese layer. Using the back of the spoon, gently spread it evenly across the surface. Take your time with this step to keep the layers distinct. 
Step 4: In a clean bowl, whisk together 1 package (3.9 oz) of instant chocolate pudding mix and 1½ cups of cold milk for about 2 minutes, or until the mixture thickens. Let it sit for a minute or two if needed to reach a firmer consistency. Once ready, spread the chocolate pudding evenly over the cherry layer. This creates a rich, smooth transition from the fruit.
The Grand Finale: Topping and Chilling
Step 5: Spread the remaining 1½ cups of whipped topping evenly over the chocolate pudding layer. This fluffy layer provides a perfect finish, tying all the components together beautifully. 
Step 6: For an extra touch of elegance and flavor, garnish your lush. Options include chocolate shavings, mini chocolate chips, or a few extra cherries. 


Once assembled, cover the dish and refrigerate for at least 4 hours, or preferably overnight, to allow the layers to set and the flavors to fully develop. This ensures easy, clean slicing and a truly delightful dessert experience. For another delicious cherry-infused treat, don't miss our Cherry Rhubarb Coffee Bars with Cardamom and Anise.
Tips for Success and Variations
- Perfect Chilling: The longer your lush chills, the better. Overnight is ideal for the best texture and flavor fusion.
- Customizing the Crust: Feel free to experiment with other cookie crumbs! Vanilla wafers or shortbread cookies could offer a different flavor profile.
- Pudding Varieties: If you're not a fan of chocolate, vanilla, banana, or even white chocolate instant pudding mixes would work wonderfully.
- Whipped Topping vs. Whipped Cream: While store-bought whipped topping provides stability, freshly whipped cream can be used for a more homemade touch. Just note it might not hold its shape as long.
- Other Lush Recipes: If you love no-bake desserts, consider trying a tropical variation like Mandarin Orange Pineapple Cake.
Enjoy every delightful bite of this easy-to-make, utterly delicious Layered Cherry Cheesecake Lush!
FAQs
How long does Layered Cherry Cheesecake Lush need to chill?
For the best results and perfectly set layers, this dessert should chill in the refrigerator for at least 4 hours. Chilling overnight is even better, allowing the flavors to meld beautifully and the layers to firm up completely for easier slicing.
Can I make this no-bake cherry lush ahead of time?
Absolutely! This Layered Cherry Cheesecake Lush is an excellent make-ahead dessert. You can prepare it up to 24 hours in advance. In fact, many find that the flavors are even more pronounced and delicious after an overnight chill.
What other fruit fillings can I use in a dessert lush?
While cherry is classic, you can easily customize this lush with other fruit pie fillings. Popular alternatives include blueberry, strawberry, peach, or even a mixed berry blend. Simply swap the cherry pie filling for your fruit of choice, keeping the quantity similar.
What's the secret to getting clean slices of cheesecake lush?
To achieve beautiful, clean slices, ensure your dessert is thoroughly chilled. Use a sharp, thin-bladed knife and wipe it clean with a damp cloth after each cut to prevent dragging layers. For extra firm slices, you can place the dessert in the freezer for 15-20 minutes before serving.

Layered Cherry Cheesecake Lush Dessert
- Total Time: 4 hours 25 minutes
- Yield: 12-16 servings 1x
- Diet: N/A
Description
This easy, no-bake dessert features a decadent chocolate cookie crust, a creamy cheesecake layer, sweet cherry pie filling, rich chocolate pudding, and a fluffy whipped topping.
Ingredients
2 cups chocolate graham cracker or Oreo crumbs
½ cup melted butter
8 oz cream cheese, softened
1 cup powdered sugar
1½ cups whipped topping (like Cool Whip), divided
1 can (21 oz) cherry pie filling
1 package (3.9 oz) instant chocolate pudding mix
1½ cups cold milk
Optional: chocolate shavings, mini chocolate chips, or extra cherries for garnish
Instructions
Step 1: Prepare the Crust: In a medium bowl, mix the chocolate cookie crumbs and melted butter until the mixture resembles wet sand. Press the mixture firmly into the bottom of a 9x13-inch baking dish to form an even crust. Place in the refrigerator and chill for 10–15 minutes to set.
Step 2: Make the Cream Cheese Layer: In a separate bowl, beat the softened cream cheese and powdered sugar until smooth and creamy. Gently fold in 1½ cups of whipped topping until well combined. Spread this mixture evenly over the chilled crust, making sure to cover edge to edge for a solid base.
Step 3: Add the Cherry Pie Filling: Carefully spoon the cherry pie filling over the cream cheese layer. Use the back of the spoon to gently spread it across the surface, taking care to keep the layers distinct.
Step 4: Mix and Spread the Chocolate Pudding Layer: In a clean bowl, whisk together the instant chocolate pudding mix and 1½ cups of cold milk for about 2 minutes, or until thickened. Let it sit for a minute or two if it needs to firm up more. Once ready, spread it evenly over the cherry layer.
Step 5: Add the Final Layer of Whipped Topping: Spread the remaining 1½ cups of whipped topping evenly over the chocolate pudding layer.
Step 6: Garnish (Optional but Recommended): If desired, add some chocolate shavings, mini chocolate chips, or a few extra cherries on top for garnish.
Notes
For best results, allow the dessert to chill overnight. For cleaner slices, use a sharp knife and wipe it between cuts. You can easily swap cherry pie filling for other fruit fillings like blueberry or strawberry.
- Prep Time: 25 minutes
- Cook Time: 0 minutes
- Category: Dessert
- Method: No-Bake
- Cuisine: American
Nutrition
- Serving Size: 1 slice
- Calories: 320 kcal
- Sugar: 30g
- Sodium: 280mg
- Fat: 15g
- Saturated Fat: 8g
- Unsaturated Fat: 6g
- Trans Fat: 0g
- Carbohydrates: 45g
- Fiber: 2g
- Protein: 4g
- Cholesterol: 35mg


