
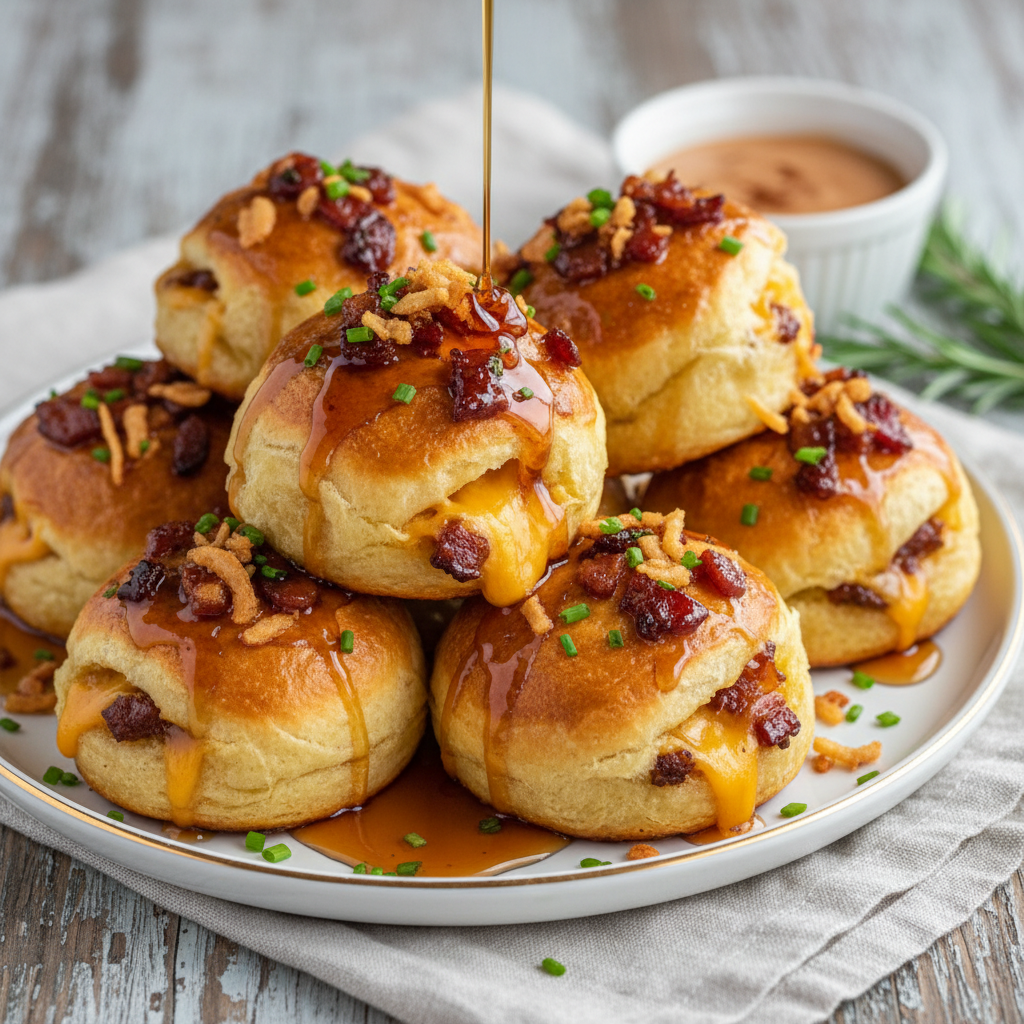
Prepare your taste buds for an explosion of flavor with these incredible Maple Bacon Cheeseburger Bombs! Imagine all the beloved elements of a juicy cheeseburger – savory ground beef, crisp bacon, and gooey cheddar – nestled inside a warm, golden biscuit. But here’s the game-changer: a irresistible maple glaze that adds a touch of sweet complexity, perfectly balancing the rich, salty notes within.
These aren't just a meal; they're a handheld celebration, perfect for any occasion. Whether you're hosting a casual get-together, need an exciting appetizer, or simply want to elevate your weeknight dinner with something fun and delicious, these bombs are guaranteed to steal the show. Easy to make and even easier to devour, they're about to become your new favorite!
Why You'll Fall in Love with These Bombs
Beyond their amazing taste, Maple Bacon Cheeseburger Bombs offer several fantastic reasons to get cooking:
- Irresistible Flavor Fusion: The blend of salty bacon, umami-rich beef, sharp cheddar, and sweet maple creates a harmonious and addictive profile. It's a gourmet twist on comfort food!
- Effortless Preparation: Using store-bought biscuit dough makes assembling these bombs surprisingly quick and simple, ideal for even the busiest cooks.
- Party-Perfect Portions: Each bomb is a self-contained bite, making them mess-free and super convenient for serving at gatherings. They’re as fun to eat as they are to share!
- Customization Options: Feel free to experiment with different cheeses, add a hint of spice with jalapeños, or vary the dipping sauces to suit your preference.
If you're a fan of innovative, crowd-pleasing bites, you might also enjoy our Easy Sheet Pan Nachos: The Ultimate Crowd-Pleasing Recipe or our unique Homemade McGriddle Muffins: Sweet & Savory Breakfast Bites.
Essential Ingredients for Your Bombs
Gathering your ingredients is the first step to creating these delightful bombs. You'll find most of these are kitchen staples, ready to be transformed into something extraordinary. When preparing your ingredients, ensure you have a Quality Chef's Knife on hand for efficient prep.
For the Hearty Filling:
- 1 pound ground beef (80/20 lean is ideal for juiciness)
- 4 slices bacon, cooked until crisp and crumbled
- 1 cup shredded sharp cheddar cheese
- 1 tablespoon Worcestershire sauce
- 1 teaspoon garlic powder
- Salt and freshly ground black pepper, to taste
For the Fluffy Wrapper:
- 1 can (16 oz) refrigerated biscuit dough (e.g., Pillsbury Grands!)
For the Signature Maple Glaze:
- 1/4 cup pure maple syrup
- 1 tablespoon unsalted butter, melted
- 1/2 teaspoon garlic powder (optional, but highly recommended for an extra layer of flavor)
Crafting Your Maple Bacon Cheeseburger Bombs: Step-by-Step Guide
Follow these straightforward instructions to create perfectly golden, flavor-packed bombs every time. For best results, don't rush the sealing process!
Step 1: Prepare Your Oven and Baking Sheet
Begin by preheating your oven to 375°F (190°C). Line a large baking sheet with parchment paper to prevent sticking and ensure easy cleanup. This simple step makes a big difference.
Step 2: Cook and Crumble the Bacon
In a skillet over medium heat, cook the bacon until it reaches your desired crispiness. Remove the cooked bacon, place it on paper towels to drain excess fat, then crumble it into small, delicious pieces. Set aside.
Step 3: Prepare the Flavorful Beef Mixture
Using the same skillet (no need to clean, those bacon drippings add fantastic flavor!), add your ground beef. Cook it over medium heat, breaking it up with a spoon until it's completely browned. Drain any excess grease. Stir in the Worcestershire sauce, 1 teaspoon of garlic powder, salt, and pepper. Finally, fold in your crumbled bacon. Remove the mixture from the heat and allow it to cool slightly; this makes it much easier to handle when filling the biscuits.
Step 4: Ready the Biscuit Dough Rounds
Open the can of refrigerated biscuit dough and separate each biscuit. On a lightly floured surface, gently flatten each biscuit into a round disc, aiming for about 4 inches in diameter. Be careful not to flatten them too thin, as this could lead to tearing during assembly.
Step 5: Fill Each Biscuit with Savory Goodness
Place a generous tablespoon of your seasoned beef and bacon mixture directly into the center of each flattened biscuit. Top this savory mound with a sprinkle of shredded cheddar cheese. Don't be shy with the cheese – it’s a cheeseburger bomb after all!
Step 6: Seal the Bombs Securely
Carefully bring the edges of the biscuit dough up and over the filling, pinching them together firmly to create a completely sealed, spherical bomb. Take your time to ensure there are no gaps where the delicious cheese might escape during baking. A good seal is key!
Step 7: Prepare and Apply the Maple Glaze
In a small bowl, whisk together the pure maple syrup, melted unsalted butter, and the optional 1/2 teaspoon of garlic powder. This sweet and savory glaze is what gives these bombs their distinctive, irresistible finish. Brush the tops and sides of each sealed cheeseburger bomb generously with this maple mixture. For more on maple syrup, check out Wikipedia's page on Maple Syrup.


Step 8: Bake to Golden Perfection
Arrange the glazed bombs on your prepared baking sheet, leaving a little space between each to allow for even cooking. Bake for 12-15 minutes, or until the biscuits are beautifully golden brown and puffed up, and the cheese inside is gloriously melted and bubbly. Serve them immediately and watch them vanish!
Savor Every Sweet & Savory Bite!
These Maple Bacon Cheeseburger Bombs are more than just a recipe; they're an experience. They capture the comforting essence of a classic cheeseburger and elevate it with a surprising, yet perfectly harmonious, maple sweetness wrapped in a soft biscuit. They're fun to make, a joy to eat, and truly perfect for any occasion that calls for delicious, easy-to-share food. Give them a try, and prepare for endless compliments!
FAQs
What makes Maple Bacon Cheeseburger Bombs unique?
These bombs offer a unique sweet and savory flavor profile by combining classic cheeseburger ingredients u2013 seasoned ground beef, crispy bacon, and sharp cheddar u2013 with the unexpected twist of a fluffy biscuit wrapper and a delightful maple glaze.
Can I substitute other cheeses in this recipe?
Absolutely! While cheddar cheese is classic, feel free to experiment with other melty cheeses like Monterey Jack, Colby, or a spicy pepper jack for an extra kick. Even a blend of cheeses would work wonderfully.
What are the best occasions to serve these cheeseburger bombs?
Maple Bacon Cheeseburger Bombs are incredibly versatile! They're perfect for game day gatherings, casual parties, potlucks, or as a fun and easy family dinner. Their handheld nature makes them ideal for snacking and mingling.
How do I ensure my bombs are fully sealed before baking?
After placing the filling and cheese, carefully gather the edges of the biscuit dough around the mixture. Pinch the seams together firmly at the top to create a tight seal. Take your time to ensure there are no gaps, which prevents the filling from escaping during baking.

Maple Bacon Cheeseburger Bombs
- Total Time: 35 minutes
- Yield: 8 servings 1x
- Diet: Omnivore
Description
Fluffy biscuit bombs filled with savory ground beef, crispy bacon, sharp cheddar cheese, and glazed with a sweet and garlicky maple syrup.
Ingredients
1 pound ground beef (80/20)
4 slices bacon, cooked crispy and crumbled
1 cup shredded sharp cheddar cheese
1 tablespoon Worcestershire sauce
1 teaspoon garlic powder
Salt and freshly ground black pepper, to taste
1 can (16 oz) refrigerated biscuit dough (8 count)
1/4 cup pure maple syrup
1 tablespoon unsalted butter, melted
1/2 teaspoon garlic powder (optional, for glaze)
Instructions
Step 1: Preheat your oven to 375°F (190°C). Line a large baking sheet with parchment paper.
Step 2: In a skillet over medium heat, cook the bacon until crispy. Remove, drain on paper towels, and crumble. Set aside.
Step 3: In the same skillet, cook the ground beef over medium heat, breaking it apart, until fully browned. Drain any excess grease. Stir in the Worcestershire sauce, 1 teaspoon garlic powder, salt, and pepper. Fold in the crumbled bacon. Remove from heat and let cool slightly.
Step 4: Separate the refrigerated biscuit dough. On a lightly floured surface, gently flatten each biscuit into a 4-inch round disc.
Step 5: Place a generous tablespoon of the beef and bacon mixture in the center of each flattened biscuit. Top with a sprinkle of shredded cheddar cheese.
Step 6: Carefully bring the edges of the biscuit dough up and over the filling, pinching them together firmly to create a completely sealed ball.
Step 7: In a small bowl, whisk together the pure maple syrup, melted butter, and the optional 1/2 teaspoon garlic powder for the glaze. Brush the tops and sides of each sealed bomb generously with this glaze.
Step 8: Arrange the glazed bombs on the prepared baking sheet. Bake for 12-15 minutes, or until the biscuits are golden brown and puffed, and the cheese is melted and bubbly. Serve immediately.
Notes
For an extra kick, add a pinch of red pepper flakes to the beef mixture. Serve with your favorite dipping sauces like ketchup, mustard, or a tangy BBQ sauce.
- Prep Time: 20 minutes
- Cook Time: 15 minutes
- Category: Appetizer
- Method: Baking
- Cuisine: American
Nutrition
- Serving Size: 1 bomb
- Calories: 380 kcal
- Sugar: 8g
- Sodium: 650mg
- Fat: 22g
- Saturated Fat: 9g
- Unsaturated Fat: 10g
- Trans Fat: 0g
- Carbohydrates: 25g
- Fiber: 1g
- Protein: 20g
- Cholesterol: 75mg


Leave a Reply