
Halloween is just around the corner, and what better way to celebrate than with a treat that's both spooky and sweet? Say hello to these adorable and utterly delicious Mummy Brownies! Perfect for parties, trick-or-treaters, or just a fun baking session with the family, these fudgy delights are surprisingly easy to make and guaranteed to bring smiles.
We all love a good brownie, right? But transform it into a cute little mummy, and you've got a seasonal sensation! This recipe starts with a rich, chewy brownie base that's moist and chocolatey. Then comes the fun part: decorating! With just a few simple steps and some clever piping, you'll have a whole army of sweet, bandage-wrapped mummies staring back at you.
Why You'll Love These Mummy Brownies
- Kid-Friendly: The decorating is a fantastic activity for little hands.
- Crowd-Pleaser: Always a hit at Halloween gatherings.
- Easy to Customize: Use your favorite brownie recipe or a box mix for speed.
- Fudgy Perfection: Our brownie base is rich and incredibly moist.
Forget complicated desserts; these Mummy Brownies are all about simple ingredients and maximum impact. You don't need to be a professional baker to create these festive treats. Just follow our easy instructions, and you'll be a Halloween hero in no time!
Tips for Perfect Fudgy Brownies
Achieving that perfect fudgy brownie texture is key to a truly delightful treat. Here are a few secrets:
- Don't Overmix: Once you add the dry ingredients, mix just until combined. Overmixing develops gluten, leading to tougher brownies.
- Use Quality Chocolate: For the best flavor, choose good quality cocoa powder and chocolate. It really makes a difference!
- Don't Overbake: This is the most crucial tip for fudgy brownies. Brownies are often done when a toothpick inserted into the center comes out with moist crumbs, not completely clean. The edges should be set, but the center might still look a little gooey. For more baking tips, check out this guide to perfect brownies from Food Network.
- Cool Completely: Let the brownies cool completely in the pan before cutting. This helps them set and makes them easier to handle for decorating.
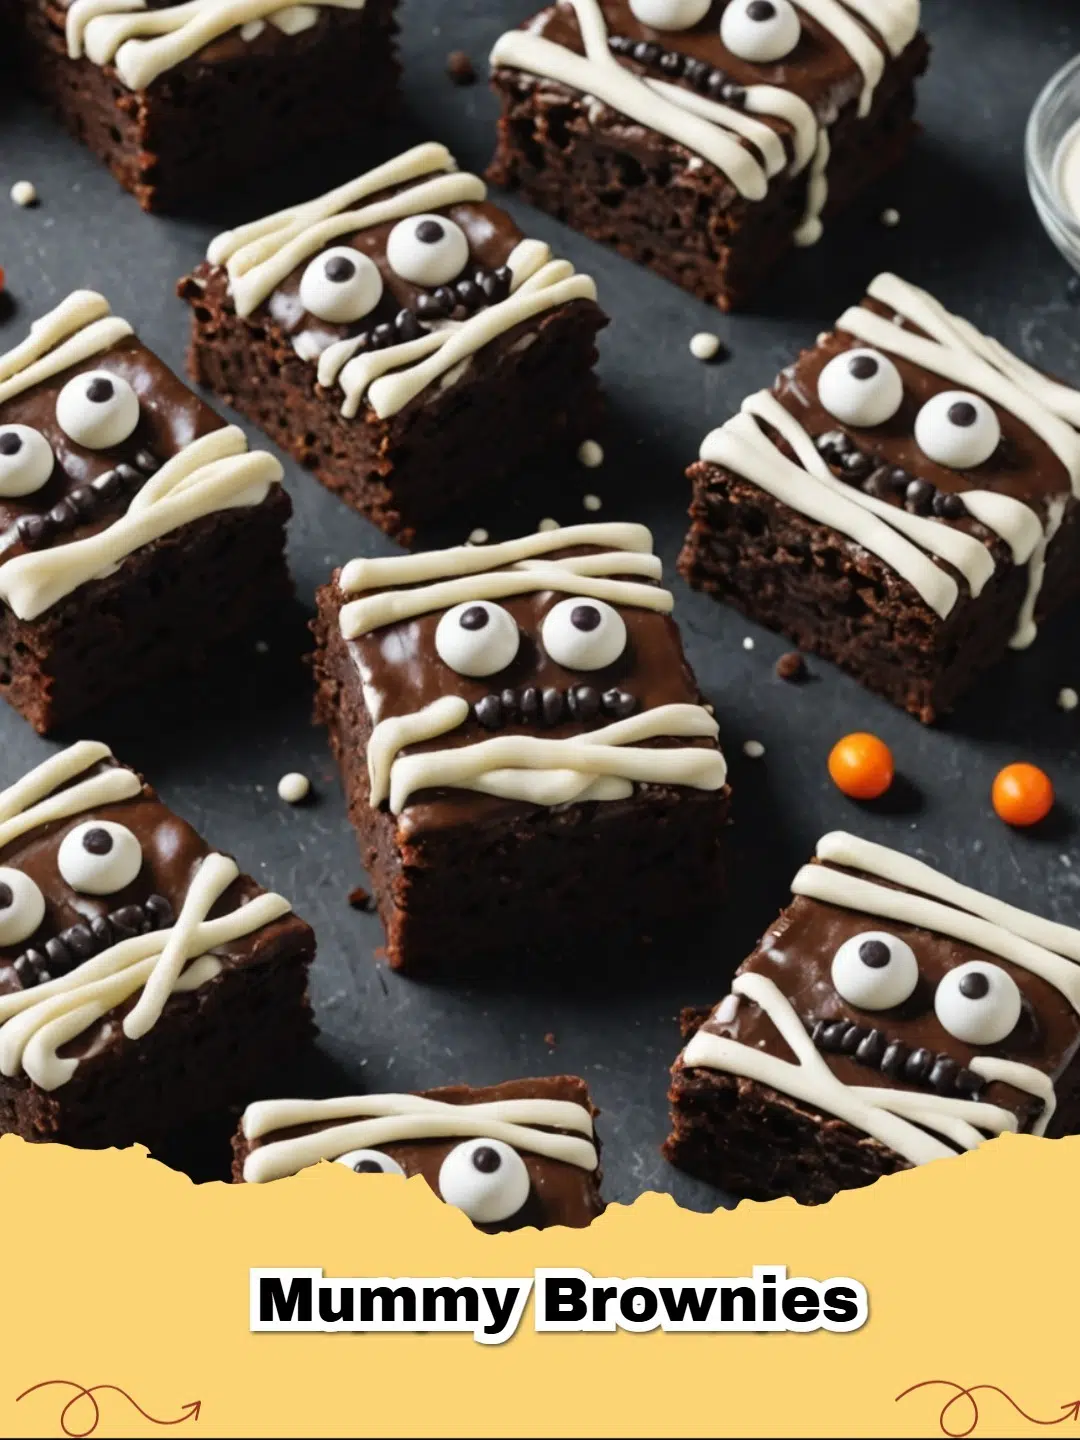
How to Decorate Your Mummy Brownies
Once your brownies are baked and cooled, the real fun begins! You'll need white frosting (store-bought or homemade vanilla buttercream) and some edible candy eyes.
First, cut your cooled brownies into squares or rectangles. Next, using a piping bag fitted with a small round tip (or a Ziploc bag with a corner snipped off), pipe thin, squiggly lines back and forth across each brownie. Leave a small gap near the top for the eyes. Carefully place two candy eyes in this gap. Continue piping a few more lines over the top of the eyes to complete the mummy look. And just like that, you've got a whole tray of adorable mummies!
These Mummy Brownies are not just a treat for the taste buds, but also a joy to make. They perfectly capture the playful spirit of Halloween and are sure to be a star at any seasonal celebration. Happy baking and happy haunting!
FAQs
What are Mummy Brownies?
Mummy Brownies are a fun and festive Halloween dessert where fudgy chocolate brownies are decorated to look like cute mummies using white frosting or melted white chocolate and edible candy eyes. They're a delightful treat for kids and adults alike!
Can I make these Mummy Brownies ahead of time?
Yes, you can absolutely make Mummy Brownies in advance! The undecorated brownies can be stored in an airtight container at room temperature for up to 3-4 days or frozen for up to 3 months. Once decorated, they are best enjoyed within 1-2 days, as the frosting can start to dry out.


What kind of frosting works best for the mummy wrapping?
A simple vanilla buttercream frosting or cream cheese frosting works wonderfully for creating the mummy 'bandages.' You can also use melted white chocolate or even store-bought white icing in a tube with a fine tip for convenience. The key is to have a consistency that's easy to pipe into thin lines.
What if I don't have candy eyes?
No candy eyes? No problem! You can use small chocolate chips placed upside down, mini M&M's, or even dots of black gel icing to create the eyes. Get creative with what you have on hand to bring your mummies to life!

Spooktacular Mummy Brownies
- Total Time: 1 hour 30 minutes (includes cooling)
- Yield: 16 brownies 1x
- Diet: Vegetarian
Description
Fudgy, chocolatey brownies decorated to look like adorable mummies, perfect for a fun Halloween treat!
Ingredients
1/2 cup (113g) unsalted butter, melted
1 cup (200g) granulated sugar
2 large eggs
1 teaspoon vanilla extract
1/2 cup (60g) all-purpose flour
1/3 cup (30g) unsweetened cocoa powder
1/4 teaspoon baking powder
1/4 teaspoon salt
1 cup powdered sugar
3 tablespoons milk (or heavy cream)
1/2 teaspoon vanilla extract
16 pairs edible candy eyes
Instructions
Step 1: Preheat your oven to 350°F (175°C). Line an 8x8 inch baking pan with parchment paper, leaving an overhang on two sides.
Step 2: In a medium bowl, whisk together the melted butter and granulated sugar until well combined and smooth.
Step 3: Add the eggs one at a time, whisking well after each addition. Stir in the vanilla extract.
Step 4: In a separate small bowl, whisk together the flour, cocoa powder, baking powder, and salt.
Step 5: Gradually add the dry ingredients to the wet ingredients, mixing with a spatula or spoon until just combined. Do not overmix.
Step 6: Pour the batter into the prepared baking pan and spread evenly. Bake for 25-30 minutes, or until a toothpick inserted into the center comes out with moist crumbs (not wet batter).
Step 7: Let the brownies cool completely in the pan on a wire rack before cutting. This is crucial for fudgy brownies.
Step 8: While brownies cool, prepare the frosting. In a medium bowl, whisk together the powdered sugar, milk (or cream), and vanilla extract until smooth and creamy. If too thick, add more milk a teaspoon at a time. If too thin, add more powdered sugar.
Step 9: Once brownies are cool, lift them from the pan using the parchment paper overhang and cut into 16 squares or rectangles.
Step 10: Transfer the frosting to a piping bag fitted with a small round tip, or a Ziploc bag with a small corner snipped off.
Step 11: Pipe thin, squiggly lines of frosting across each brownie, leaving a small gap near the top for the eyes. Don't worry about perfection; mummies are messy!
Step 12: Carefully place two candy eyes in the gap you left. Pipe a few more lines over the top of the eyes to resemble bandages.
Step 13: Serve immediately or store in an airtight container at room temperature.
Notes
For extra richness, you can add 1/2 cup of chocolate chips to the brownie batter. If you don't have candy eyes, use mini chocolate chips (upside down) or small dots of black icing.
- Prep Time: 20 minutes
- Cook Time: 30 minutes
- Category: Dessert
- Method: Baking
- Cuisine: American
Nutrition
- Serving Size: 1 brownie
- Calories: 280 kcal
- Sugar: 30g
- Sodium: 90mg
- Fat: 12g
- Saturated Fat: 7g
- Unsaturated Fat: 4g
- Trans Fat: 0g
- Carbohydrates: 42g
- Fiber: 2g
- Protein: 3g
- Cholesterol: 45mg


Leave a Reply