
Introduction
No Bake Oreo Cookies and Cream Bars are the ultimate solution for anyone who craves a decadent, gourmet dessert without the hassle of turning on the oven. These bars represent the pinnacle of easy home baking, combining the nostalgic crunch of classic sandwich cookies with a silky, velvet-like binding that melts in your mouth. Whether you are preparing for a neighborhood potluck, a child’s birthday party, or a quiet night in, these bars offer a level of satisfaction that is hard to match. The beauty of the No Bake Oreo Cookies and Cream Bars lies in their simplicity, requiring only a handful of ingredients and minimal preparation time.
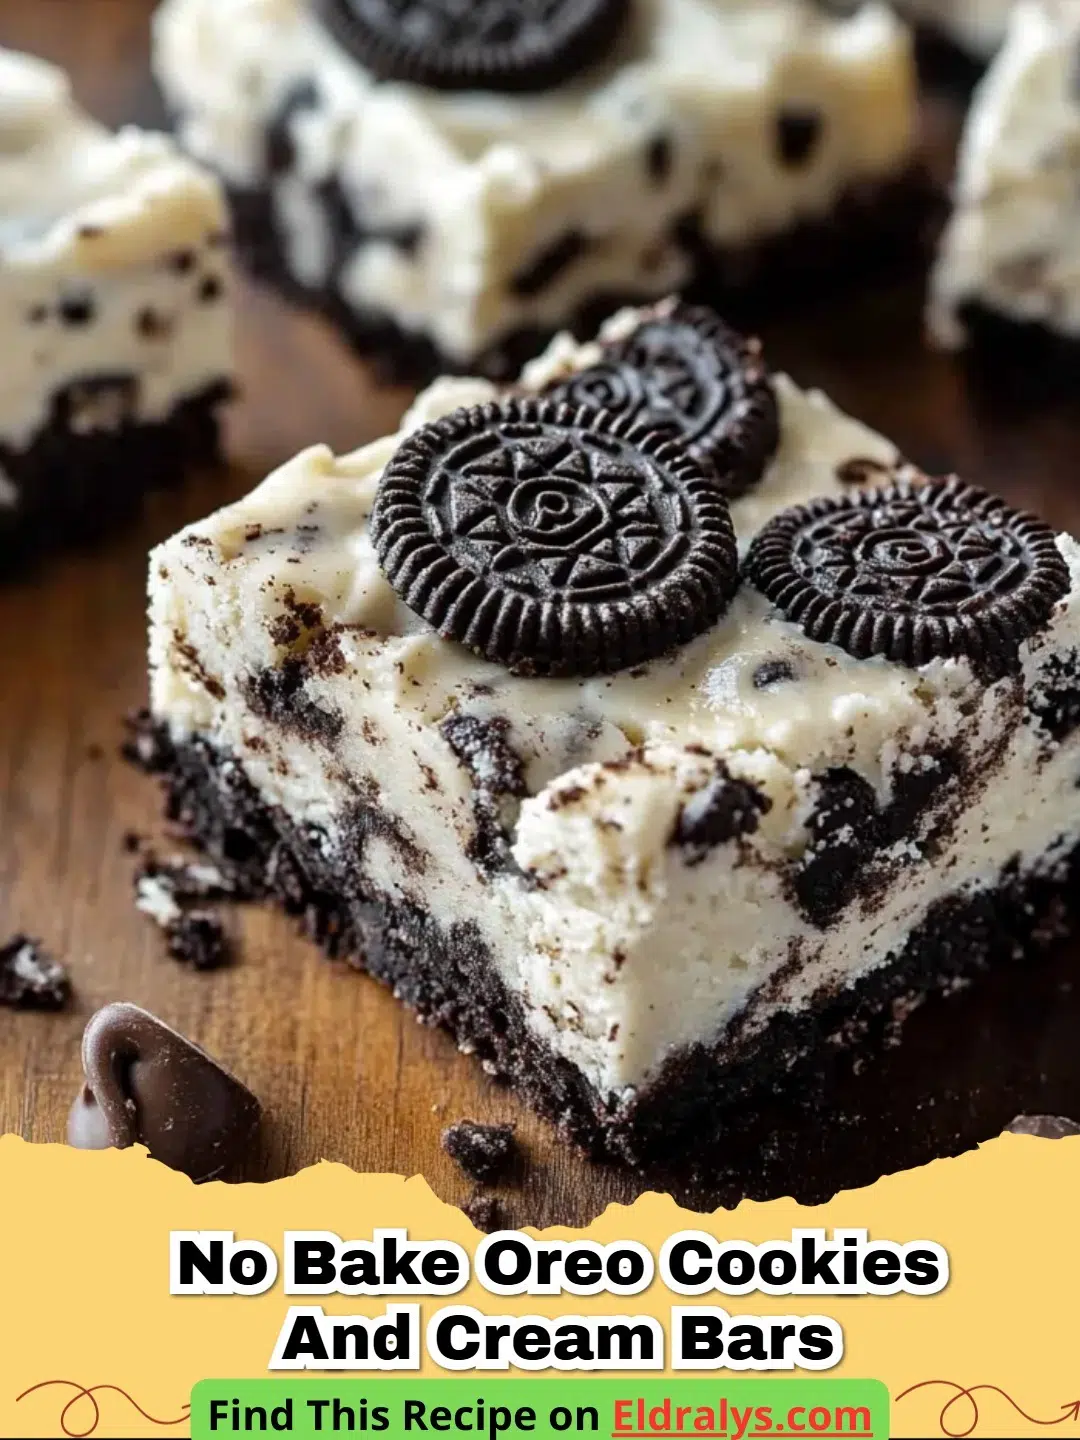
As we dive into this recipe, you will discover that the texture is just as important as the flavor. The contrast between the dark, cocoa-rich cookie pieces and the sweet, milky white chocolate or marshmallow base creates a visual and sensory masterpiece. In a world where complicated pastries often take center stage, there is something deeply comforting about a treat that relies on the classic cookies-and-cream profile. By following this guide, you will learn how to master the art of the no-bake bar, ensuring every bite of your No Bake Oreo Cookies and Cream Bars is perfectly balanced and structurally sound.
Why You’ll Love It
You will absolutely fall in love with these No Bake Oreo Cookies and Cream Bars because they require zero baking time and offer maximum flavor reward. The preparation is incredibly straightforward, making it a perfect project for novice bakers or busy parents. Furthermore, these bars are a massive crowd-pleaser; it is rare to find someone who doesn't adore the combination of Oreos and cream. They are also highly customizable, allowing you to swap in different cookie flavors or add toppings like sprinkles or chocolate drizzle. The portability of the No Bake Oreo Cookies and Cream Bars makes them ideal for lunches and picnics, as they hold their shape well when kept cool. Finally, the rich, buttery finish of the crust combined with the chunky cookie bits creates an addictive texture that keeps everyone coming back for seconds.
Ingredients
To create the perfect batch of No Bake Oreo Cookies and Cream Bars, you will need the following high-quality ingredients:
- 1 package (approx. 14.3 oz) of Oreo cookies
- 1/4 cup unsalted butter, melted
- 10 oz package of mini marshmallows (or 12 oz white chocolate chips)
- 1 teaspoon pure vanilla extract
- A pinch of sea salt to balance the sweetness
Notes and Substitutions
While the classic recipe is divine, you can experiment with different variations of the core components. For a richer flavor, consider using the Decadent Oreo Pound Cake Recipe as inspiration for adding extra chocolate layers. If you prefer a lighter texture, marshmallows are your best friend, whereas white chocolate provides a firmer, fudge-like consistency. You can also use gluten-free sandwich cookies if you have dietary restrictions. Always ensure your butter is high-quality, as it acts as the primary binder for the base. For those who want a more layered approach, checking out the No-Bake Oreo Chocolate Lasagna can give you great ideas on incorporating whipped cream layers between the cookie crust.
Equipment
You only need basic kitchen tools to make these No Bake Oreo Cookies and Cream Bars. Ensure you have an 8x8 or 9x9 inch square baking pan. A large mixing bowl is essential for combining the ingredients. You will also need a microwave-safe bowl or a double boiler to melt your binding agents safely. To ensure your white chocolate melts perfectly, you might want to refer to professional melting techniques at King Arthur Baking. Finally, parchment paper is non-negotiable for easy removal.
Instructions
Follow these steps to create your masterpieces:
- Step 1: Prepare your baking pan by lining it with parchment paper, leaving an overhang on the sides for easy lifting.
- Step 2: Place the Oreo cookies in a food processor and pulse until they are medium-fine crumbs, leaving a few larger chunks for texture. If you don't have a processor, place them in a zip-top bag and crush them with a rolling pin.
- Step 3: In a large bowl, melt the butter and marshmallows (or white chocolate) together until smooth. Stir in the vanilla extract and salt.
- Step 4: Quickly fold the crushed cookies into the melted mixture until every piece is thoroughly coated. This is the secret to perfect No Bake Oreo Cookies and Cream Bars.
- Step 5: Press the mixture firmly into the prepared pan using a spatula or the bottom of a measuring cup. Ensure it is even and packed tight.
- Step 6: Place the pan in the refrigerator and allow the No Bake Oreo Cookies and Cream Bars to set for at least 3 hours, or overnight for the best results.
- Step 7: Once set, lift the bars out using the parchment paper edges and slice them into squares with a sharp knife.
Pro Tips
To achieve professional-grade No Bake Oreo Cookies and Cream Bars, always use fresh ingredients. If you are using white chocolate, melt it at low heat to prevent seizing. Adding a tablespoon of heavy cream to the melting chocolate can help create a smoother bite. When pressing the mixture into the pan, don't be afraid to use some muscle; a tightly packed bar is less likely to crumble when sliced. If the mixture is too sticky, slightly dampen your hands or the spatula with water to press it down effectively. These No Bake Oreo Cookies and Cream Bars also look stunning if you reserve a few whole cookies to crush and sprinkle on the very top before the bars set.
Serving, Storage & Variations
Serve your No Bake Oreo Cookies and Cream Bars chilled for the best texture. They pair wonderfully with a cold glass of milk or a scoop of vanilla bean ice cream. For storage, keep the bars in an airtight container in the refrigerator for up to one week. If you want to keep them longer, they freeze beautifully for up to three months. For variations, try using Golden Oreos for a "vanilla-on-vanilla" experience or Mint Oreos for a refreshing twist. You can even stir in some peanut butter chips or a drizzle of dark chocolate to elevate the decadence. No Bake Oreo Cookies and Cream Bars are incredibly versatile, so feel free to let your culinary creativity shine through with every batch.
Nutrition Information
Understanding the nutritional profile of your treats helps in planning a balanced diet. Below is the estimated nutrition for one serving of our No Bake Oreo Cookies and Cream Bars.
| Nutrient | Amount |
|---|---|
| Calories | 210 kcal |
| Protein | 2g |
| Carbohydrates | 28g |
| Fat | 11g |
| Sodium | 145mg |
| Sugar | 18g |
Disclaimer: The nutritional information provided is an estimate based on standard ingredients and serving sizes. Actual values may vary depending on the specific brands used.
Conclusion
In conclusion, these No Bake Oreo Cookies and Cream Bars are a testament to the fact that you don't need a lot of time or complex techniques to create something truly magical. The rich, creamy texture and iconic flavor make them an instant favorite for anyone who tries them. By following this simple recipe and using our pro tips, you can guarantee a perfect result every time. We hope you enjoy making and sharing these No Bake Oreo Cookies and Cream Bars as much as we do. Happy no-baking!


FAQs
Can I use Double Stuf Oreos for these bars?
Yes, you can use Double Stuf Oreos, but you may need to increase the amount of cookies slightly to ensure the bars hold their shape properly, as the extra cream filling can make the mixture softer.
How long do these bars need to set in the fridge?
For the best results, let the No Bake Oreo Cookies and Cream Bars chill for at least 2 to 4 hours. Chilling overnight is even better for achieving clean, firm slices.
Why are my bars falling apart?
If your bars are crumbling, it is likely because the cookies weren't crushed finely enough or there wasn't enough melted butter or marshmallow to bind them. Ensure a tight pack when pressing them into the pan.
Can I freeze No Bake Oreo Cookies and Cream Bars?
Absolutely! Wrap individual bars in plastic wrap and store them in an airtight container in the freezer for up to 3 months. Thaw in the fridge before serving.

No Bake Oreo Cookies and Cream Bars
- Total Time: 3 hours 15 minutes
- Yield: 16 bars 1x
- Diet: Vegetarian
Description
A simple and decadent 4-ingredient dessert bar featuring the classic flavor of Oreo cookies in a creamy, no-bake format.
Ingredients
1 package (14.3 oz) Oreo cookies
1/4 cup unsalted butter, melted
10 oz mini marshmallows
1 tsp vanilla extract
Instructions
Step 1: Line an 8x8 inch baking pan with parchment paper.
Step 2: Crush the Oreo cookies into crumbs using a food processor or a rolling pin.
Step 3: Melt the butter and marshmallows in a large microwave-safe bowl in 30-second intervals until smooth.
Step 4: Stir in the vanilla extract, then fold in the cookie crumbs until fully incorporated.
Step 5: Press the mixture firmly into the prepared pan.
Step 6: Refrigerate for at least 3 hours before slicing into 16 bars.
Notes
Store in the refrigerator to keep the bars firm. For extra indulgence, add a layer of melted white chocolate on top.
- Prep Time: 15 minutes
- Cook Time: 0 minutes
- Category: Dessert
- Method: No-Bake
- Cuisine: American
Nutrition
- Serving Size: 1 bar
- Calories: 210 kcal
- Sugar: 18g
- Sodium: 145mg
- Fat: 11g
- Saturated Fat: 5g
- Unsaturated Fat: 4g
- Trans Fat: 0g
- Carbohydrates: 28g
- Fiber: 1g
- Protein: 2g
- Cholesterol: 10mg
Related posts:
 The Ultimate Cowboy Steak with Truffle Honey Butter That Will Melt Your Heart
 The Most Irresistible Honey Garlic Steak Bites That Will Melt Your Heart
 The Most Divine High Protein Sugar-Free Monkey Bread That Will Melt Your Soul
 The Most Legendary Authentic Thai Crying Tiger (Sua Rong Hai) Steak Recipe That Will Heal Your Soul

Leave a Reply