
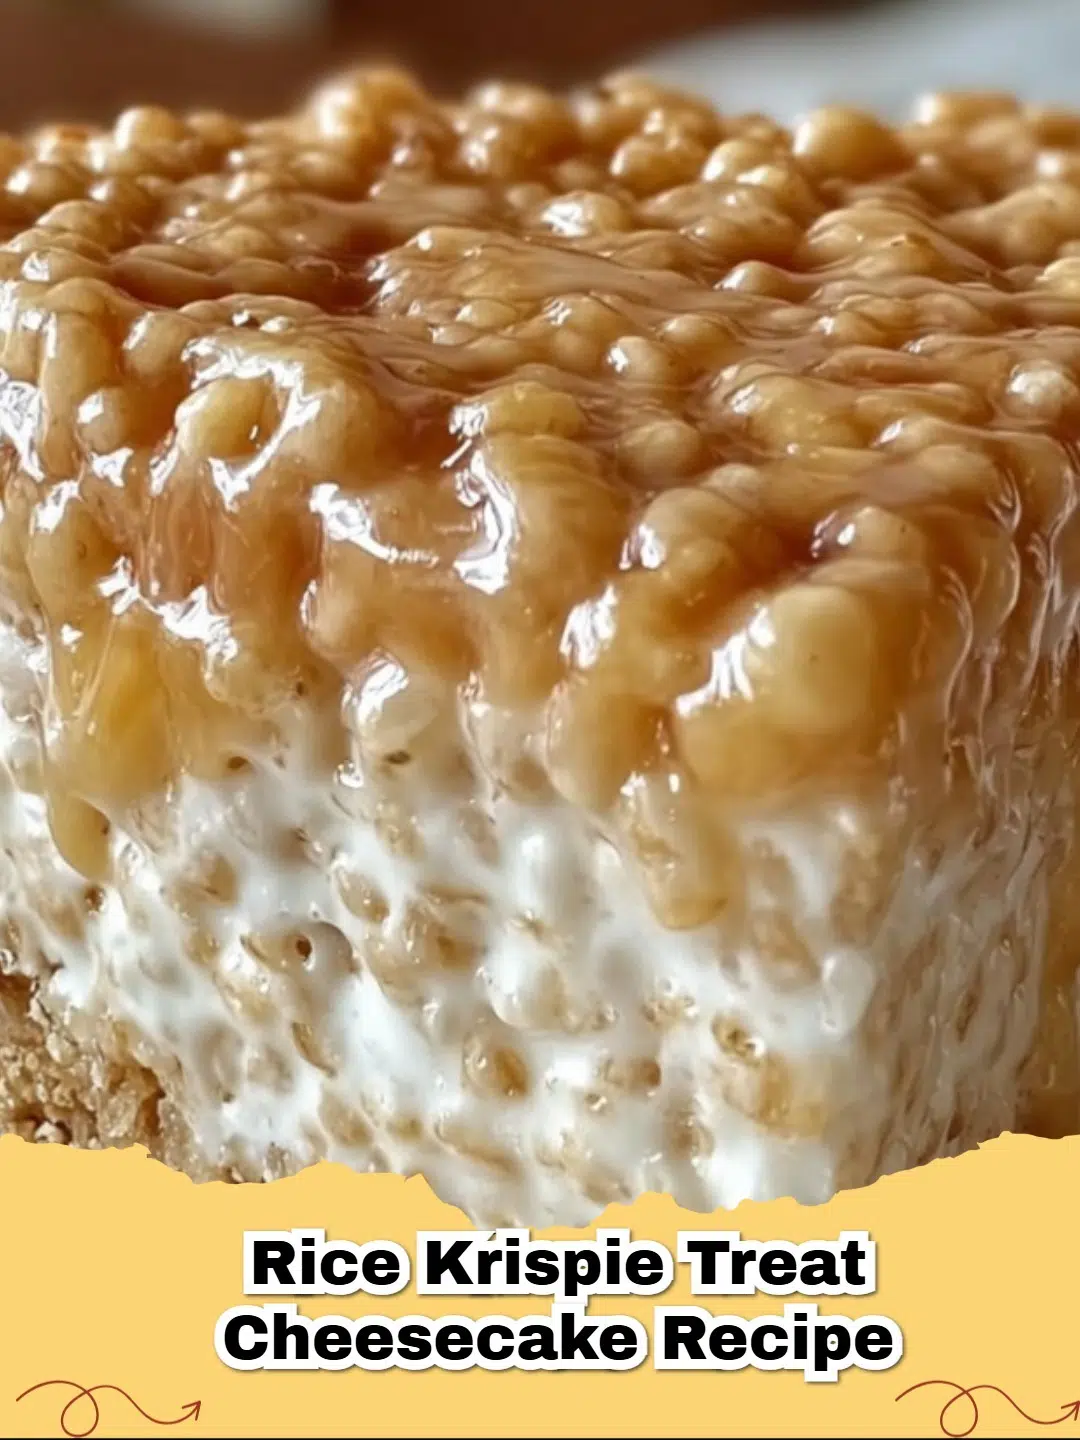
Get ready to take a delicious trip down memory lane with a dessert that perfectly blends two childhood favorites: the crispy, chewy delight of Rice Krispie Treats and the smooth, creamy indulgence of cheesecake. Yes, you heard that right – we’re talking about the Ultimate No-Bake Rice Krispie Treat Cheesecake!
This recipe is a game-changer for anyone who loves easy, impressive desserts. It features a sweet, buttery Rice Krispie Treat crust that forms the perfect foundation for a rich, tangy, and utterly dreamy cream cheese filling. Best of all? It’s completely no-bake, meaning less time in the kitchen and more time enjoying this spectacular creation!
Why You'll Love This Rice Krispie Treat Cheesecake
This isn't just another dessert; it's an experience. Here's why this recipe will become a new favorite in your repertoire:
- No-Bake Bliss: Say goodbye to oven worries! This cheesecake sets beautifully in the refrigerator, making it perfect for summer gatherings or when you just don't want to heat up your kitchen.
- Nostalgic Flavor Fusion: It brings together the beloved crunch of Rice Krispie Treats with the sophisticated creaminess of cheesecake, creating a unique and irresistible dessert that appeals to all ages.
- Impressively Easy: Despite its stunning appearance and gourmet taste, this recipe is incredibly straightforward. With simple steps and readily available ingredients, even novice bakers can achieve show-stopping results.
- Crowd-Pleasing: Whether it's a birthday party, potluck, or just a family dinner, this cheesecake is guaranteed to be a conversation starter and a definite hit.
Ingredients You'll Need
Gathering your ingredients is the first step to creating this magical dessert. You'll need components for both the iconic Rice Krispie crust and the luscious cheesecake filling.
For the Irresistible Rice Krispie Crust:
- Unsalted butter
- Mini marshmallows
- Rice Krispies cereal
For the Creamy Cheesecake Filling:
- Cream cheese (softened to room temperature is key!)
- Powdered sugar
- Vanilla extract
- Heavy whipping cream
Optional Garnish:
- Extra mini marshmallows
- Sprinkles for a festive touch
How to Make the Best Rice Krispie Treat Cheesecake
Crafting this cheesecake is a joyous process. Follow these simple steps to ensure a perfect dessert every time.
Getting the Perfect Rice Krispie Crust
The foundation of this cheesecake is its unique and delicious crust. You'll melt butter and marshmallows together until smooth, then quickly fold in the Rice Krispies. Press this mixture into your springform pan, creating a sturdy and delicious base. Ensure it’s evenly pressed for the best structure.
Creating the Creamy Cheesecake Filling
The filling is a classic no-bake cheesecake. Softened cream cheese is beaten until light and fluffy with powdered sugar and vanilla. In a separate bowl, heavy cream is whipped to stiff peaks, then gently folded into the cream cheese mixture. This creates an airy, yet rich and stable filling.
Chill Time is Crucial!
Once the filling is smoothly spread over the Rice Krispie crust, the hardest part begins: waiting! This cheesecake requires significant chilling time to set properly. This ensures clean slices and a delightful firm-yet-creamy texture. For more information on the history and various forms of this beloved dessert, you can read about cheesecake on Wikipedia.
Variations and Serving Suggestions
While incredible on its own, this Rice Krispie Treat Cheesecake is also a fantastic canvas for your culinary creativity:
- Chocolate Drizzle: A simple drizzle of melted chocolate or chocolate syrup takes this dessert to the next level.
- Fruity Fun: Top with fresh berries like strawberries or raspberries for a burst of color and tartness.
- Caramel Crunch: A swirl of caramel sauce and a sprinkle of sea salt can add a sophisticated touch.
- Candy Toppings: Crush your favorite candy bars (like Snickers or Butterfingers) and sprinkle them over the top.
- Holiday Themes: Use food coloring in the filling or sprinkles to match any holiday!
Frequently Asked Questions (FAQs)
Have more questions about this delightful dessert? Check out our FAQs for helpful tips and tricks!
Conclusion
This No-Bake Rice Krispie Treat Cheesecake is truly a dessert marvel. It’s fun, familiar, incredibly easy, and guarantees smiles all around. Whether you’re making it for a special occasion or just to satisfy a sweet craving, it’s sure to become a cherished recipe. So, gather your ingredients, get ready for some no-bake magic, and prepare to enjoy the best of both worlds!


FAQs
Can I make Rice Krispie Treat Cheesecake ahead of time?
Absolutely! This cheesecake is perfect for making in advance. It needs at least 4 hours to chill and set, but can be prepared a day or two ahead. Store it covered in the refrigerator until ready to serve.
How do I prevent my Rice Krispie crust from getting soggy?
The key to a non-soggy crust is to ensure the cheesecake filling is well-chilled and firm before pouring it onto the crust. Also, don't let the cheesecake sit at room temperature for too long. If you're particularly worried, a thin layer of melted white chocolate brushed onto the cooled crust before adding the filling can act as a barrier.
What variations can I try with this cheesecake?
Get creative! You can add mini chocolate chips to the filling, swirl in some caramel or chocolate sauce, or top with fresh berries for a fruity twist. For a seasonal touch, try a pumpkin spice filling in the fall or peppermint extract for the holidays. You could also experiment with different cereals for the crust, like Fruity Pebbles.
How long does Rice Krispie Treat Cheesecake last?
When properly stored in an airtight container in the refrigerator, your Rice Krispie Treat Cheesecake will last for up to 3-4 days. For best texture and flavor, consume within the first two days.

Ultimate No-Bake Rice Krispie Treat Cheesecake
- Total Time: 4 hours 30 minutes
- Yield: 10-12 servings 1x
- Diet: Vegetarian
Description
A fun and incredibly delicious no-bake cheesecake featuring a crunchy Rice Krispie treat crust and a rich, creamy cheesecake filling.
Ingredients
½ cup (1 stick) unsalted butter
1 (10 oz) bag mini marshmallows (about 5 ½ cups)
8 cups Rice Krispies cereal
2 (8 oz) blocks cream cheese, softened
1 cup powdered sugar
1 teaspoon vanilla extract
1 ½ cups heavy whipping cream
Optional: extra mini marshmallows or sprinkles for garnish
Instructions
Step 1: Prepare your pan. Lightly grease a 9-inch springform pan with cooking spray. You can also line the bottom with parchment paper for easier removal.
Step 2: Make the Rice Krispie crust. In a large pot or Dutch oven, melt the butter over low heat. Add 1 (10 oz) bag of mini marshmallows and stir continuously until completely melted and smooth. Remove from heat.
Step 3: Combine with cereal. Quickly add the 8 cups of Rice Krispies cereal to the melted marshmallow mixture. Stir until the cereal is evenly coated.
Step 4: Press the crust. Transfer the Rice Krispie mixture to the prepared springform pan. Using a piece of parchment paper or buttered hands, firmly and evenly press the mixture into the bottom of the pan to form the crust. Set aside to cool while you prepare the filling.
Step 5: Prepare the cheesecake filling. In a large mixing bowl, beat the softened cream cheese with an electric mixer until smooth and creamy. Add the powdered sugar and vanilla extract, continuing to beat until well combined and fluffy, scraping down the sides of the bowl as needed.
Step 6: Whip the cream. In a separate, clean, cold mixing bowl, whip the heavy whipping cream with an electric mixer on high speed until stiff peaks form.
Step 7: Combine filling. Gently fold the whipped cream into the cream cheese mixture until no streaks remain and the filling is light and airy.
Step 8: Assemble and chill. Pour the cheesecake filling over the cooled Rice Krispie crust in the springform pan. Gently spread it evenly with a spatula. Cover the pan loosely with plastic wrap and refrigerate for at least 4 hours, or preferably overnight, until the cheesecake is fully set.
Step 9: Garnish and serve. Once set, carefully remove the springform ring. Garnish with extra mini marshmallows or sprinkles if desired. Slice with a sharp, warm knife for clean cuts and serve immediately.
Notes
Ensure cream cheese is fully softened to room temperature for a smooth, lump-free filling. For easier slicing, dip your knife in hot water and wipe it clean between each cut. This cheesecake is best enjoyed chilled.
- Prep Time: 30 minutes
- Cook Time: 0 minutes
- Category: Dessert
- Method: No-Bake
- Cuisine: American
Nutrition
- Serving Size: 1 slice
- Calories: 450 kcal
- Sugar: 40g
- Sodium: 280mg
- Fat: 25g
- Saturated Fat: 15g
- Unsaturated Fat: 8g
- Trans Fat: 0g
- Carbohydrates: 55g
- Fiber: 1g
- Protein: 5g
- Cholesterol: 80mg


Leave a Reply