
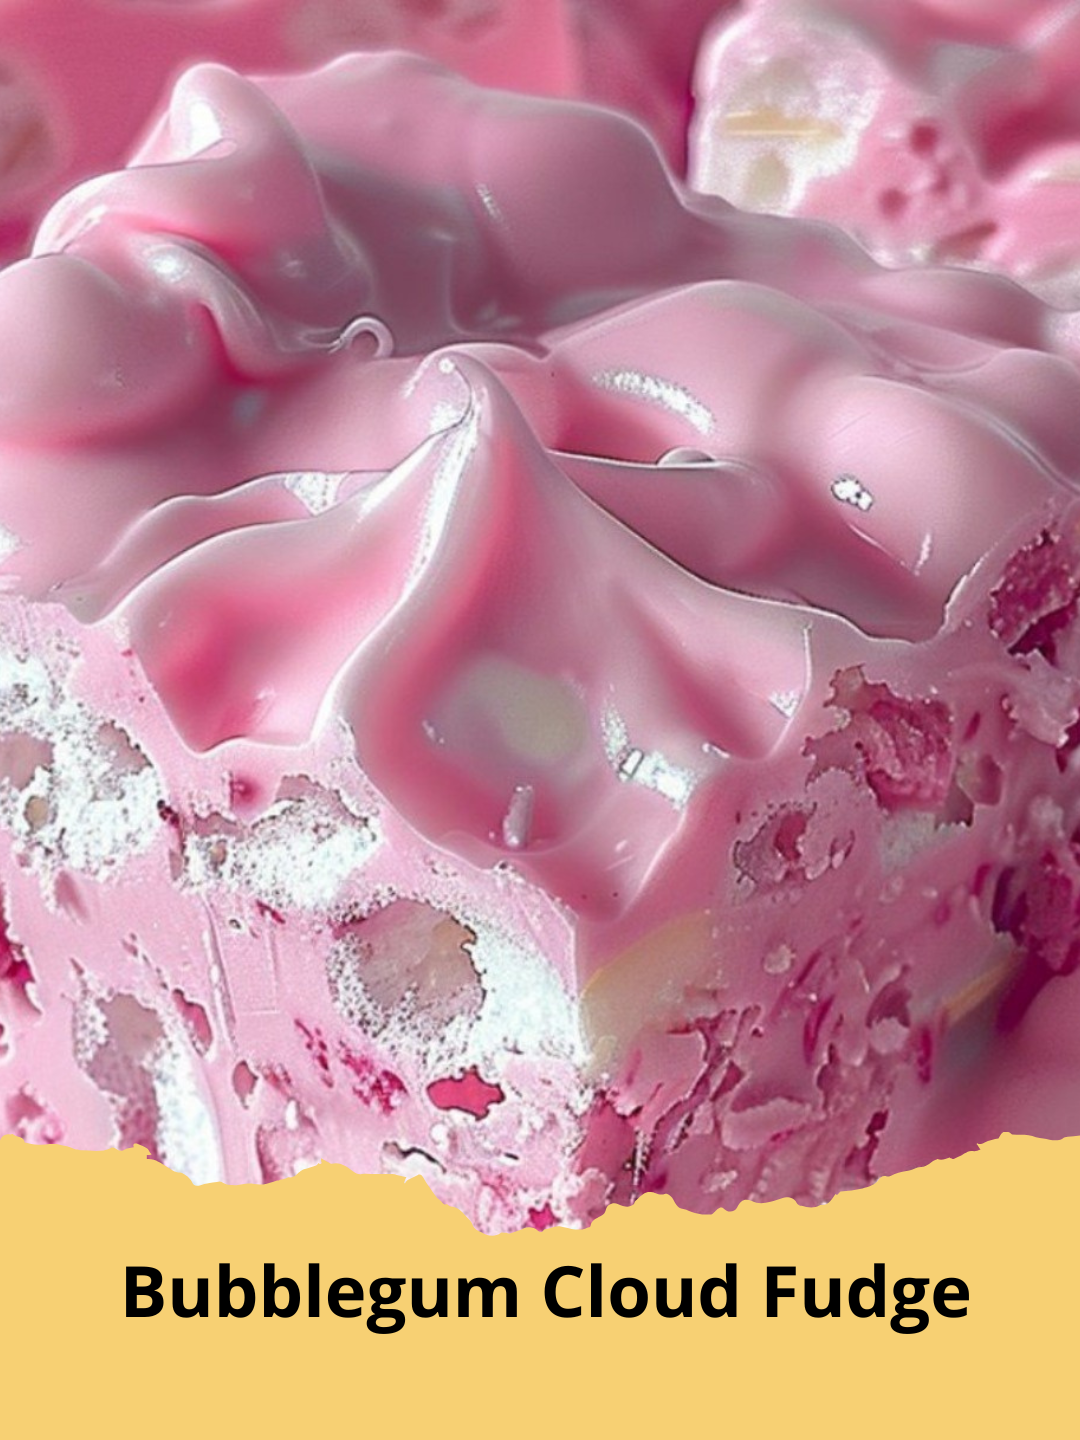
Ready for a treat that's as fun to make as it is to eat? Our Whimsical Bubblegum Cloud Fudge is here to transport you back to childhood with its vibrant colors and unmistakable nostalgic flavor. This no-bake wonder is incredibly easy, making it the perfect project for a rainy afternoon or a delightful centerpiece for your next party. Prepare to be amazed by how simple it is to create such a charming and delicious confection!
This recipe is all about bringing joy with minimal effort. Forget complicated candy thermometers and endless stirring; this fudge comes together with just a few ingredients and a microwave. The result? A creamy, dreamy fudge with beautiful pink and blue swirls that truly lives up to its 'cloud' name. Let's dive into the magic!
Why This Bubblegum Cloud Fudge Will Be Your New Favorite
Beyond its eye-catching appearance, this fudge offers so much to love:
- Effortlessly Easy: A simple no-bake method means anyone can make it, regardless of baking experience.
- Bursting with Nostalgia: That classic bubblegum flavor is a guaranteed crowd-pleaser and a delightful trip down memory lane.
- Visually Stunning: The vibrant swirls make it an instant hit at any gathering, perfect for birthdays, holidays, or just because!
- Customizable Fun: Easy to adapt with different colors or fun add-ins.
Essential Ingredients for Your Cloud Fudge
You'll be surprised at how few ingredients are needed to create this delightful fudge. Quality is key, especially for your flavoring!
- 1 (14-ounce) can Sweetened Condensed Milk
- 3 cups white chocolate chips (good quality melts best!)
- 4 tablespoons unsalted butter
- 2 teaspoons bubblegum flavoring or extract
- Pink gel food coloring
- Blue gel food coloring
- Optional: Mini marshmallows or sprinkles for extra texture
Step-by-Step Guide to Whimsical Bubblegum Cloud Fudge
Creating this fudge is a breeze! Follow these simple steps for a perfect batch every time:
- Step 1: Prepare your pan. Line an 8x8 inch baking pan with parchment paper, allowing an overhang on the sides. Lightly grease the parchment paper for easy removal.
- Step 2: Melt the base. In a large microwave-safe bowl, combine the white chocolate chips, butter, and sweetened condensed milk. Microwave in 30-second intervals, stirring thoroughly after each, until the mixture is completely smooth and melted. This typically takes 1.5 to 2 minutes.
- Step 3: Add the flavor. Stir the bubblegum flavoring into the melted mixture until it is well combined and fragrant.
- Step 4: Divide and color. Divide the fudge mixture evenly into two separate bowls. Add a few drops of pink gel food coloring to one bowl and stir until you achieve your desired shade. Repeat with the blue gel food coloring in the second bowl.
- Step 5: Layer the colors. Spoon alternating dollops of the pink and blue fudge mixtures into your prepared pan.
- Step 6: Create swirls. Use a knife or skewer to gently swirl the colors together. Be careful not to overmix, as this can cause the colors to blend too much and lose their distinct 'cloud' effect.
- Step 7: Chill the fudge. Place the pan in the refrigerator for at least 2 hours, or until the fudge is firm to the touch.
- Step 8: Cut and serve. Once firm, use the parchment paper overhang to lift the fudge out of the pan. Carefully cut into 1-inch squares using a Quality Chef's Knife. Enjoy your whimsical creation!
Tips for Fudge Perfection
- Don't Rush the Melt: When melting the chocolate, patience is key. Overheating can cause it to seize. Gentle, short bursts in the microwave work best.
- High-Quality Flavoring: The taste of your fudge truly depends on the bubblegum extract. Invest in a good quality one for the most authentic flavor.
- Subtle Swirls: Less is more when swirling the colors. A light hand creates beautiful, distinct patterns.
- Add-Ins: For an extra playful texture, fold in mini marshmallows or a handful of colorful sprinkles before chilling. This adds a fun chewiness!
Fun Variations to Explore
Want to get even more creative? Try these ideas:
- Sprinkle Explosion: Press a generous amount of colorful sprinkles onto the top of the fudge before it sets for an extra festive look and a satisfying crunch.
- Flavor Swaps: Exchange the bubblegum extract for other playful flavors like cotton candy, watermelon, or even a mix of tropical fruit extracts for a different 'cloud' experience.
- Layered Look: Instead of swirling, you could pour one color entirely, chill slightly, then pour the second color on top for distinct, striking layers.
Serving and Storage Suggestions
This Bubblegum Cloud Fudge is perfect for any occasion! Arrange it on a vibrant platter for parties, package individual squares in decorative bags as gifts, or simply keep it on hand for a sweet indulgence. It pairs wonderfully with other easy-to-make desserts like our Easy Brownie Mix Cookies: Your Shortcut to Chewy, Chocolatey Bliss or a slice of Juicy Pineapple Heaven Cake: Your Easiest Tropical Dessert!
To maintain its freshness, store any leftover fudge in an airtight container at room temperature for up to one week, or in the refrigerator for up to two weeks. For longer storage, wrap individual pieces tightly in plastic wrap and freeze for up to 2-3 months. Thaw at room temperature before serving.
So go ahead, embrace the fun, and create a batch of this Whimsical Bubblegum Cloud Fudge. It's more than just a dessert; it's a delightful experience that brings a smile to every face!
FAQs
What gives Bubblegum Cloud Fudge its distinct flavor?
The signature taste of this fudge comes from high-quality bubblegum flavoring or extract. Using a good brand ensures that classic, sweet, and fruity essence.


Can I substitute white chocolate chips with other chocolate types?
For the best color and flavor, white chocolate chips are recommended. Other chocolates might overpower the bubblegum flavor or affect the vibrant pink and blue colors.
How long does the fudge need to chill before cutting?
The Bubblegum Cloud Fudge needs to chill in the refrigerator for at least 2 hours, or until it is completely firm. This ensures clean, easy cuts and a perfect texture.
What are some fun variations for this fudge recipe?
You can add colorful sprinkles on top before chilling, experiment with different flavor extracts like cotton candy or watermelon, or even create distinct layers instead of swirls for a different visual appeal.

Whimsical Bubblegum Cloud Fudge
- Total Time: 2 hours 17 minutes
- Yield: 36 squares 1x
- Diet: Vegetarian
Description
This vibrant, easy-to-make Bubblegum Cloud Fudge is a no-bake nostalgic treat, bursting with sweet bubblegum flavor and eye-catching pink and blue swirls.
Ingredients
1 (14-ounce) can sweetened condensed milk
3 cups white chocolate chips
4 tablespoons unsalted butter
2 teaspoons bubblegum flavoring or extract
Pink gel food coloring
Blue gel food coloring
Optional: Mini marshmallows or colorful sprinkles
Instructions
Step 1: Prepare your pan. Line an 8x8 inch baking pan with parchment paper, allowing an overhang on the sides. Lightly grease the parchment paper for easy removal.
Step 2: Melt the base. In a large microwave-safe bowl, combine the white chocolate chips, butter, and sweetened condensed milk. Microwave in 30-second intervals, stirring thoroughly after each, until the mixture is completely smooth and melted. This typically takes 1.5 to 2 minutes.
Step 3: Add the flavor. Stir the bubblegum flavoring into the melted mixture until it is well combined and fragrant.
Step 4: Divide and color. Divide the fudge mixture evenly into two separate bowls. Add a few drops of pink gel food coloring to one bowl and stir until you achieve your desired shade. Repeat with the blue gel food coloring in the second bowl.
Step 5: Layer the colors. Spoon alternating dollops of the pink and blue fudge mixtures into your prepared pan.
Step 6: Create swirls. Use a knife or skewer to gently swirl the colors together. Be careful not to overmix, as this can cause the colors to blend too much and lose their distinct 'cloud' effect.
Step 7: Chill the fudge. Place the pan in the refrigerator for at least 2 hours, or until the fudge is firm to the touch.
Step 8: Cut and serve. Once firm, use the parchment paper overhang to lift the fudge out of the pan. Carefully cut into 1-inch squares using a Quality Chef's Knife. Enjoy your whimsical creation!
Notes
For extra fun, press some sprinkles onto the top of the fudge before it sets. Ensure you use good quality gel food coloring for vibrant hues.
- Prep Time: 15 minutes
- Cook Time: 2 minutes
- Category: Dessert
- Method: No-Bake
- Cuisine: American
Nutrition
- Serving Size: 1 square
- Calories: 180 kcal
- Sugar: 25g
- Sodium: 45mg
- Fat: 8g
- Saturated Fat: 5g
- Unsaturated Fat: 2g
- Trans Fat: 0g
- Carbohydrates: 28g
- Fiber: 0g
- Protein: 2g
- Cholesterol: 15mg


Leave a Reply