
There's something incredibly comforting about the aroma of homemade food sizzling in the kitchen. For me, that smell often brings back memories of my grandmother's house, bustling with family, and the star of many gatherings: her legendary homemade chicken spring rolls. I remember being a curious little helper, perched on a stool, watching her deftly fill and roll each delicate wrapper. The way she'd patiently guide my tiny hands to fold the sides, then roll them tightly – it felt like a secret art form. When those golden-brown chicken spring rolls finally emerged from the hot oil, crispy and fragrant, it was pure magic. The first bite, a perfect blend of savory chicken and crisp vegetables, always tasted like home. Store-bought versions simply couldn't compare. This recipe for crispy chicken spring rolls isn't just about food; it's about recreating that feeling, sharing that tradition, and making new cherished memories with every delicious bite. It's a recipe that has stood the test of time in my family, and I'm so excited to share it with yours.
Why This Recipe is a Must-Try
- Unbeatable Crispy Texture: Achieves that coveted golden-brown, shatteringly crisp exterior that is the hallmark of perfect chicken spring rolls.
- Flavor-Packed Filling: A savory and aromatic blend of ground chicken and fresh vegetables, seasoned to perfection, making every bite a delight.
- Perfect for Any Occasion: Whether it's a family dinner, a party appetizer, or a cozy night in, these chicken spring rolls are always a crowd-pleaser.
- Freezer-Friendly: Easily prepare a large batch and freeze some for quick, delicious meals whenever the craving strikes, making meal prep a breeze.
Key Ingredient Notes
Spring Roll Wrappers
The type of wrapper you choose can make or break your crispy chicken spring rolls. Look for square, thin, wheat-based spring roll wrappers in the frozen section of most Asian grocery stores or even larger supermarkets. Avoid rice paper wrappers, which are used for fresh, uncooked spring rolls; these won't give you the desired crispiness when fried. Make sure to thaw them completely in the refrigerator overnight or at room temperature for a few hours before using, keeping them covered with a damp cloth as you work to prevent drying out.
Ground Chicken
For the juiciest chicken spring rolls, opt for ground chicken with a slightly higher fat content, like ground chicken thigh, or a mix of white and dark meat. If you're using lean ground chicken breast, you might want to add a touch more oil to your filling mixture to prevent it from becoming too dry. Ensure it's cooked through but not overcooked before wrapping, as it will cook again when the spring rolls are fried.
Fresh Vegetables
The medley of shredded cabbage, carrots, and bean sprouts provides essential texture and freshness to your chicken spring rolls. Don't skimp on these! For best results, shred your own cabbage and carrots or buy pre-shredded varieties to save time. Make sure to squeeze out any excess moisture from the vegetables after sautéing, especially the cabbage and bean sprouts, to prevent your spring rolls from becoming soggy and to ensure maximum crispiness. This step is crucial for achieving truly crispy chicken spring rolls.

Step-by-Step Guide with Pro Tips
Prepping Your Filling for Perfect Chicken Spring Rolls
First, finely dice your onion and garlic. Shred your cabbage and carrots if they aren't already. In a large skillet or wok, heat a tablespoon of oil over medium-high heat. Add the ground chicken and cook, breaking it up with a spoon, until it's no longer pink. Drain any excess fat. Add the diced onion and garlic to the skillet and sauté for 2-3 minutes until fragrant. Next, add the shredded cabbage and carrots. Cook, stirring occasionally, until the vegetables are tender-crisp, about 5-7 minutes. Stir in the bean sprouts and cook for another 2 minutes. Remove from heat.
Seasoning and Cooling the Filling
Now, it's time to season your delicious chicken spring rolls filling! Stir in the soy sauce, oyster sauce, sesame oil, and black pepper. Taste and adjust seasonings as needed. It should be savory and well-balanced. Transfer the filling to a large bowl and let it cool completely. This is a critical step; a hot filling will create condensation inside the wrapper, making your chicken spring rolls soggy.
The Art of Rolling Chicken Spring Rolls
On a clean, dry surface, lay out one spring roll wrapper in a diamond shape with a corner pointing towards you. Place about 2-3 tablespoons of the cooled filling near the bottom corner, shaping it into a log. Fold the bottom corner up over the filling, tucking it in snugly. Fold the left and right corners towards the center, like an envelope. Then, roll the spring roll tightly from the bottom up to the top corner. Before sealing, dab a little water or a cornstarch slurry (1 tsp cornstarch + 1 tbsp water) on the top corner to act as glue. This ensures your chicken spring rolls stay sealed during frying. Repeat with the remaining wrappers and filling. Consider making a double batch and freezing some before frying! For more weeknight dinner ideas, check out our Crispy Oven Baked Chicken Fillet recipe.
Frying for Golden Perfection
In a deep pot or Dutch oven, heat about 2-3 inches of vegetable oil to 350°F (175°C). If you don't have a thermometer, you can test the oil by dropping a tiny piece of wrapper in; it should sizzle immediately. Carefully place 3-4 chicken spring rolls into the hot oil, making sure not to overcrowd the pot. Fry for 5-7 minutes, turning occasionally, until they are golden brown and crispy on all sides. Use tongs to transfer the fried chicken spring rolls to a wire rack lined with paper towels to drain excess oil. Serve immediately with your favorite dipping sauce. Store any leftover ingredients or prepped filling in quality containers like Basics Glass Food Storage for freshness.
Variations & Serving Suggestions
Spice It Up!
For those who love a kick, add a teaspoon of sriracha or a pinch of red pepper flakes to the chicken spring rolls filling. A dash of ginger powder can also elevate the flavor profile. You can also serve these crispy chicken spring rolls with a spicy sriracha mayo or a sweet chili sauce with extra chili flakes.
Vegetable Swaps
Feel free to customize the vegetable mix in your chicken spring rolls. Shredded mushrooms, bell peppers, or even finely chopped water chestnuts can add interesting textures and flavors. Just ensure they are cooked down to release moisture before adding to the filling.
Serving Suggestions
These chicken spring rolls are fantastic on their own as an appetizer with a simple sweet chili dipping sauce, plum sauce, or even a homemade peanut sauce. For a more substantial meal, serve them alongside a fresh green salad or some steamed jasmine rice. They also pair wonderfully with other Asian-inspired dishes, like our The Ultimate Wok-Fired Onion Beef Fried Rice Recipe.
Nutrition Information
Below is an estimated nutritional breakdown for one serving (2 spring rolls) of these delicious crispy chicken spring rolls. Please note that these values can vary based on specific ingredient brands and preparation methods.


| Nutrient | Amount per Serving |
|---|---|
| Calories | 280 kcal |
| Carbohydrates | 25g |
| Cholesterol | 45mg |
| Total Fat | 15g |
| Fiber | 3g |
| Protein | 12g |
| Saturated Fat | 3g |
| Serving Size | 2 spring rolls |
| Sodium | 550mg |
| Sugar | 4g |
| Trans Fat | 0g |
| Unsaturated Fat | 10g |
Conclusion
Making homemade crispy chicken spring rolls is a rewarding experience that brings a taste of authentic flavor right to your kitchen. While it takes a little time and care, the result – those golden, crunchy parcels bursting with savory chicken and fresh vegetables – is absolutely worth it. This recipe is more than just instructions; it’s a way to create delicious memories, just like my grandmother did for me. So gather your ingredients, put on some music, and enjoy the process of crafting these delightful chicken spring rolls. Happy cooking, and even happier eating!
FAQs
What type of wrappers should I use for crispy chicken spring rolls?
For crispy chicken spring rolls, you should use square, thin, wheat-based spring roll wrappers, often found in the freezer section of Asian grocery stores or large supermarkets. Avoid using rice paper wrappers, as these are meant for fresh, uncooked spring rolls and will not achieve the desired crispy texture when fried.
How do I prevent my homemade chicken spring rolls from becoming soggy?
To prevent soggy chicken spring rolls, ensure your filling is completely cooled before wrapping. Also, drain any excess moisture from the cooked vegetables. When frying, make sure your oil is at the correct temperature (350u00b0F / 175u00b0C) and avoid overcrowding the pot, which can lower the oil temperature and lead to oil absorption and sogginess.
Can I freeze chicken spring rolls?
Yes, chicken spring rolls are excellent for freezing! You can freeze them either before or after frying. To freeze un-fried spring rolls, place them in a single layer on a baking sheet until solid, then transfer to an airtight freezer-safe bag or container for up to 3 months. Fry directly from frozen, adding a few extra minutes to the cooking time.
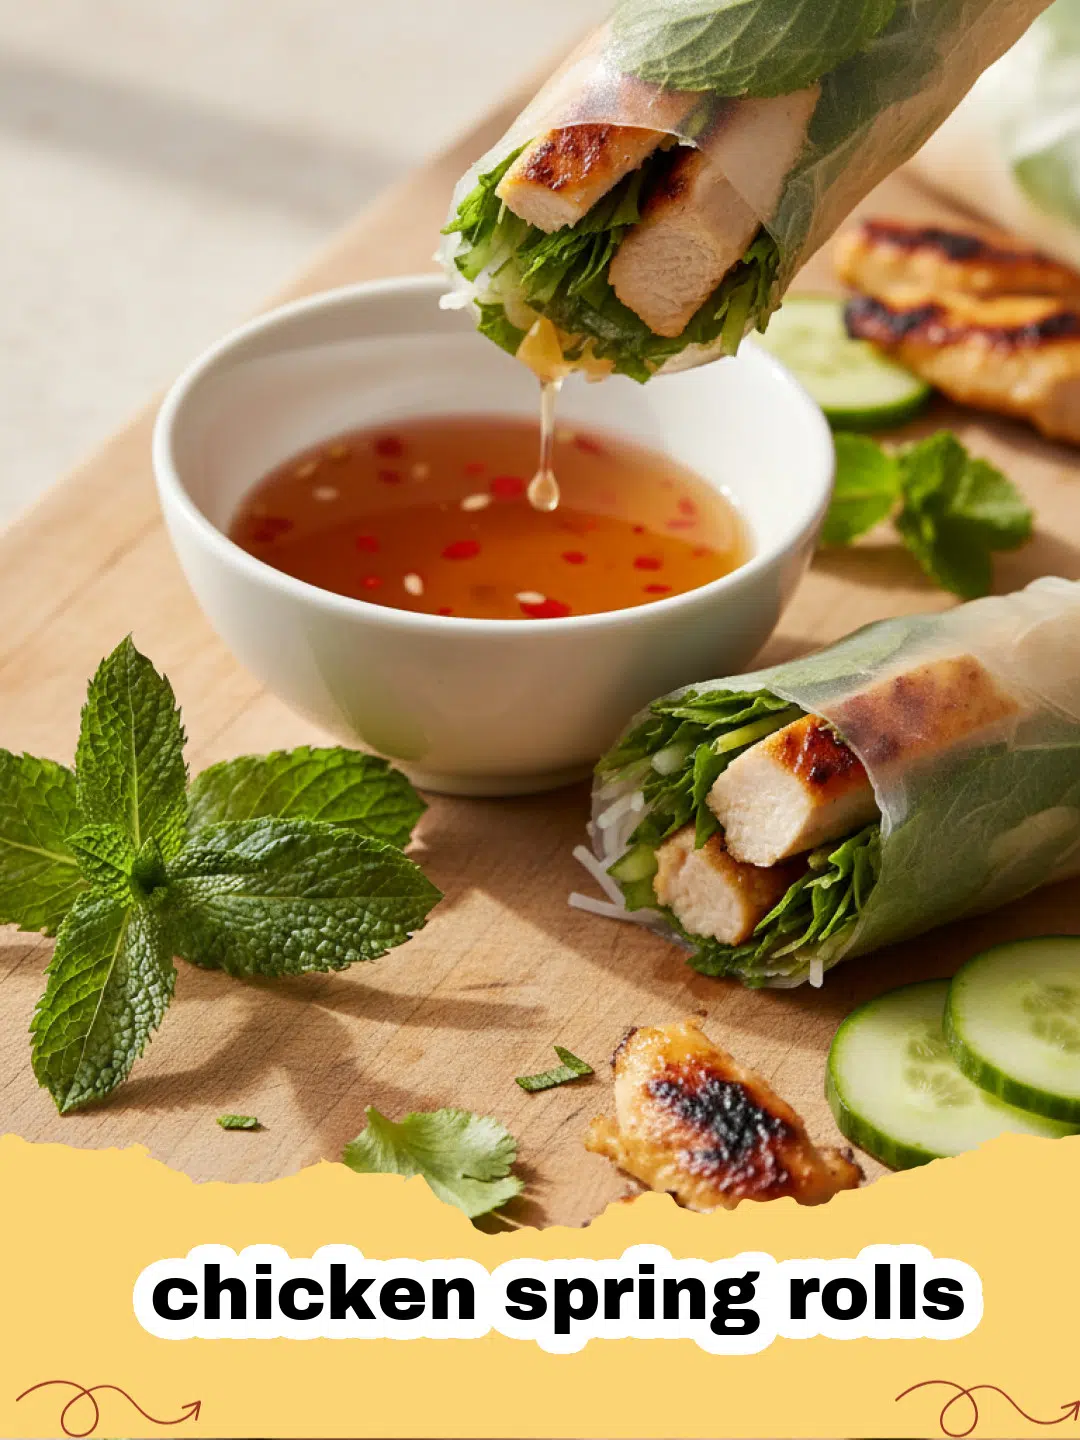
What are some good dipping sauces for chicken spring rolls?
Classic dipping sauces for chicken spring rolls include sweet chili sauce, plum sauce, or a savory peanut sauce. For a spicier option, try sriracha mayo. A simple mix of soy sauce, rice vinegar, and a touch of sugar also makes a delicious accompaniment.

The Ultimate Crispy Chicken Spring Rolls
- Total Time: 1 hour 5 minutes
- Yield: 20-24 spring rolls 1x
Description
Authentic homemade crispy chicken spring rolls, packed with savory ground chicken and crisp vegetables, perfect as an appetizer or a light meal. Achieve that shatteringly crisp texture every time!
Ingredients
1 lb ground chicken (preferably dark meat or a mix)
1 large onion, finely diced
4 cloves garlic, minced
4 cups shredded green cabbage
2 cups shredded carrots
1 cup fresh bean sprouts
2 tbsp soy sauce
1 tbsp oyster sauce
1 tsp sesame oil
1/2 tsp black pepper
20-24 square spring roll wrappers (wheat-based, frozen)
Vegetable oil, for frying
Water or cornstarch slurry (for sealing)
Instructions
Step 1: In a large skillet or wok, heat 1 tablespoon of vegetable oil over medium-high heat. Add the ground chicken and cook, breaking it up with a spoon, until it's no longer pink, about 5-7 minutes. Drain any excess fat.
Step 2: Add the diced onion and minced garlic to the skillet with the cooked chicken. Sauté for 2-3 minutes until fragrant and softened.
Step 3: Stir in the shredded cabbage and carrots. Cook, stirring occasionally, until the vegetables are tender-crisp, about 5-7 minutes. Add the bean sprouts and cook for an additional 2 minutes. Remove the skillet from heat.
Step 4: Season the filling by stirring in the soy sauce, oyster sauce, sesame oil, and black pepper. Taste and adjust seasonings as desired. Transfer the filling to a large bowl and let it cool completely to room temperature. This step is crucial to prevent soggy spring rolls.
Step 5: Thaw the spring roll wrappers according to package directions. Prepare a small bowl of water or a cornstarch slurry (1 tsp cornstarch mixed with 1 tbsp water) for sealing.
Step 6: Lay one spring roll wrapper on a clean, dry surface with a corner pointing towards you (diamond shape). Place about 2-3 tablespoons of the cooled filling near the bottom corner, shaping it into a log.
Step 7: Fold the bottom corner up over the filling, tucking it in snugly. Fold the left and right corners towards the center, like an envelope. Then, roll the spring roll tightly from the bottom up to the top corner. Dab the top corner with water or slurry to seal securely.
Step 8: Repeat the rolling process with the remaining wrappers and filling. Keep rolled spring rolls covered with a damp cloth to prevent drying.
Step 9: In a deep pot or Dutch oven, heat 2-3 inches of vegetable oil to 350°F (175°C). Do not overcrowd the pot; fry 3-4 spring rolls at a time.
Step 10: Carefully place the spring rolls into the hot oil. Fry for 5-7 minutes, turning occasionally, until they are golden brown and crispy on all sides. Ensure they are cooked through.
Step 11: Using tongs, transfer the fried chicken spring rolls to a wire rack lined with paper towels to drain excess oil. Serve immediately with your favorite dipping sauce.
Notes
For best results, allow the filling to cool completely before rolling. This prevents the wrappers from becoming soggy. You can freeze un-fried spring rolls for up to 3 months. To cook from frozen, simply fry them directly from the freezer, adding a few extra minutes to the cooking time until golden and crispy.
- Prep Time: 45 minutes
- Cook Time: 20 minutes
- Category: Tacos Wraps & Sandwiches
- Cuisine: Asian
Nutrition
- Serving Size: 2 spring rolls
- Calories: 280 kcal
- Sugar: 4g
- Sodium: 550mg
- Fat: 15g
- Saturated Fat: 3g
- Unsaturated Fat: 10g
- Trans Fat: 0g
- Carbohydrates: 25g
- Fiber: 3g
- Protein: 12g
- Cholesterol: 45mg


Leave a Reply