
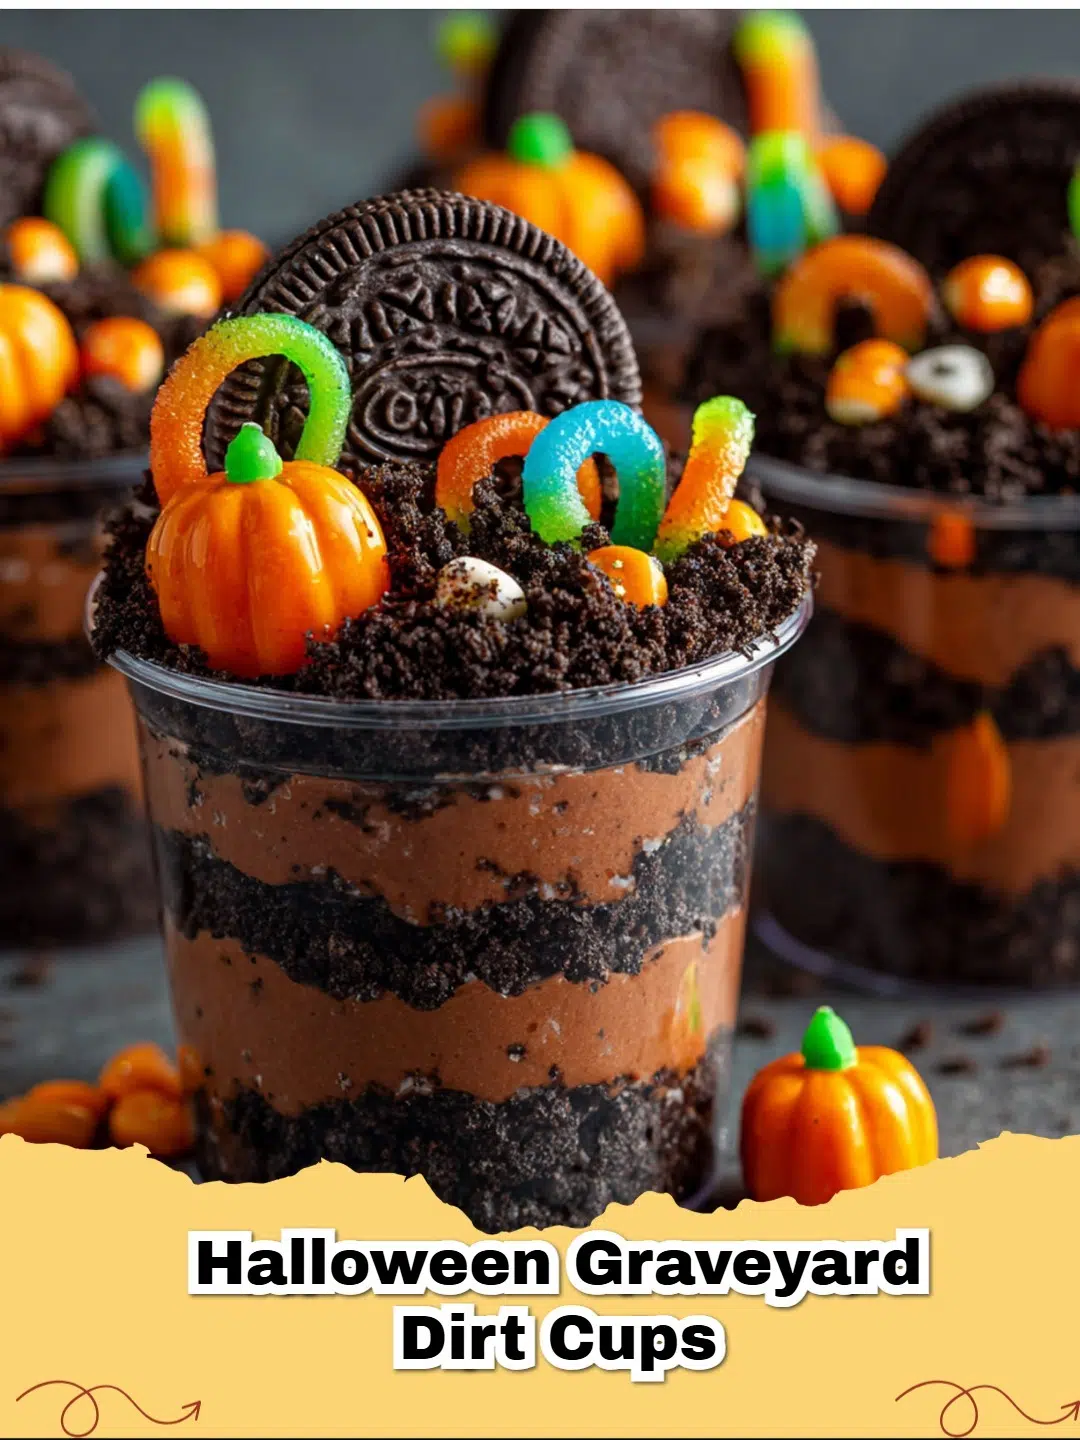
Get ready to unleash your inner ghoul with these incredibly fun and utterly delicious Spooky Halloween Graveyard Dirt Cups! This no-bake dessert is a Halloween tradition for a reason: it’s easy to make, looks delightfully eerie, and tastes fantastic. Imagine layers of rich chocolate pudding, crumbled Oreo 'dirt,' and creepy gummy worms, all coming together in individual cups. It’s the perfect project for little hands and a guaranteed hit at any Halloween gathering.
Why You'll Love This Frightfully Easy Treat
Our Graveyard Dirt Cups recipe is more than just a dessert; it's a centerpiece for your Halloween festivities. Here's what makes them truly special:
- Effortlessly No-Bake: No oven required! This makes it ideal for busy schedules and a cool kitchen activity.
- Kid-Friendly Activity: Children will adore helping with the crushing of Oreos and arranging the spooky decorations. It's a fantastic way to get them involved in holiday prep!
- Rich & Decadent Flavor: The combination of creamy chocolate pudding and crunchy cookie crumbs is a match made in Halloween heaven.
- Endlessly Customizable: From tombstones to candy critters, the decorating possibilities are boundless. Let your imagination run wild!
- Party Perfect: Served in individual cups, these treats are easy to serve, mess-free, and look amazing on any dessert table.
Gather Your Ghoulish Ingredients
Creating these edible graveyards requires just a handful of simple ingredients, most of which you likely have in your pantry or can easily find at any grocery store. The full measurements are in the recipe card below, but here’s a peek at what you’ll need:
- Instant chocolate pudding mix
- Cold milk
- Oreo cookies (the classic kind!)
- Whipped topping (for extra creaminess, optional)
- Gummy worms and rectangular cookies (like Milano cookies) for decoration
These ingredients combine to create a delicious and visually striking dessert that embodies the spirit of Halloween fun.
How to Assemble Your Spooky Graveyard Dirt Cups
Making these dirt cups is all about layering! You'll start by transforming ordinary Oreos into spooky 'dirt,' then whip up a smooth, creamy chocolate pudding. From there, it's a simple assembly line of deliciousness, culminating in a graveyard scene that's almost too good to eat.
For another fun and easy chocolate treat, consider making Easy Brownie Mix Cookies: Your Shortcut to Chewy, Chocolatey Bliss!
Tips for a Perfectly Spooky Graveyard
- Achieve the Right 'Dirt' Texture: Use a food processor to finely crush your Oreos, or place them in a resealable bag and crush with a rolling pin. Some larger chunks add to the rustic 'dirt' look!
- Chill for Success: Don't skip the chilling step for the pudding. A well-chilled pudding layer ensures your cups hold their shape beautifully.
- Creative Tombstones: Milano cookies are classic for 'tombstones,' but graham crackers or even shortbread cookies also work well. You can even write spooky messages on them with edible markers!
- Worm Placement: Place your gummy worms strategically so they look like they're crawling out of the 'dirt' for maximum creepy effect.
- Beyond the Worms: Enhance your graveyard scene with other Halloween candies like candy pumpkins, candy corn, or even mini chocolate ghosts. For more fall-inspired cookie fun, try Easy No-Chill Pumpkin Spice Cookies: Your New Fall Favorite.
Halloween is a time for playful frights and sweet treats, and these Spooky Halloween Graveyard Dirt Cups deliver on both fronts. They are a beloved classic for their simplicity, deliciousness, and engaging presentation. Whether you’re hosting a monster mash or enjoying a cozy evening of scary movies, these dirt cups are sure to be a scream!
For more fascinating insights into the origins and traditions of Halloween, explore this comprehensive article on The History of Halloween.
FAQs
Can I make Graveyard Dirt Cups in advance?
Yes, you can prepare these spooky dirt cups 1-2 days ahead of time. Store them covered in the refrigerator. For the freshest look, add the 'tombstone' cookies and gummy worms just before serving.
What type of cookies are best for the 'dirt' layer?
Classic Oreo cookies are perfect for creating the dark 'dirt' effect due to their rich chocolate flavor and crumbly texture. You can use a food processor for a fine crumb or a resealable bag and rolling pin for a more rustic texture.


Are there any variations to make these dirt cups even spookier?
Absolutely! Get creative with your decorations. Add candy corn, candy pumpkins, mini chocolate ghosts, or edible googly eyes. For a 'mossy' effect, you can mix a few drops of green food coloring into a small portion of the pudding before layering.
Can I use homemade pudding instead of instant?
While instant pudding sets quickly and is convenient, you can certainly use homemade chocolate pudding. Just ensure it's fully chilled and set before layering to maintain the structure of your dirt cups.

Spooky Halloween Graveyard Dirt Cups
- Total Time: 2 hours 20 minutes (includes chilling)
- Yield: 6-8 servings 1x
- Diet: Vegetarian
Description
A delightfully eerie and easy no-bake dessert featuring layers of chocolate pudding, crushed Oreos, and gummy worms, perfect for Halloween parties or a fun treat.
Ingredients
1 (14.3 oz) package Oreo cookies (about 36 cookies)
2 (3.9 oz) packages instant chocolate pudding mix
4 cups cold milk
1 (8 oz) container whipped topping, thawed (like Cool Whip, optional)
12-16 gummy worms
6-8 rectangular cookies (such as Milano cookies or Pirouettes) for 'tombstones'
Optional: Halloween candy for decoration (candy pumpkins, candy corn)
Instructions
Step 1: Prepare the 'dirt' by crushing the Oreo cookies. Place them in a food processor and pulse until fine crumbs are formed, or put them in a large resealable bag and crush with a rolling pin.
Step 2: In a large bowl, whisk together the instant chocolate pudding mix and cold milk for 2 minutes, or until the mixture begins to thicken. If using, gently fold in the thawed whipped topping for an extra creamy texture.
Step 3: Begin assembling the dirt cups. Place a layer of crushed Oreos (about 1-2 tablespoons) at the bottom of 6-8 individual clear cups or small dessert glasses.
Step 4: Spoon a layer of chocolate pudding mixture over the Oreo crumbs, filling about one-third of the cup.
Step 5: Add another layer of crushed Oreos, followed by another layer of pudding. Repeat until the cups are nearly full, ending with a generous top layer of crushed Oreos to resemble 'dirt'.
Step 6: Place the assembled dirt cups in the refrigerator to chill for at least 2 hours, allowing the pudding to fully set.
Step 7: Just before serving, decorate your graveyard. Insert one rectangular cookie into the 'dirt' at the edge of each cup to serve as a 'tombstone.' Arrange 1-2 gummy worms so they appear to be crawling out of the 'dirt.' Add any additional Halloween candies for a more festive look.
Notes
For a fun twist, use white chocolate pudding and color it green with food coloring for a 'slime' effect, or use vanilla pudding with orange food coloring for a pumpkin patch theme. You can also crush up some cream-filled chocolate wafers for an even richer 'dirt' layer.
- Prep Time: 20 minutes
- Cook Time: 0 minutes
- Category: Dessert
- Method: No-Bake
- Cuisine: American
Nutrition
- Serving Size: 1 cup
- Calories: 380 kcal
- Sugar: 45g
- Sodium: 420mg
- Fat: 13g
- Saturated Fat: 6g
- Unsaturated Fat: 6g
- Trans Fat: 0g
- Carbohydrates: 65g
- Fiber: 3g
- Protein: 5g
- Cholesterol: 15mg


Leave a Reply