
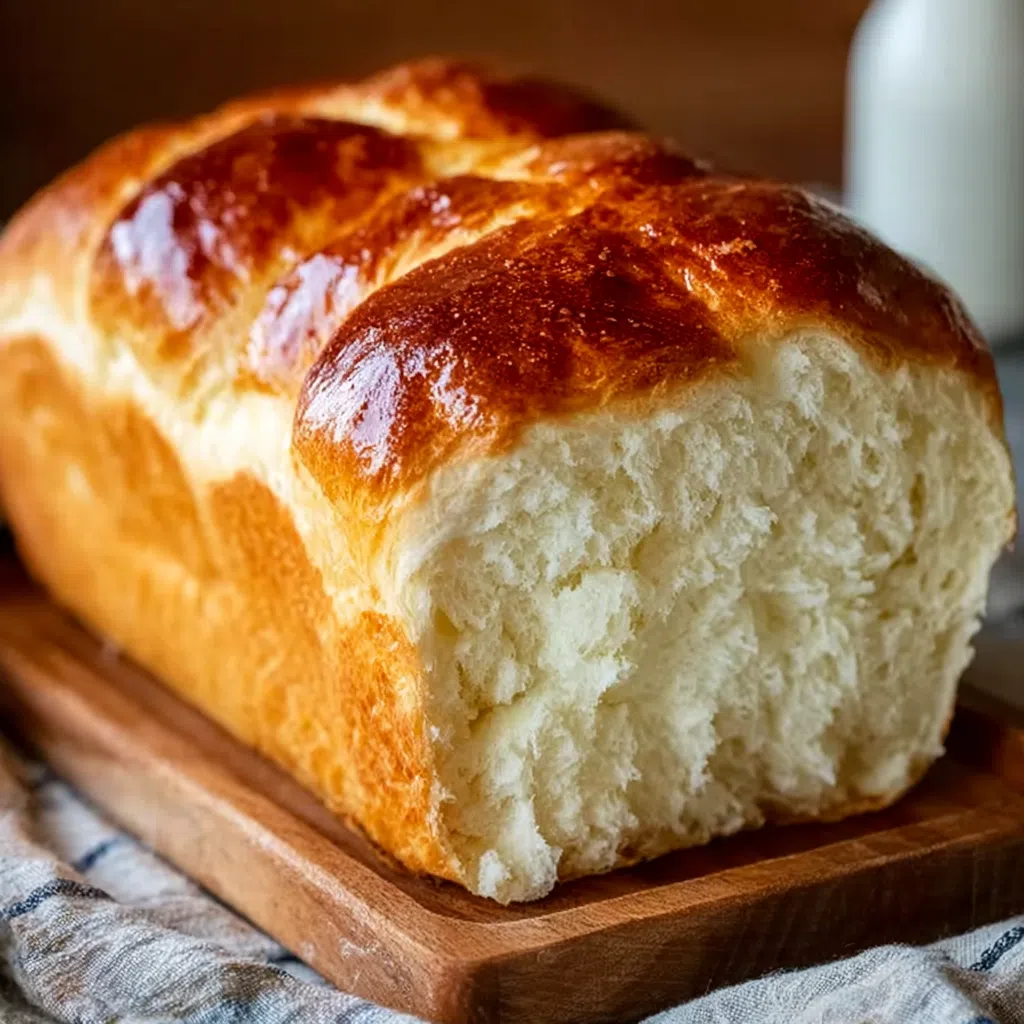
Imagine slicing into a loaf of bread so soft, so fluffy, and so incredibly delicious, you'll wonder why you ever bought it from the store. That's exactly what you'll achieve with our ultimate soft homemade white bread recipe! Perfect for building the most amazing sandwiches or simply enjoying with a smear of butter, this recipe will transform your kitchen into a bakery.
The Magic of Baking Your Own Sandwich Bread
There's a unique satisfaction that comes from creating something wholesome and delicious from scratch. This recipe focuses on simplicity and technique to yield a loaf that's tender, with a beautiful golden crust, and free from preservatives. It’s an approachable recipe, making it perfect for both novice and experienced bakers.
We’ll guide you through each step, from activating the yeast to achieving that perfect rise, ensuring your bread is consistently soft and flavorful. Get ready to impress your family and friends with the best homemade white bread they've ever tasted!
Gather Your Tools for Bread-Making Success
While the ingredients are simple, a few essential tools can make the process even smoother. A reliable 9x5-inch loaf pan is crucial for shaping your bread, and a large mixing bowl or a stand mixer with a dough hook will be your best friend for kneading. For those clean, perfect slices once your masterpiece is baked and cooled, a Quality Chef's Knife is a fantastic investment.
Ingredients for Your Soft White Bread
This recipe relies on everyday pantry staples, proving that extraordinary flavor doesn't require exotic ingredients. Here's what you'll need to create your incredibly soft sandwich loaf:
- 1 cup warm milk (about 105-115°F or 40-46°C)
- ⅓ cup warm water (about 105-115°F or 40-46°C)
- 2 tablespoons granulated sugar
- 2 ¼ teaspoons active dry yeast
- 2 tablespoons unsalted butter, softened
- 1 ½ teaspoons salt
- 3 ¾ cups all-purpose flour, plus more for dusting
The warm milk in this recipe contributes to the bread's incredible richness and keeps the crumb wonderfully tender, a hallmark of truly superior white bread. For those looking to add a delightful side to their sandwiches, consider our Easy Cranberry Pecan Chicken Salad: Your 15-Minute Recipe Guide!.
Step-by-Step Instructions: Baking Your Perfect Loaf
Follow these detailed steps to bake a loaf of white bread that's perfectly soft and ready for any sandwich creation.

- Step 1: In a large mixing bowl, combine the warm milk, warm water, and sugar. Sprinkle the active dry yeast over the liquid and let it sit for 5-10 minutes. The mixture should become frothy, indicating your yeast is active and ready to work its magic.
- Step 2: Add the softened unsalted butter and salt to the activated yeast mixture. Stir well to combine.
- Step 3: Gradually add about half of the all-purpose flour to the wet ingredients, mixing until a shaggy dough begins to form.
- Step 4: Continue adding the remaining flour, a little at a time, mixing until all the flour is incorporated and the dough starts to come together.
- Step 5: Knead the dough. If kneading by hand, transfer the dough to a lightly floured surface and knead for about 10 minutes until it becomes smooth, elastic, and no longer sticky. If using a stand mixer, attach the dough hook and knead on medium speed for about 8 minutes until the dough is smooth and springs back when lightly touched.
- Step 6: Place the kneaded dough into a lightly greased bowl, turning once to coat. Cover the bowl with plastic wrap or a clean kitchen towel. Let it rise in a warm, draft-free spot for 1 to 1½ hours, or until it has clearly doubled in size. This is the first rise.
- Step 7: Once the dough has doubled, gently punch it down to release the air. Turn the dough onto a lightly floured surface.
- Step 8: Shape the loaf. Flatten the dough into a rectangle. Starting from one of the shorter ends, tightly roll the dough into a log. Pinch the seam closed along the bottom and at the ends to create a neat loaf shape.
- Step 9: Place the shaped dough, seam-side down, into a greased 9x5-inch loaf pan.
- Step 10: Cover the loaf pan loosely with plastic wrap or a clean towel. Let the dough rise again for about 30-45 minutes, or until it has risen nicely just above the edge of the pan. This is the second rise.
- Step 11: While the dough is completing its second rise, preheat your oven to 375°F (190°C).
- Step 12: Bake the bread for 30-35 minutes, or until the top is golden brown and the loaf sounds hollow when tapped. An instant-read thermometer inserted into the center should read between 190-200°F (88-93°C).
- Step 13: Immediately remove the bread from the pan and transfer it to a wire rack to cool completely. This is crucial for preventing a soggy bottom and allowing the crumb to set properly.
For an extra soft crust and a touch of richness, you can brush the top of the warm loaf with melted butter right after it comes out of the oven. Understanding the science of yeast is fascinating; you can learn more about how yeast works in baking on Wikipedia.
Expert Tips for the Softest Loaf Ever
Achieving bakery-quality soft bread at home is simple with these pointers:
- Precision with Liquids: Always ensure your milk and water are within the 105-115°F range. Too cold, and the yeast won't activate; too hot, and it will die.
- Knead Thoroughly: Kneading is critical for developing the gluten that gives bread its structure and soft chewiness. Don't cut this step short.
- Resist Extra Flour: Adding too much flour during kneading or shaping can make your bread dense and dry. Use just enough to prevent sticking.
- Patient Proofing: Let the dough rise until it has truly doubled in size for both rises. Patience here pays off in a light, airy texture.
- Cool Completely: This is perhaps the most important tip! Slicing warm bread traps steam, leading to a gummy interior. Always cool on a wire rack.
Serving Up Your Homemade Perfection
Once your beautiful loaf has cooled, the culinary possibilities are endless!
- The Ultimate Sandwiches: Elevate your favorite deli meats, cheeses, or even a simple PB&J.
- Golden Toast: Perfect for breakfast with butter, jam, or avocado.
- Gooey Grilled Cheese: The soft interior and crisp crust are ideal for the classic comfort food.
- French Toast: Slightly stale slices are fantastic for soaking up a rich, custardy batter.
- Hearty Sides: Serve alongside a comforting meal like Slow Cooker Beef Curry: An Easy, Flavorful & Comforting Recipe.
Baking homemade white bread is a rewarding experience that fills your home with an irresistible aroma and your table with delicious goodness. Enjoy every soft, tender slice!


FAQs
How can I tell if my yeast is active and ready for baking?
Active dry yeast, when mixed with warm liquids and a pinch of sugar, should become frothy and bubbly within 5-10 minutes. This indicates the yeast is alive and ready to make your bread rise. If there's no foam, your yeast may be old or the liquid temperature was incorrect.
What's the key to achieving a consistently soft and fluffy texture in homemade white bread?
The secrets to a soft and fluffy loaf include using warm milk for added richness and a tender crumb, ensuring thorough kneading to develop gluten structure, and allowing adequate time for both proofing (rising stages). Avoid adding too much extra flour during kneading, which can lead to a dense loaf.
How should I store my homemade white bread to keep it fresh for longer?
Once your homemade white bread is completely cooled to room temperature, store it in an airtight container, a bread box, or a sealed plastic bag. This will keep it fresh for 3-5 days. Avoid refrigerating, as cold temperatures can actually cause bread to stale faster. For longer storage, slice and freeze.
Can I make this homemade white bread ahead of time or freeze it?
Yes, you can absolutely make this bread ahead of time! Baked and cooled loaves freeze beautifully for up to 3 months. For best results, slice the bread before freezing, then thaw individual slices as needed. You can also prepare the dough, complete the first rise, then punch it down, wrap it tightly, and refrigerate overnight for baking the next day.

The Ultimate Soft Homemade White Bread
- Total Time: 2 hours 45 minutes
- Yield: 1 loaf (12 slices) 1x
- Diet: Vegetarian
Description
Bake an incredibly soft and fluffy homemade white bread, perfect for sandwiches, toast, or enjoying with your favorite spreads.
Ingredients
1 cup warm milk (105-115°F / 40-46°C)
⅓ cup warm water (105-115°F / 40-46°C)
2 tablespoons granulated sugar
2 ¼ teaspoons active dry yeast
2 tablespoons unsalted butter, softened
1 ½ teaspoons salt
3 ¾ cups all-purpose flour, plus more for dusting
Instructions
Step 1: In a large mixing bowl, combine the warm milk, warm water, and sugar. Sprinkle the active dry yeast over the liquid and let it sit for 5-10 minutes. The mixture should become frothy, indicating your yeast is active and ready to work its magic.
Step 2: Add the softened unsalted butter and salt to the activated yeast mixture. Stir well to combine.
Step 3: Gradually add about half of the all-purpose flour to the wet ingredients, mixing until a shaggy dough begins to form.
Step 4: Continue adding the remaining flour, a little at a time, mixing until all the flour is incorporated and the dough starts to come together.
Step 5: Knead the dough. If kneading by hand, transfer the dough to a lightly floured surface and knead for about 10 minutes until it becomes smooth, elastic, and no longer sticky. If using a stand mixer, attach the dough hook and knead on medium speed for about 8 minutes until the dough is smooth and springs back when lightly touched.
Step 6: Place the kneaded dough into a lightly greased bowl, turning once to coat. Cover the bowl with plastic wrap or a clean kitchen towel. Let it rise in a warm, draft-free spot for 1 to 1½ hours, or until it has clearly doubled in size. This is the first rise.
Step 7: Once the dough has doubled, gently punch it down to release the air. Turn the dough onto a lightly floured surface.
Step 8: Shape the loaf. Flatten the dough into a rectangle. Starting from one of the shorter ends, tightly roll the dough into a log. Pinch the seam closed along the bottom and at the ends to create a neat loaf shape.
Step 9: Place the shaped dough, seam-side down, into a greased 9x5-inch loaf pan.
Step 10: Cover the loaf pan loosely with plastic wrap or a clean towel. Let the dough rise again for about 30-45 minutes, or until it has risen nicely just above the edge of the pan. This is the second rise.
Step 11: While the dough is completing its second rise, preheat your oven to 375°F (190°C).
Step 12: Bake the bread for 30-35 minutes, or until the top is golden brown and the loaf sounds hollow when tapped. An instant-read thermometer inserted into the center should read between 190-200°F (88-93°C).
Step 13: Immediately remove the bread from the pan and transfer it to a wire rack to cool completely. This is crucial for preventing a soggy bottom and allowing the crumb to set properly.
Notes
For an even softer crust, brush the warm loaf with melted butter immediately after removing it from the oven. Always ensure your liquids are within the specified temperature range to properly activate the yeast.
- Prep Time: 20 minutes
- Cook Time: 35 minutes
- Category: Bread
- Method: Baking
- Cuisine: American
Nutrition
- Serving Size: 1 slice
- Calories: 220 kcal
- Sugar: 4g
- Sodium: 320mg
- Fat: 4g
- Saturated Fat: 2g
- Unsaturated Fat: 2g
- Trans Fat: 0g
- Carbohydrates: 40g
- Fiber: 2g
- Protein: 7g
- Cholesterol: 10mg


Leave a Reply