
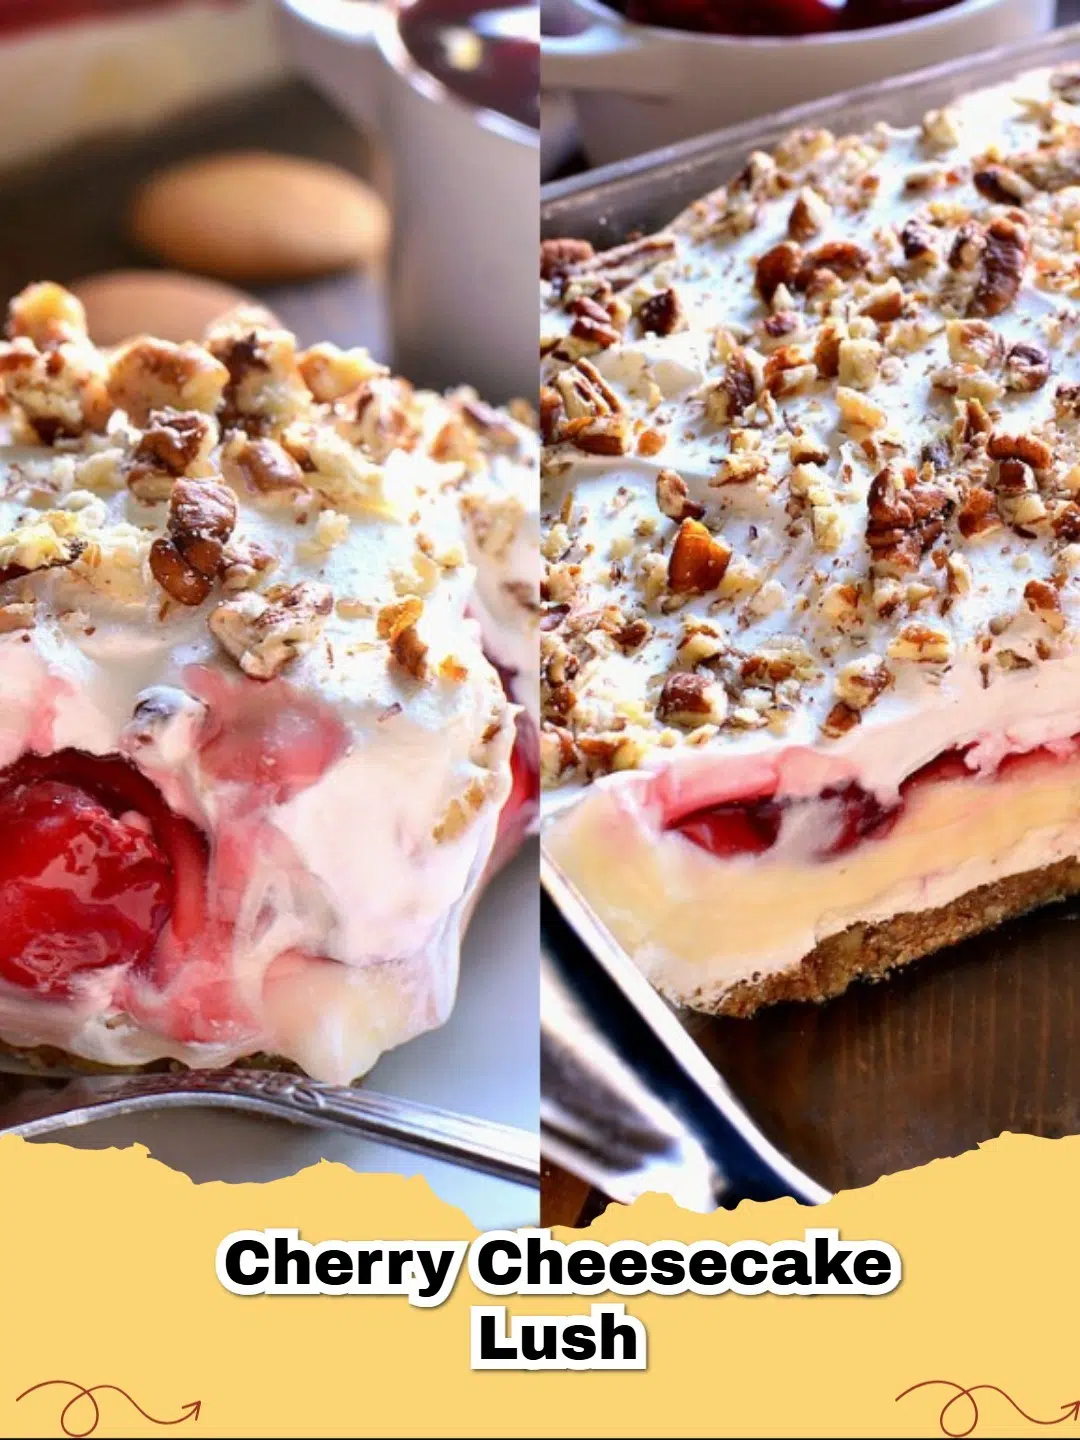
When summer rolls around, or honestly, any time of year you crave something sweet without turning on the oven, a no-bake dessert is a true hero. And among the pantheon of easy treats, the Cherry Cheesecake Lush stands tall. This layered delight combines a buttery graham cracker crust, a luscious cream cheese filling, and a vibrant cherry topping into a dessert that's as impressive to look at as it is to eat.
This isn't just any dessert; it's a symphony of textures and flavors. You get the satisfying crunch of the crust, the silky smooth and tangy-sweet cream cheese layer, and the burst of fruity goodness from the cherry topping. It’s perfect for potlucks, family gatherings, or simply when you need a little pick-me-up. Plus, the 'no-bake' aspect means less time sweating in the kitchen and more time enjoying your creation!
Whether you're a seasoned baker or a kitchen novice, this recipe is incredibly forgiving and guarantees rave reviews. Let's dive into how you can whip up this crowd-pleasing Cherry Cheesecake Lush with minimal effort and maximum deliciousness.
What Makes This Cherry Cheesecake Lush So Irresistible?
The beauty of this lush recipe lies in its simplicity and layers. Each component plays a vital role:
- The Crust: A simple mixture of crushed graham crackers, melted butter, and a touch of sugar forms the perfect base. It’s crunchy, buttery, and holds up beautifully to the creamy layers above.
- The Cream Cheese Layer: This is where the magic happens! A blend of cream cheese, powdered sugar, and whipped topping creates a light, airy, yet rich and tangy filling that mimics a classic cheesecake without any baking. For more on the versatility of cheesecake, check out its fascinating history on Wikipedia.
- The Cherry Topping: Bright, sweet, and slightly tart cherry pie filling adds a burst of color and fruitiness that cuts through the richness of the cream cheese.
Tips for the Best No-Bake Lush
- Chill Time is Crucial: Don't skimp on the refrigeration time. Each layer needs to set properly to prevent a messy dessert. The final chill is essential for easy slicing.
- Room Temperature Cream Cheese: Ensure your cream cheese is at room temperature before mixing. This prevents lumps and ensures a smooth, creamy filling.
- Gentle Folding: When incorporating the whipped topping into the cream cheese mixture, fold it gently to maintain its airy texture.
- Even Layers: Use an offset spatula or the back of a spoon to spread each layer evenly for a beautiful presentation.
Ready to create a dessert that will have everyone asking for seconds? This Cherry Cheesecake Lush is about to become your new favorite easy recipe!
FAQs
Can I use a different fruit pie filling for this lush recipe?
Absolutely! While cherry is classic, this recipe is incredibly versatile. Feel free to substitute with any other pie filling you love, such as blueberry, strawberry, peach, or even apple. Just make sure it's a pre-made pie filling for the best results and easiest preparation.
How long does Cherry Cheesecake Lush last in the refrigerator?
When properly covered and refrigerated, Cherry Cheesecake Lush can last for 3-4 days. For optimal freshness and texture, it's best enjoyed within the first two days after preparation. The crust can sometimes soften over time, but the flavors remain delicious.
Can I freeze Cherry Cheesecake Lush?
Yes, you can! For best results, freeze individual slices or the entire pan (uncovered) until firm, then wrap tightly in plastic wrap and then foil. It can be frozen for up to 1-2 months. Thaw in the refrigerator for several hours or overnight before serving. Note that the texture of the crust and cream cheese layer might change slightly after freezing and thawing.


What type of crust can I use if I don't want graham crackers?
While graham crackers are traditional, you can easily substitute them with other crushed cookies or biscuits. Options include vanilla wafers, shortbread cookies, or even crushed OREO cookies for a chocolate twist. Ensure you use the same amount (or slightly more) of crushed crumbs to achieve a firm crust.

Cherry Cheesecake Lush
- Total Time: 4 hours 20 minutes
- Yield: 12-16 servings 1x
- Diet: Vegetarian
Description
An irresistible no-bake layered dessert featuring a graham cracker crust, a creamy cheesecake filling, and a sweet cherry pie topping.
Ingredients
1 1/2 cups graham cracker crumbs (about 10-12 full sheets)
1/4 cup granulated sugar
1/2 cup unsalted butter, melted
2 (8-ounce) packages cream cheese, softened
1 cup powdered sugar
1 (12-ounce) container frozen whipped topping, thawed and divided (like Cool Whip)
1 (21-ounce) can cherry pie filling
Instructions
Step 1: In a medium bowl, combine the graham cracker crumbs, granulated sugar, and melted butter. Mix well until the crumbs are thoroughly moistened.
Step 2: Press the crumb mixture firmly and evenly into the bottom of a 9x13-inch baking dish. Place in the refrigerator to chill while you prepare the next layer.
Step 3: In a large mixing bowl, beat the softened cream cheese and powdered sugar with an electric mixer until smooth and creamy, about 2-3 minutes.
Step 4: Gently fold in about 2 cups (half) of the thawed whipped topping into the cream cheese mixture until no streaks remain.
Step 5: Spread the cream cheese mixture evenly over the chilled graham cracker crust in the baking dish.
Step 6: Carefully spread the remaining 2 cups of whipped topping over the cream cheese layer.
Step 7: Spoon the cherry pie filling over the whipped topping layer, spreading it evenly to cover the entire surface.
Step 8: Cover the dish tightly with plastic wrap and refrigerate for at least 4 hours, or preferably overnight, to allow the layers to set completely.
Step 9: Before serving, you can garnish with additional fresh cherries or whipped cream if desired. Slice and serve chilled.
Notes
For an extra touch, swirl a bit of melted chocolate over the cherry layer before chilling. You can also use a different fruit pie filling like blueberry or strawberry for variety.
- Prep Time: 20 minutes
- Cook Time: 0 minutes
- Category: Dessert
- Method: No-Bake
- Cuisine: American
Nutrition
- Serving Size: 1 slice
- Calories: 380 kcal
- Sugar: 35g
- Sodium: 220mg
- Fat: 21g
- Saturated Fat: 12g
- Unsaturated Fat: 7g
- Trans Fat: 0g
- Carbohydrates: 45g
- Fiber: 1g
- Protein: 4g
- Cholesterol: 45mg


Leave a Reply