
This delightful easter poke cake recipe is more than just a dessert; it's a vibrant, jiggly testament to spring, a culinary hug that brings smiles to every face at your holiday gathering. I remember one particular Easter when I was about eight years old. My grandma, a woman whose kitchen always smelled of vanilla and warmth, was attempting a new dessert. It was supposed to be a beautiful, layered trifle, but in her excitement (and perhaps a little too much sherry in the custard, a story for another time!), one of the cake layers collapsed. Panic set in! My younger cousins, restless from their Easter egg hunt, were already clamoring for something sweet. Grandma, ever the improviser, quickly whipped up a box of Jell-O, poked holes in the still-warm cake, and poured the colorful liquid over it. She topped it with whipped cream and a sprinkle of leftover pastel M&Ms from the egg hunt. It wasn't the trifle she intended, but that vibrant, moist, and unexpectedly playful cake became an instant legend in our family. It was her impromptu easter poke cake recipe, born from a kitchen mishap, and it tasted like pure joy. Every year since, we’ve made some version of that magical, colorful creation, a testament to the fact that the best traditions often begin with a happy accident. This easter poke cake recipe captures that same spirit of fun, ease, and deliciousness, ensuring your holiday dessert is as memorable as Grandma’s.
Why This Easter Poke Cake Recipe is a Must-Try
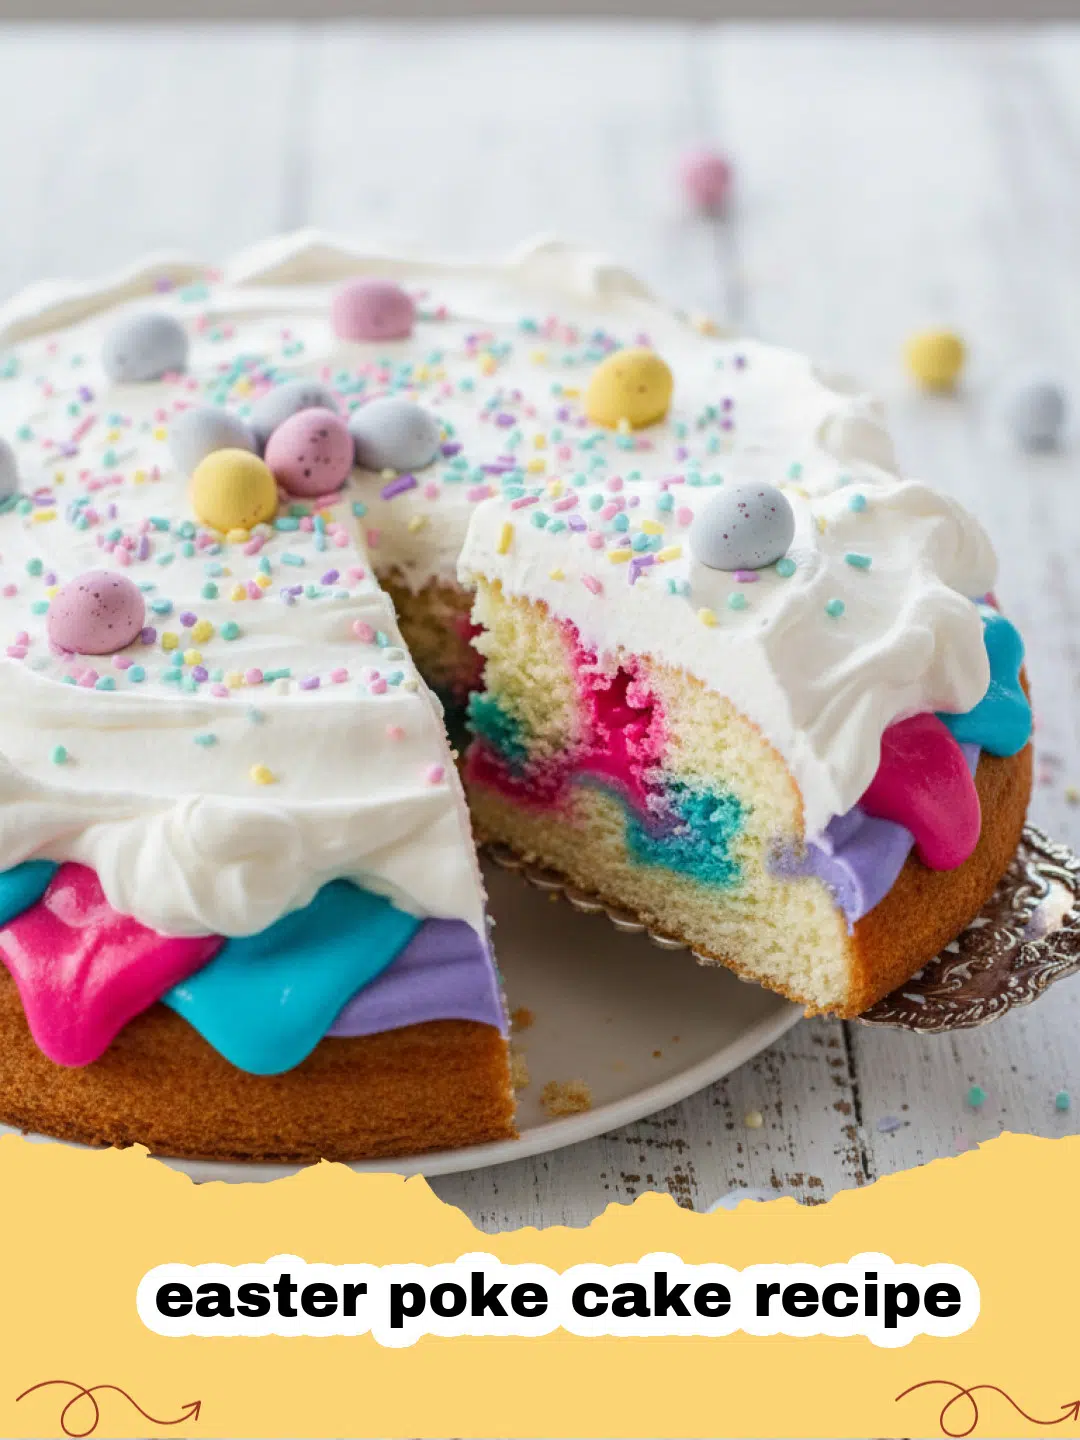
- Effortlessly Festive: With its vibrant colors peeking through the fluffy white topping, this easter poke cake recipe screams celebration. It’s naturally stunning without requiring advanced decorating skills.
- Moist & Flavorful: The gelatin soaks into the cake, creating an incredibly moist texture and infusing it with bright, fruity flavors that are a perfect complement to a spring meal.
- Incredibly Easy to Make: Starting with a boxed cake mix simplifies the process, making this easter poke cake recipe accessible for bakers of all skill levels, leaving you more time to enjoy the holiday.
- Customizable Fun: Whether you prefer classic pastels or bold, bright hues, you can easily adapt the colors and flavors of the gelatin to match your Easter theme or personal preference.
Key Ingredient Notes for Your Easter Poke Cake Recipe
Getting the most out of your easter poke cake recipe means understanding a few key ingredients. While the recipe is straightforward, a little insight goes a long way to ensure a perfect, crowd-plepleasing dessert.
Boxed White or Yellow Cake Mix
Starting with a good quality boxed white or yellow cake mix is the secret to the ease and consistent results of this easter poke cake recipe. While you can certainly bake a cake from scratch, a mix saves time and still delivers a delicious base. For an even richer, more bakery-style cake, consider 'doctoring' your cake mix. Instead of water, use milk, and add an extra egg yolk or a teaspoon of vanilla extract. This little tweak can elevate a simple mix into something truly special, making your easter poke cake recipe even more impressive.
Gelatin (Jell-O)
The star of the 'poke' in this easter poke cake recipe! The gelatin is what gives the cake its signature moistness and vibrant color. Choose an assortment of pastel colors for a classic Easter look, such as strawberry, lemon, lime, and berry blue. Ensure you use regular, not sugar-free, gelatin for the best texture and flavor. The key is to mix the gelatin with hot water until fully dissolved, but then allow it to cool slightly before pouring it over the cake. If it's too hot, it can break down the cake structure; if it's too cool, it might set too quickly. Aim for warm to touch, but not scalding hot.
Whipped Topping (Cool Whip)
A light, airy, and stable whipped topping is crucial for the perfect finish on your easter poke cake recipe. While homemade whipped cream is lovely, store-bought whipped topping (like Cool Whip) provides superior stability, especially when storing the cake. It holds its shape beautifully and doesn't weep as quickly as fresh whipped cream, making it ideal for a dessert that often sits out during holiday gatherings. Remember to thaw it completely in the refrigerator before using, but keep it cold until you're ready to spread it over the chilled cake. This ensures it's smooth, fluffy, and easy to work with.

Step-by-Step Guide with Pro Tips for the Perfect Easter Poke Cake Recipe
Creating this stunning easter poke cake recipe is simpler than you might think. Follow these steps carefully, and you'll have a show-stopping dessert for your Easter celebration!
- Step 1: Preheat your oven to 350°F (175°C). Grease and flour a 9x13 inch baking pan, or spray it well with non-stick baking spray. This ensures your easter poke cake recipe bakes evenly and releases easily.
- Step 2: Prepare the cake mix according to package directions in a large bowl. For an extra rich cake, consider using milk instead of water and adding an extra egg yolk. Pour the batter into your prepared pan and bake for 30-35 minutes, or until a toothpick inserted into the center comes out clean.
- Step 3: While the cake is still warm, but after it has cooled for about 10-15 minutes, use the handle of a wooden spoon or a large fork to poke holes all over the top of the cake, about 1 inch apart. Don't be shy – these holes are crucial for your easter poke cake recipe to absorb all that delicious gelatin!
- Step 4: In separate bowls, prepare each flavor of gelatin. For each flavor, dissolve the contents of one small (3 oz) package of gelatin in 1 cup of boiling water. Stir until completely dissolved, then add 1/2 cup of cold water. Allow the gelatin mixtures to cool for about 10-15 minutes at room temperature; they should be warm but not hot.
- Step 5: Carefully spoon or pour the different colored gelatin mixtures into the holes you've created in the cake. Alternate colors randomly to create a beautiful, marbled effect. Try to fill each hole generously. This step is where the magic of the easter poke cake recipe really happens!
- Step 6: Place the cake in the refrigerator and chill for at least 3-4 hours, or preferably overnight, to allow the gelatin to fully set and infuse into the cake. This chilling time is non-negotiable for the best texture and flavor in your easter poke cake recipe. Consider storing it in a glass food storage container with a lid to keep it fresh while chilling. This Basics Glass Food Storage set is perfect for such tasks!
- Step 7: Once the cake is completely chilled and the gelatin is firm, spread the thawed whipped topping evenly over the entire surface of the cake. Decorate with sprinkles, extra candy, or fresh fruit for a festive touch.
- Step 8: Slice and serve this beautiful easter poke cake recipe cold! Enjoy the smiles and compliments it brings to your Easter table.
Variations & Serving Suggestions for Your Easter Poke Cake Recipe
This easter poke cake recipe is a fantastic canvas for creativity! Here are some ideas to make it your own and ensure it’s served to perfection:
Color & Flavor Variations:
- Rainbow Delight: Use 4-5 different, vibrant gelatin colors for a truly show-stopping rainbow effect. Think red, orange, yellow, green, and blue.
- Monochromatic Magic: Choose different shades of the same color gelatin (e.g., light blue, medium blue, dark blue) for a sophisticated, layered look.
- Tropical Twist: Use pineapple, orange, and lime gelatin. Top with shredded coconut and mandarin orange segments.
- Chocolate Lover's Dream: Start with a chocolate cake mix. Instead of gelatin, you can poke holes and pour warm chocolate fudge sauce or sweetened condensed milk before chilling. Top with chocolate whipped cream and chocolate shavings.
- Citrus Burst: Combine lemon, lime, and orange gelatin. A squeeze of fresh citrus juice into the cooled gelatin can also brighten the flavors.
Topping Transformations:
- Springtime Sprinkles: Use pastel-colored sprinkles, jimmies, or nonpareils for a classic Easter look.
- Candy Fun: Decorate with mini chocolate eggs, jelly beans, or crushed pastel candies.
- Fresh Fruit Finesse: Arrange fresh berries (strawberries, blueberries, raspberries) or sliced kiwi on top for a fresh, elegant touch. You could even create a pattern!
- Coconut Cloud: Toast some shredded coconut and sprinkle it generously over the whipped topping for added texture and flavor.
Serving Suggestions:
- Chilled Perfection: Always serve this easter poke cake recipe cold. It’s best enjoyed straight from the refrigerator to maintain its firm texture and refreshing taste.
- Holiday Brunch Star: While it’s perfect after an Easter dinner, its light and fruity nature also makes it a wonderful addition to an Easter brunch spread alongside savory dishes like The Ultimate Creamy, Cheesy Scalloped Potatoes or even a simple platter of The Foolproof Guide to Perfect Hard Boiled Eggs.
- Portion Control: Cut into squares for easy serving. The vibrant cross-section of the cake with its colorful gelatin makes for an appealing presentation on individual plates.
- Accompaniments: A small scoop of vanilla bean ice cream or a drizzle of a light fruit syrup can elevate the dessert even further, though it’s perfectly delicious on its own.
Nutrition Information
Here's a breakdown of the estimated nutrition information per serving for this delightful easter poke cake recipe. Please note that these values are estimates and can vary based on specific ingredients and brands used.
| Nutrient | Amount Per Serving |
|---|---|
| Calories | 320 |
| Carbohydrate Content | 48g |
| Cholesterol Content | 35mg |
| Fat Content | 14g |
| Fiber Content | 1g |
| Protein Content | 3g |
| Saturated Fat Content | 8g |
| Serving Size | 1 slice (approx. 1/12 of cake) |
| Sodium Content | 300mg |
| Sugar Content | 35g |
| Trans Fat Content | 0g |
| Unsaturated Fat Content | 6g |
Conclusion
And there you have it – the ultimate easter poke cake recipe, a vibrant, joyful, and incredibly easy dessert that’s sure to become a beloved tradition in your own home. Whether you’re recreating a cherished childhood memory or simply looking for a foolproof way to add a splash of color and sweetness to your Easter table, this recipe delivers on all fronts. Its moist texture, fruity flavors, and eye-catching appearance make it a true holiday gem. So go ahead, gather your ingredients, embrace the fun of poking holes and pouring colorful gelatin, and get ready to enjoy the smiles this delightful easter poke cake recipe will bring. Happy Easter and happy baking!
FAQs
Can I make this easter poke cake recipe ahead of time?
Absolutely! In fact, this easter poke cake recipe benefits from being made ahead. It needs at least 3-4 hours to chill for the gelatin to set properly, but chilling overnight is ideal. This allows the flavors to meld beautifully and the cake to become perfectly moist. Just add the whipped topping and decorations shortly before serving.


What kind of cake mix works best for this easter poke cake recipe?
A plain white or yellow cake mix works wonderfully for this easter poke cake recipe as it provides a neutral base for the vibrant gelatin colors to shine through. You can also use a vanilla cake mix. For an extra rich cake, consider using milk instead of water and adding an extra egg yolk to the mix.
How do I store leftover Easter Poke Cake?
Store any leftover easter poke cake recipe tightly covered in the refrigerator. It will stay fresh and delicious for 3-4 days. Because of the gelatin and whipped topping, it must be kept cold. A glass food storage container works perfectly for maintaining freshness.
Can I use homemade whipped cream instead of store-bought for this easter poke cake recipe?
While homemade whipped cream is delicious, for this easter poke cake recipe, store-bought whipped topping (like Cool Whip) is often recommended due to its superior stability. Homemade whipped cream tends to soften and 'weep' after a while, especially when left out for a period, which might affect the appearance and texture of your cake. If you opt for homemade, add a stabilizer like cream of tartar or cornstarch to help it hold its shape longer.

Easter Poke Cake
- Total Time: 4 hours 5 minutes (includes chilling)
- Yield: 12-16 servings 1x
Description
A vibrant, moist, and easy-to-make poke cake, perfect for Easter celebrations, featuring colorful gelatin and a fluffy whipped topping.
Ingredients
1 (15.25 ounce) package white or yellow cake mix (plus ingredients needed on box)
3 (3 ounce) packages different flavored gelatin (e.g., strawberry, lime, lemon, berry blue)
3 cups boiling water, divided
1 1/2 cups cold water, divided
1 (12 ounce) container frozen whipped topping, thawed
Assorted pastel sprinkles or candy for decoration (optional)
Instructions
Step 1: Preheat oven to 350°F (175°C). Grease and flour a 9x13 inch baking pan.
Step 2: Prepare cake mix according to package directions. Pour batter into the prepared pan.
Step 3: Bake for 30-35 minutes, or until a wooden skewer inserted into the center comes out clean. Let the cake cool in the pan for 10-15 minutes.
Step 4: While the cake is still warm, use the handle of a wooden spoon or a large fork to poke holes evenly over the entire surface of the cake, about 1 inch apart and going almost to the bottom.
Step 5: In three separate bowls, prepare each package of gelatin. Dissolve each package completely in 1 cup of boiling water. Stir for 2 minutes, then add 1/2 cup of cold water to each. Let the gelatin mixtures cool for 10-15 minutes until warm but not hot.
Step 6: Carefully spoon or pour the different colored gelatin mixtures into the poked holes, alternating colors randomly across the cake. Try to fill each hole generously.
Step 7: Refrigerate the cake for at least 3-4 hours, or preferably overnight, to allow the gelatin to set completely and infuse into the cake.
Step 8: Once the cake is completely chilled and the gelatin is firm, spread the thawed whipped topping evenly over the entire surface of the cake. Decorate with pastel sprinkles or candy, if desired. Slice and serve cold.
Notes
For best results, ensure the cake is completely cooled (but not cold) when you poke the holes and pour the gelatin. The gelatin should be cool to the touch, not hot, to prevent melting the cake. Chilling overnight is ideal for the gelatin to fully set and create the signature moist texture. Store leftovers covered in the refrigerator.
- Prep Time: 30 minutes
- Cook Time: 35 minutes
- Category: Desserts & Baked Goods
- Cuisine: American
Nutrition
- Serving Size: 1 slice (approx. 1/12 of cake)
- Calories: 320
- Sugar: 35g
- Sodium: 300mg
- Fat: 14g
- Saturated Fat: 8g
- Unsaturated Fat: 6g
- Trans Fat: 0g
- Carbohydrates: 48g
- Fiber: 1g
- Protein: 3g
- Cholesterol: 35mg


Leave a Reply